So, how do you tackle the issue with a Raynor circuit board? Don’t worry; fixing it isn’t as daunting as it sounds! We’ll break down the process into simple steps. Think of it as troubleshooting a new recipe—it may seem complicated at first, but with a bit of guidance, you’ll be ready to serve up a functioning garage door in no time.
Understanding Your Raynor Garage Door Opener
Before we dive into fixing your circuit board, it’s essential to understand how your Raynor garage door opener works. At its core, the opener controls your garage door’s movements through signals sent from the remote to the circuit board. This board processes the commands and ensures the door opens or closes as instructed.
Generally, there are two types of remotes used with Raynor openers: fixed-code and rolling-code remotes. Fixed-code remotes send the same signal every time, while rolling-code remotes change the signal with each use—a bit like a safety measure that keeps your opener less susceptible to unauthorized access. Knowing which type your remote is can help save time in troubleshooting, so take a moment to check it.
Always consult your user manual to find specific details about your particular Raynor model. It’s like having a map for your journey—very handy when you need to fix things!
Common Symptoms of a Faulty Circuit Board
So, how do you determine if the circuit board is the villain behind your garage door woes? Here are some common symptoms that suggest your Raynor circuit board might need attention:
- No response from the remote: If pressing the button on your remote doesn’t trigger any reaction from the garage door, it’s time to do some investigating. It could be the board or just a dead remote battery.
- Unusual blinking lights: If your opener’s LED lights are flashing erratically, that’s a signal. These lights often indicate error codes that can guide your troubleshooting efforts.
- Door movements are erratic: If your garage door opens and closes by itself or behaves unpredictably, it’s a sign that there might be disruptions in communication between the remote and the circuit board.
Seeing these symptoms can certainly be disheartening, but they also provide vital clues toward fixing your Raynor circuit board.
Gathering the Right Tools
Before we roll up our sleeves and get into the fix, let’s make sure you have the necessary tools at hand. Think of this as preparing to build a piece of IKEA furniture: you don’t want to realize halfway through that you’re missing a screwdriver!
Here’s what you’ll need:
- Screwdriver set: A basic set with both Phillips and flathead screws will come in handy.
- Multimeter: This nifty tool helps to check the voltage and continuity of electronic components.
- Replacement parts: If it turns out your circuit board is irreparable, having a replacement on hand will save you time.
- Safety goggles: Protecting your eyes is key when working with electronic devices. Better safe than sorry!
Having all your tools ready ensures you can focus on fixing the circuit board without constantly running back to grab something.
Step-by-Step: How To Fix the Circuit Board
Now that you’re armed with the right tools, let’s walk through the steps to fix your Raynor circuit board. This part may feel a bit technical, but don’t worry; I’ll break it down for you.
Step 1: Disconnect Power
Your safety comes first! To start, unplug your garage door opener from the power source. Think of it as turning off the stove before reaching for that hot pan. This step will protect you from any electrical shocks while you work on the circuit board.
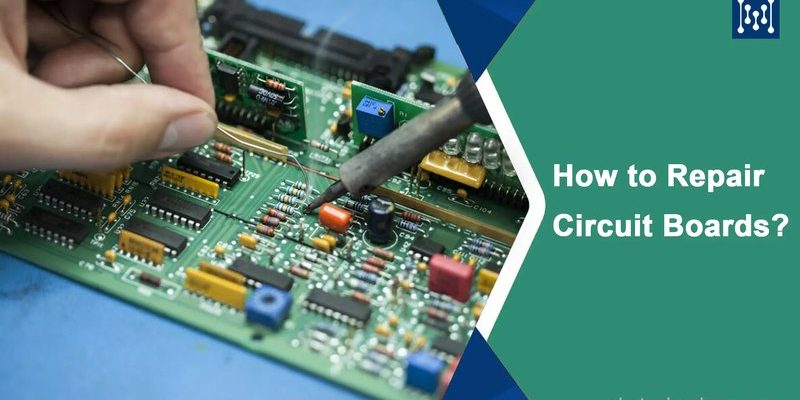
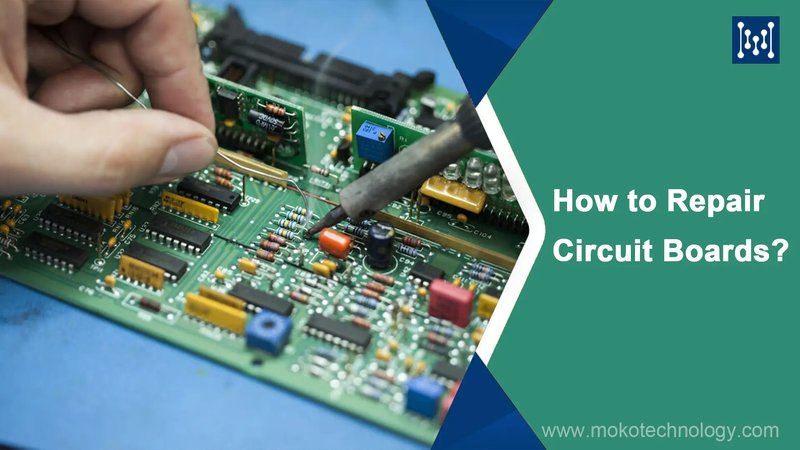
Step 2: Access the Circuit Board
Next, you’ll need to remove the cover of the garage door opener. Usually, this involves unscrewing a few screws. Keep them in a small container so they don’t go missing—even in a neat kitchen, things have a tendency to disappear!
Once the cover is off, you’ll typically see the circuit board mounted securely. Take a moment to visually inspect it for any obvious signs of damage, like burn marks or broken components. This could save you time later and help identify what’s wrong.
Step 3: Testing Components
Using your multimeter, check the continuity of the different components on the circuit board. Here’s a simple way to do this:
1. Set your multimeter to the continuity setting.
2. Touch one probe to one end of a component and the other to the opposite end—like touching both ends of a wire.
3. If your multimeter beeps, that component is working. If not, it could be faulty and require replacement.
Remember, this process may take some time, and it’s totally normal to feel a bit lost. Just take it step by step, like solving a puzzle.
Step 4: Resetting the Circuit Board
Sometimes, all your circuit board needs is a good reset. To do this, unplug the power again and wait about 10 seconds before plugging it back in. This action is similar to rebooting your computer when it’s sluggish.
Then, try reconnecting your remote to the circuit board by following the specific syncing procedures outlined in your manual. This could bring everything back to normal!
When to Call in the Experts
While fixing a Raynor circuit board can feel empowering, there comes a point when it’s best to let the professionals take over. If after all your efforts, your garage door still won’t respond, or you notice severe damage to the circuit board, seeking help might be the right move.
Consider contacting a qualified technician who has experience with Raynor garage door openers. They can diagnose the issue more accurately and save you from any further headaches.
Here’s the thing: spending a little money on a pro can save you time and frustration in the end. Think of it as investing in your sanity!
Fixing a Raynor circuit board doesn’t have to be a stressful experience. By understanding how the system works, recognizing the symptoms of trouble, and following our straightforward steps, you can troubleshoot and potentially fix the issue yourself.
Remember, it’s all about patience and following the process step by step—much like learning to cook a challenging dish. Even if you hit a snag, just gather your tools, refer to your manual, and keep at it. Before you know it, you’ll have your garage door running smoothly again, ready to greet you after a long day.