In this article, we’re going to walk through how to fix your Craftsman battery backup, step by step. Whether you’ve noticed it’s not holding a charge or your remote isn’t syncing properly, we’ll explore common issues and how to tackle them. So, grab a cup of coffee, and let’s get into it!
Understanding the Basics of Your Craftsman Battery Backup
Before diving into the fixes, it’s essential to understand how your Craftsman battery backup works. Essentially, it’s a rechargeable battery that provides power to your garage door opener when there’s a power outage. This backup system will kick in when you least expect it, acting like a superhero swooping in to save the day.
You might be wondering how long these batteries last and what signs indicate they need replacement. Most Craftsman battery backups last between 3 to 5 years, but factors like usage frequency and environmental conditions can affect their lifespan. Look for signs like the battery not holding a charge or the garage door opener refusing to operate during a power outage.
In short, knowing your battery backup is a critical first step toward troubleshooting any issues you might face.
Common Issues with Craftsman Battery Backup
Just like any piece of technology, the Craftsman battery backup can run into problems. Here are a few hiccups you might encounter:
- Battery Not Holding Charge: This is one of the most common problems. If the battery seems to die quickly, it may be worn out.
- Remote Not Syncing: You might find that your remote isn’t communicating with the opener, making you feel like you’re shouting into the void.
- Failure to Activate: Sometimes, the battery doesn’t engage when the power goes out, leaving you in the dark—literally.
By identifying these common issues, you can better diagnose what’s wrong. It can save you time and help you figure out the next steps to fix your Craftsman battery backup.
Step 1: Checking the Battery
The first step in fixing your Craftsman battery backup is to check the battery itself. This is like checking the fuel gauge in your car before hitting the road. Here’s how to go about it:
1. Disconnect the Power: Safety first! Unplug the garage door opener from the outlet.
2. Open the Battery Compartment: On most Craftsman models, this is straightforward—usually, it’s a cover you can slide or unscrew open.
3. Inspect the Battery: Look for any signs of corrosion or loose connections. If the battery looks old or swollen, it’s time for a replacement.
Making sure that everything is in good condition is crucial. A simple check can sometimes save you from unnecessary repairs.
Step 2: Resetting the System
If checking the battery doesn’t fix the issue, try resetting the power unit. Think of this as giving your opener a fresh start, like rebooting a computer. To reset your Craftsman garage door opener, follow these steps:
1. Cut Power: Unplug the garage door opener again for about 30 seconds.
2. Plug It Back In: Reconnect the power.
3. Press the Learn Button: Depending on your Craftsman model, this button is often located on the back or side. Press it until the light blinks.
Resetting can resolve synchronization issues with the remote or battery, giving everything a clean slate to work from.
Step 3: Reprogramming the Remote
If the remote isn’t syncing after a reset, reprogramming it is your next move. This step is straightforward, and it can often do the trick. Here’s how to reprogram your Craftsman remote:
1. Press the Learn Button Again: Just like before, you’ll start with pressing the learn button on the garage door opener until the light blinks.
2. Press the Button on the Remote: While the light is blinking, press and hold the button you’d like to program on the remote.
3. Release the Button: Wait for the light to stop blinking and then release the button on the remote.
Now, your remote should be synced with the battery backup once again. If not, consider checking the batteries in your remote; they might be low.
Step 4: Replacing the Battery
When all else fails, it might be time to replace the battery. It’s like changing the oil in your car—sometimes, it’s just necessary to keep everything running smoothly. Here’s how to replace the battery for your Craftsman opener:
1. Remove the Old Battery: Carefully disconnect the old battery from the wires, ensuring to note how it’s connected.
2. Install the New Battery: Connect the new battery just as you removed the old one. Make sure the connections are secure.
3. Test the Backup: After installing the new battery, plug everything back in and test the backup during a power outage to ensure it functions correctly.
Replacing the battery can help restore your opener’s reliability, bringing back that peace of mind you need.
Preventative Tips for Maintaining Your Craftsman Battery Backup
Once your Craftsman battery backup is fixed, you’ll want to keep it in good shape. Here are some simple maintenance tips:
- Regular Checks: Every few months, open the battery compartment and ensure everything looks good. This is like a regular health check-up for your opener.
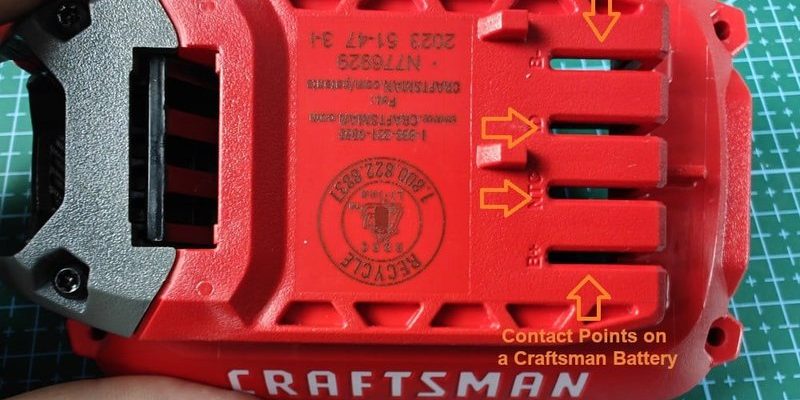
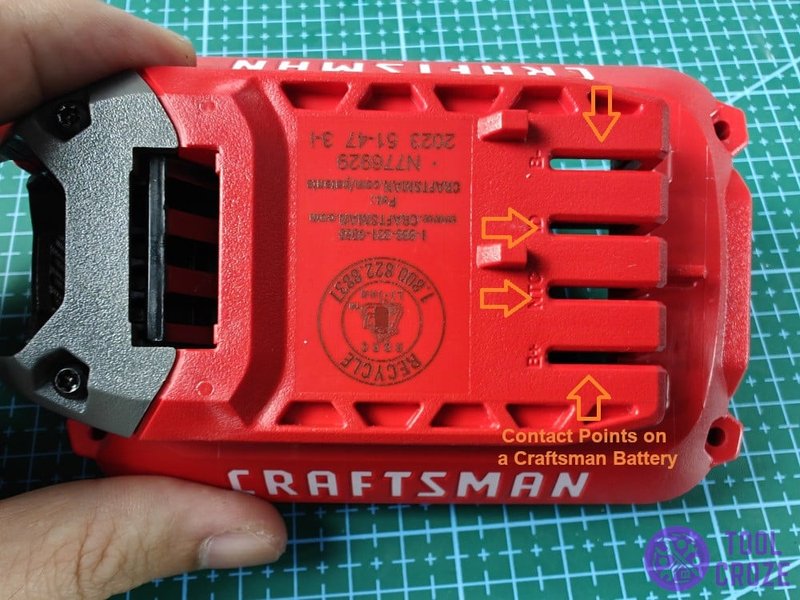
- Clean Connections: Dust and dirt can interfere with performance. Clean the terminals and battery contacts gently with a damp cloth.
- Replace as Needed: Don’t wait for issues to arise. If your battery is nearing the 3-year mark, consider replacing it proactively.
Following these tips can help extend the life of your battery backup, ensuring you’re always prepared for outages.
When to Call a Professional
Sometimes, despite your best efforts, you might find that the battery backup won’t cooperate. If you’ve checked everything and it still doesn’t work, it could be a more significant issue. Perhaps it’s the opener itself or an electrical problem.
In these cases, reaching out to a professional might be the best choice. It’s like calling a mechanic when your car won’t start, even after changing the battery. Professionals have experience and tools that can quickly diagnose and fix complicated issues. So don’t hesitate to ask for help!
In conclusion, fixing your Craftsman battery backup can often be a straightforward process. By checking the battery, resetting the system, reprogramming the remote, and replacing the battery when necessary, you can troubleshoot and get everything running smoothly again. Just remember to maintain your system to avoid future headaches. That way, you’ll continue to enjoy the reliability of your garage door opener, even when the power goes out!