Disabling the safety sensor on your Chamberlain garage door opener isn’t as tricky as it sounds. However, it’s essential to understand both the “how” and the “why” before you dive into it. In this guide, we’ll walk you through the steps needed to safely disable the safety sensor, ensuring that you’re informed and prepared along the way.
Understanding the Chamberlain Safety Sensor
The Chamberlain safety sensor is designed to prevent accidents. It uses infrared beams to “see” the area just below the garage door. When the door is closing, if the sensor detects an object within its range, it immediately stops the door and may even reverse its path. This is crucial for keeping your loved ones and pets safe.
However, there could be instances when you might need to disable this feature—like during installation, repairs, or troubleshooting. (But remember, safety first! Only disable it when absolutely necessary and re-enable it as soon as possible.)
Steps to Disable Chamberlain Safety Sensor
Here’s how you can disable the safety sensor on your Chamberlain garage door opener:
- Step 1: First, locate the safety sensors. They are usually on either side of the garage door, mounted a few inches above the ground.
- Step 2: Next, you’ll want to ensure that the sensors are powered. Check the connection and that there isn’t any debris blocking their line of sight.
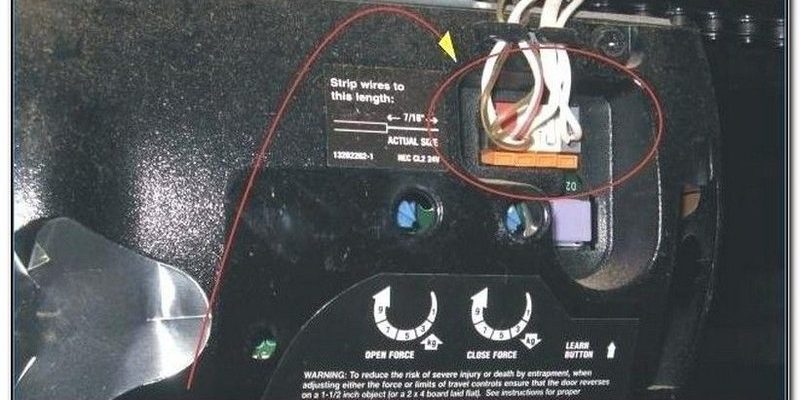
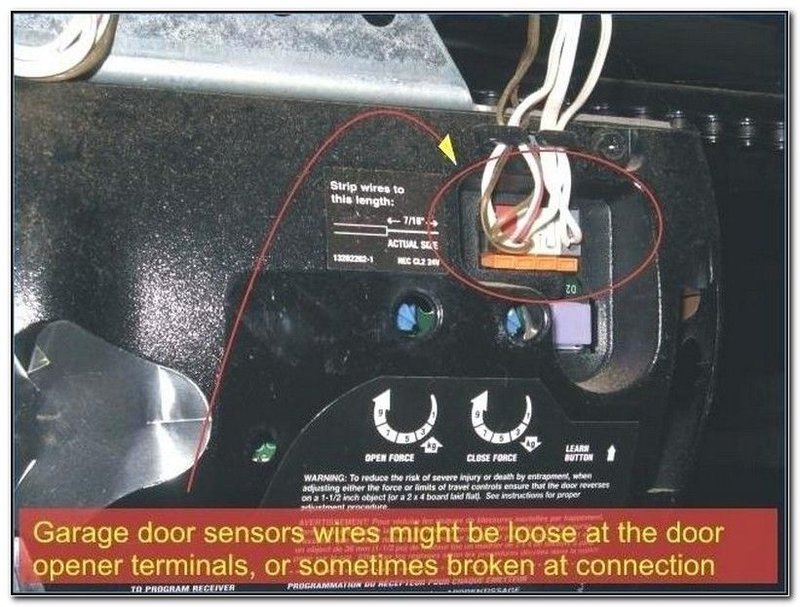
- Step 3: Once you’ve confirmed they’re in working order, look for the safety sensor’s wire connection point. You’ll need to disconnect these wires. This is usually done by unwinding the wire nuts or clips that hold them together.
- Step 4: With the wires disconnected, the safety sensors should no longer be operational. Now you can proceed with your work.
Remember, it’s best to keep the sensor wires protected. If you’re planning to keep them disconnected for a while, consider using electrical tape to cover the exposed ends.
Things to Remember While Disabling the Sensor
Before you proceed, keep these essential reminders in mind:
- Safety First: If you disable the sensor, never walk under the closing door without supervision.
- Short-Term Solution: Think of disabling the sensor as a temporary measure. As soon as your repairs are complete, re-enable the sensor for safety.
- Check for Malfunctions: If you find yourself needing to disable the safety feature frequently, it might be time to troubleshoot or replace the sensors.
Disabling the safety sensor might feel somewhat like driving without a seatbelt. It’s doable, but it comes with risks. Always stay vigilant!
How to Re-enable the Safety Sensor
Now that you’ve finished your work, it’s time to reconnect those sensors. Here’s how you can do it:
- Step 1: Reconnect the safety sensor wires you disconnected earlier. Make sure they are tightly secured using wire nuts or clips.
- Step 2: Clean the sensor lenses to remove any dust or debris that could obstruct the infrared signals.
- Step 3: Test the functionality by hitting the remote to close the door. Make sure it doesn’t close if there’s an object in its path.
Re-enabling the safety sensor should be done immediately after you finish whatever task you needed to do. It’s a good habit to get into.
Troubleshooting Common Issues
If for any reason, your Chamberlain garage door won’t operate correctly even after re-enabling the safety sensors, check these common problems:
- Misaligned Sensors: Make sure the sensors are perfectly aligned and pointing towards each other. Even a slight misalignment can cause issues with operation.
- Power Supply: Confirm that both sensors are receiving power. A blown fuse or power outage can cause them to malfunction.
- Obstruction: Ensure there’s nothing in the way of the sensor beams—like dust or spider webs.
If you ever feel stuck, a quick reset of the garage door opener might do the trick. Sometimes, a fresh start can clear up any glitches.
When to Seek Professional Help
If you’ve gone through the steps above and the safety sensor is still causing problems, it might be time to call in a professional. Here are some indicators that it’s time for help:
- Continuous Malfunction: If the door won’t close at all or reverses frequently, it’s a sign something’s amiss.
- Wiring Issues: If you notice frayed or damaged wires, seeking help is essential to prevent further hazards.
- Frequent Errors: If you’re having to disable the sensor often, there may be a deeper issue within the opener itself.
Getting a professional to take a look can save you time and headaches—and ensure everything is working as it should.
Disabling the safety sensor on a Chamberlain garage door opener can seem daunting at first, but it’s quite straightforward when you know the steps. As you navigate through this process, always put safety first, seeing it not just as an inconvenience but as your last line of defense against mishaps.
Remember to reconnect and test the sensors as soon as you’re done, ensuring your garage remains a safe space for your family and your vehicles. And if you run into any persistent problems, don’t hesitate to reach out to a professional for help. Sometimes, a little extra support is all we need to keep things running smoothly!