
The Skylink keypad is a handy device that can control your garage door or other entry points in your home. Think of it as your personal doorkeeper, allowing access with just a few taps. Before we dive in, let me assure you: the beauty of the Skylink keypad is all about simplicity and efficiency. You don’t need a technical degree to get this done, and I’ll break it all down so you can feel confident in your abilities.
Understanding Your Skylink Keypad
Before you plug in and start pushing buttons, it’s essential to understand what your Skylink keypad does and how it works. This keypad provides a wireless way to control your garage door opener or any compatible access system. Instead of fumbling for a remote, you simply enter a code, and voilà—your garage opens as if by magic!
First off, take a look at the keypad. It usually comes with a series of numbers and may even have a few extra buttons for functions like lights. Each of these buttons plays a role in communicating with the rest of your garage door system. The keypad often runs on a battery, which is something to keep an eye on over time. If the keypad isn’t responding, the first thing to check should be the batteries.
Gathering Necessary Tools
Now that you understand your device, let’s gather everything you’ll need to connect the Skylink keypad to your garage door or entry system. Here’s a quick list:
- Skylink Keypad: Make sure it’s powered and ready.
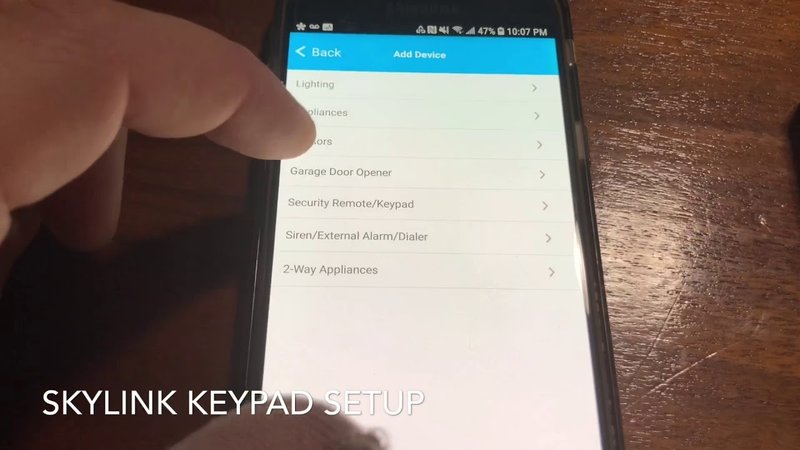
- Garage Door Opener: Check compatibility with the keypad.
- Owner’s Manual: This has specific instructions for your model.
- Tools: A screwdriver might come in handy for positioning.
With these items in hand, you’re better equipped to tackle the connection. Having the owner’s manual is particularly useful, as different Skylink models might have slight variations. So, if you think you’re in for a long process, take a deep breath; with these tools, you’re on your way.
Finding the Right Location
Next up is finding the perfect spot to install your Skylink keypad. Think about where you usually approach your garage. Ideally, the keypad should be close enough to the door so you can easily access it, but also at a spot where you feel comfortable entering your code without it being exposed to prying eyes.
Generally, a height of around 5 to 6 feet off the ground works well for easy reach. If you have kids or pets, placing the keypad higher might protect it from unintentional tampering. Make sure the area you choose is dry and doesn’t have too much traffic; you don’t want to accidentally hit it with a lawnmower or a bike!
Connecting Your Skylink Keypad
Now for the main event: connecting the keypad to your garage door opener. Follow these step-by-step instructions:
1. Power On the Keypad: If your keypad hasn’t been powered on yet, insert the batteries and check that it lights up.
2. Enter Programming Mode: On the keypad, hold the “Program” button until it starts blinking. This step sets you up for linking it with the garage door opener.
3. Input Your Code: You will enter a personal code of your choice. This doesn’t need to be anything complicated; just choose something you’ll remember.
4. Sync with Opener: Now, press the button on your garage door opener while simultaneously pressing the button on the keypad. If successful, both devices will signal that they’re connected!
This simple process helps establish a secure connection between the two devices, allowing the keypad to communicate effectively with the garage door opener.
Testing Your Connection
Once you’ve completed the connection, it’s crucial to test the setup. Stand back, give your code a try, and see if your garage door responds. If all goes well, you should hear the familiar sound of your door opening or closing!
If it doesn’t work, don’t panic! Here are a few common troubleshooting steps:
– Check the Batteries: Low batteries can cause communication issues.
– Re-enter the Programming Mode: You might need to try the programming again if something went wrong.
– Mismatch in Codes: Ensure that the code you entered into the keypad matches what was registered in your garage door opener.
Remember, troubleshooting is just part of the journey, and with a bit of patience, you’ll get there!
Maintaining Your Skylink Keypad
After connecting your Skylink keypad, ongoing maintenance is essential for keeping it functioning smoothly. Here are a few tips:
- Regularly Check the Batteries: Aim to replace them every six months or sooner, especially if you notice sluggish responses.
- Clean the Keypad: Keep it free of dirt and dust to ensure the buttons press easily.
- Test the Connection Periodically: Give it a quick test every month or so to ensure reliability.
These simple steps can extend the life of your keypad and prevent potential headaches down the line.
Advanced Options and Alternatives
If you find that the Skylink keypad isn’t the right fit for your needs, several alternatives are worth considering. For instance, *universal remotes* can operate multiple devices, including garage doors, which might simplify your access points. Additionally, many modern garage door systems now offer smartphone connectivity, giving you remote access from anywhere.
These options provide flexibility, especially if you want to integrate your garage door with a smart home system. Think about what features matter most to you—sometimes upgrading to a different system can make life even easier!
Connecting your Skylink keypad is a straightforward process that, with the right guidance, anyone can manage. Remember the steps: understanding the device, gathering your tools, installing it in a convenient place, and following the connection process step-by-step. Most importantly, don’t hesitate to double-check your work if things don’t go as planned; troubleshooting is just as important as the setup itself.
By following this guide, you’re not just improving your home’s convenience—you’re also stepping into the world of smart home technology. Enjoy the seamless access that comes with your connected keypad, and feel proud of your DIY accomplishment!