Whether you’re a new homeowner or just upgrading your system, getting your opener connected smoothly is crucial. In a world where convenience reigns supreme, a garage door opener can save you time and even keep you safe. With a Raynor opener, you’re not just investing in a tool; you’re bringing ease into your everyday life. So, let’s dive in and figure out how to connect that Raynor garage door opener step by step.
Understanding Your Raynor Garage Door Opener
Before we start connecting anything, it’s important to know your Raynor garage door opener. Most models have a similar setup, but it’s good to familiarize yourself with the basics. Typically, there are two parts: the opener itself and the remote control. The opener is usually mounted on the ceiling of your garage, and the remote is your handy device that lets you operate the door from your vehicle or even from afar.
You might be wondering how these devices talk to each other. Think of it like a small radio station. The opener sends out signals, and the remote tunes in to receive them. It’s that synchronization that allows everything to work smoothly. Plus, most modern Raynor openers come with safety features like automatic reversing, which helps prevent accidents. It’s all about making your life easier—so let’s get that connection made!
Gathering Your Tools
Before anything else, let’s round up the tools you’ll need. Luckily, you won’t need much. Here’s a quick list to help you out:
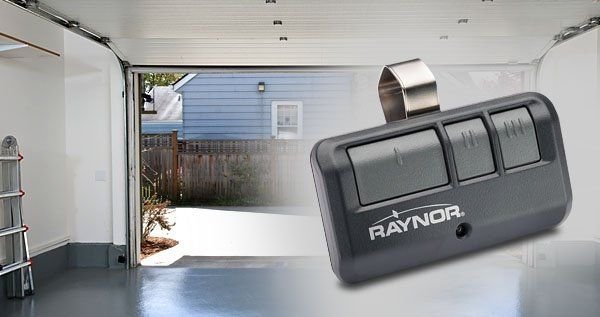
- Raynor Remote Control: Make sure you have the right remote for your opener model.
- Opener Control Panel: Typically found on the wall inside your garage.
- Owner’s Manual: This will provide specific instructions for your model.
- Step Ladder: If you need to reach the control panel mounted on the ceiling.
With this small toolkit, you’re almost ready to roll. If you’ve misplaced the manual, don’t sweat it! You can usually find a PDF version online on the Raynor website. Having the right model number will help you locate the correct guide.
Locating the Learn Button
Now that you have your tools, it’s time to head to the garage and locate the Learn button on your garage door opener. This little button is the key to connecting your remote to the opener. Usually, you’ll find it on the back or side of the motor unit.
Here’s what to look for: the Learn button is often colored (like yellow or red) and should be clearly labeled. When you press this button, it allows you to pair your remote to the opener. It’s similar to pairing your Bluetooth headphones to your phone—once they connect, they’re good to go.
If you can’t find the button, double-check your owner’s manual for specific locations based on your model. Trust me, once you find it, you’ll feel like you just unlocked a door (pun intended) to a hassle-free experience!
Connecting Your Remote Control
With the Learn button identified, you’re ready to connect the remote control. The process is pretty straightforward. Here’s how to do it:
1. Press the Learn Button: Start by pressing and releasing the Learn button. After pressing it, you have about 30 seconds to complete the next steps.
2. Press the Remote Button: Grab your Raynor remote, and press and hold the button you want to use for opening the garage door. You’ll want to make sure this button is free of potential confusion; you don’t want to be accidentally opening your neighbor’s garage!
3. Look for the Light: After a few seconds, the light on the garage door opener should blink, signaling that it has successfully learned the remote. If the light remains solid, congratulations, you’re connected!
If you miss the timing or something doesn’t work, don’t worry. Just start the process over again. Sometimes, it might take a couple of tries to get things right.
Testing the Connection
Once you think you’re all set, it’s time for the real-world test. Step outside your garage, remote in hand, and press the button you just programmed. The door should respond right away!
If it opens smoothly, you’ve done it. But if it doesn’t, don’t panic. Here are a couple of troubleshooting steps:
- Check the Batteries: Ensure that your remote’s battery is not dead. You can replace it easily if needed.
- Re-sync the Remote: Sometimes, it just needs another try. Just repeat the connection process outlined above.
- Review Your Manual: If all else fails, the manual might have additional troubleshooting options specific to your model.
Testing is crucial—just as you wouldn’t trust a bridge without checking it first!
Understanding Safety Features
When connecting your Raynor garage door opener, it’s also essential to understand the safety features involved. Many modern openers come with systems that prevent door crashes and ensure safe operation.
For instance, there’s typically a safety reversal mechanism. If something—or someone—enters the doorway while the door is closing, the opener will stop and reverse back up. It’s a lifesaver and a fantastic feature for families with kids or pets. Always make sure this function is working after installation.
Also, look for rolling codes technology in your opener. This adds a layer of security by changing the code each time you use the remote. This makes it much harder for thieves to intercept and open your garage door.
Maintenance and Regular Checks
Connecting your Raynor garage door opener is just the first step. To keep everything running smoothly, regular checks and maintenance are key. You don’t want to face a hiccup right when you need to get out.
Here are some maintenance tips:
- Test the Safety Features: Every couple of months, do a quick test of the safety reversal feature. It’s an easy check and reassures you it’s working.
- Inspect the Remote Battery: Try changing the remote’s battery at least once a year to avoid unexpected failures.
- Clean the Tracks: Dirt and debris can build up, so give the tracks a quick clean every now and then to ensure smooth operation.
A little preventive maintenance goes a long way in avoiding larger problems down the road.
Wrapping Up Your Connection Journey
There you have it! Connecting your Raynor garage door opener is more straightforward than you might have feared. By gathering your tools, locating the Learn button, and following the outlined steps, you can enjoy the convenience of a fully functional garage door system.
Remember, it’s perfectly normal for things to not work on the first try. Patience is key, so don’t hesitate to revisit the steps or consult your manual. After all, the goal here is simple: ease and security for you and your loved ones. Enjoy the ride—literally and figuratively!