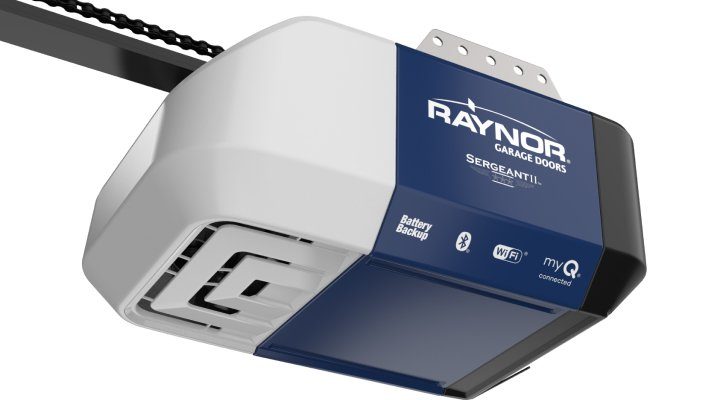
Raynor is well-known for producing reliable garage door openers, and their battery backup system is no exception. With a simple yet effective setup process, you’ll gain peace of mind knowing your garage is secure, regardless of the weather outside or a surprise power outage. Let’s dive in and break down how to connect your Raynor battery backup, so you can enjoy seamless operation without the fear of being locked out.
Before you start connecting anything, it’s crucial to understand what you’re working with. The Raynor battery backup system is designed to keep your garage door opener operational when the primary power source fails. Imagine it as a superhero—always ready to spring into action when needed. Typically, it consists of a compact battery unit and a charging system.
Why Choose a Battery Backup?
– Convenience: You won’t have to worry about getting stuck outside during a storm or after a power failure.
– Safety: A battery backup allows your garage door to function seamlessly, keeping your home secure.
The Raynor battery comes with a manual that might look a bit intimidating at first. But I promise you, it holds all the secrets to making the connection a breeze!
Do you like to be prepared? Here’s a short list of what you’ll need before hitting the ground running:
- A screwdriver (typically a Phillips or flathead will do)
- Wire cutters/strippers
- Scissors (in case you need to open up any packaging)
- Your Raynor battery backup unit
- The garage door opener remote you’d like to pair
Having these tools handy can save you time and effort. Think of them as a toolbox for success—each one plays a role in ensuring your battery backup is set up correctly.
Once you have everything in place, it’s time to get your hands on the battery backup unit. Start by unboxing it carefully and identifying the major components inside. You’ll find the battery, some cables, and possibly a user manual that outlines specific setup guidelines.
Plugging in the Battery
First things first: make sure you’re working in a safe environment, free from distractions. Place the battery backup unit on a flat surface near your garage door opener. Next, plug the unit into a standard wall outlet. This vital step allows the battery to start charging.
Remember, the charging process might take a few hours, so *patience* is key here. While you wait, it might be a great time to familiarize yourself with your garage door opener functions.
Now we’re getting to the good stuff! Connecting the battery backup to the garage door opener is relatively straightforward—think of it as plugging your phone into a charger. You’ll likely encounter two key terminals: the positive (+) and negative (–).
Steps to Connect:
1. Find the connection points on your garage door opener for the battery. They’re usually accessible from the back or side.
2. Use your wire cutters to strip about a half-inch of insulation off the end of each wire, which allows for a solid connection at the terminals.
3. Connect the positive wire to the positive terminal on the battery and the garage door opener. Then, connect the negative wire to its corresponding terminal. Make sure the connections are tight as this ensures good conductivity.
4. After connecting, secure any loose wires with tape or zip ties to prevent them from getting caught in the garage door mechanism.
After you’ve connected the battery backup, it’s time to sync your garage door opener with your remote. This part is crucial because, without the remote, the convenience factor starts to slip away. You might be wondering about the procedure; here’s a breakdown.
Syncing Steps:
1. Locate the “Learn” button on your garage door opener. It’s often near the antenna.
2. Press and *hold* the “Learn” button until you see an LED light flash, which signals it’s ready.
3. Grab your remote and press the button you wish to sync. The motor unit should click, indicating a successful pairing.
There you have it! With these steps, your Raynor battery backup is connected, and the remote should work seamlessly.
Now that everything is connected, it’s time for the moment of truth—test it out! Like a new recipe that needs a taste test, seeing it in action gives you confidence.
How to Test:
– Power On: First, ensure the battery backup is charged. You should see a green indicator light, which means everything is ready.
– Close the Garage Door: Using your remote, try to open and close the garage door. You should hear the motor whirring smoothly.
– Power Outage: For the ultimate test, switch off the main power to see if the backup is working properly. When you click the remote, the door should operate without any issue.
This step is essential! After all the hard work, the satisfaction of watching your garage door operate without hiccups is rewarding.
Even with the best setups, things might not work out as planned. Here are a few common problems you might face and solutions to help you troubleshoot:
– No power to the opener: Confirm that the battery is charged and properly connected.
– Remote not syncing: If you’re struggling to connect the remote, make sure you’re pressing the right button and that there’s no interference.
– Garage door not moving: Check if there are any obstructions blocking the door or if the battery backup is defective.
If you encounter a snag, your user manual can be incredibly useful, guiding you toward a solution.
Now that you’ve set everything up, it’s essential to keep your battery backup running smoothly. Regular maintenance is the key to longevity.
Tips for Maintenance:
– Keep It Charged: Regularly check the battery status; a fully charged battery enhances performance.
– Clear Obstructions: Make sure nothing is blocking the garage door tracks. It’ll help prevent stress on the opener.
– Check Connections: Periodically review all connections to ensure they’re still secure.
Following these tips can extend the life of your Raynor battery backup and keep your garage door performing perfectly.
Connecting the Raynor battery backup might seem intimidating at first, but with clear instructions and a bit of patience, you’ll find it’s not as tricky as it appears. By taking your time to understand the components and following the steps outlined, you’re setting yourself up for effortless operation—even in the event of a power outage. Enjoy the peace of mind that comes with a properly functioning battery backup, and know you’re always just a click away from access to your garage, no matter what!
Originally posted 2025-01-28 11:44:54.