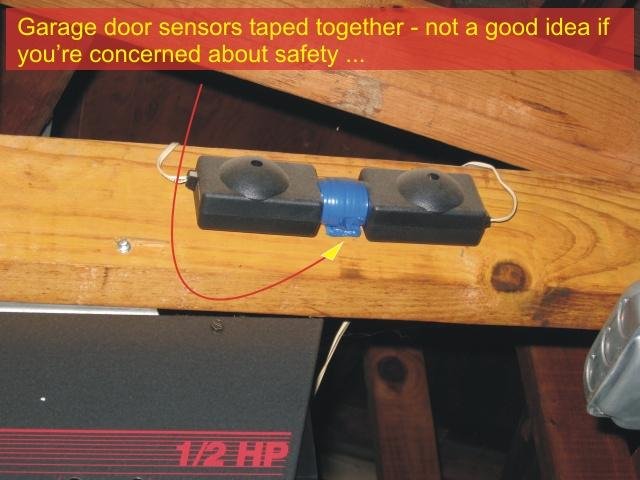
Whether you have a LiftMaster, Chamberlain, or another brand, the basic principle remains the same. Your safety sensors act as the eyes of your garage door system, preventing it from closing if something is in the way. Connecting them correctly is crucial, as they play a key role in your home’s safety. This guide will take you through the process step by step.
Understanding Your Safety Sensors
Let’s start with the basics. Garage door safety sensors are lightweight, small devices typically found near the bottom of your garage door tracks. Think of them as the vigilant guards watching over your garage—if anything obstructs their view, they stop the door from closing. Each sensor communicates via a beam of infrared light. If the beam is broken, the system will trigger a response.
Most safety sensors are super easy to spot. They usually have a sender and a receiver. The sender emits a signal, while the receiver picks it up. When everything is aligned and working correctly, the garage door operates smoothly. But if you notice that your door isn’t closing properly or keeps reversing, it might be due to a misplaced or malfunctioning sensor.
So why does this matter? Think of it this way: without these sensors, a garage door could shut down on someone or something, causing injuries or damages. Keeping your safety sensors functional means you’re prioritizing safety for everyone.
Tools You’ll Need
To connect your overhead door safety sensor, you won’t need a toolbox full of gadgets. Here’s what you need:
- A screwdriver (flathead and Phillips types are most common)
- A level (to ensure sensors are aligned properly)
- Wire connectors or electrical tape for securing connections
- A multimeter for testing sensor function
These tools make the job not just easier but also safer. The multimeter, for instance, helps check the voltage of sensors to make sure they’re working as they should. It’s like a little safety check before the big reveal!
Disconnecting the Power Source
Before you start, safety should always come first. The last thing you want is an accidental garage door movement while you’re working. Here’s how to disconnect the power:
1. Locate your garage door opener’s power supply. Typically, it can be found where the motor unit is mounted.
2. Unplug the unit to cut off electricity. If your model is hardwired, you might need to switch off the circuit breaker.
3. Confirm there’s no power by trying to use the remote or wall button to make sure nothing happens.
By disconnecting the power source, you eliminate any risk of injury while you’re working on the sensors.
Connecting the Sensors
Now, onto the actual connection! Follow these steps to connect your sensors properly:
1. Locate the wires connected to each sensor. Usually, the wires are bundled together. Make a note of where each wire goes (you can even take a picture for reference).
2. Connect the wires, matching each color accordingly. Typically, you’ll have a white wire (neutral) and a colored one (usually red or green).
3. Secure the connections. If you’ve got wire connectors, twist them tightly onto the wires. If you’re using electrical tape, wrap it snugly around the connection points.
Once everything is connected, it’s crucial to position the sensors correctly. They need to be at the same height and facing each other, creating a straight line of communication. If they’re misaligned, you might still see that pesky door reversing.
Aligning the Sensors
Alignment is vital for your sensors to work properly. It’s like tuning a musical instrument; if it’s out of sync, you won’t get the desired results. Here’s how to align them:
1. Position both sensors so they face each other. You can use a *level* for accuracy.
2. Check for clearance. Make sure there’s no debris or anything blocking the line of sight.
3. Test the door. Once aligned, plug the opener back in and try operating the door.
If the sensors are correctly aligned and working, the garage door should open and close without issue. If it still doesn’t work, you might want to check the sensor settings in your garage door opener manual.
Troubleshooting Common Issues
Sometimes, things don’t go as planned, and that’s okay! Here are some common issues you might encounter with your safety sensors:
– Door reverses before closing: This often indicates that the sensors are misaligned. Double-check their positioning and make sure nothing is obstructing the signal.
– Sensor lights are blinking or off: This usually means there’s a malfunction. Ensure the wiring is correct, look for damaged wires, or reset the sensors to establish connectivity.
– Sensors are too high or too low: If your sensors are not at a height that allows for adequate detection, they may fail to work correctly. They should be around six inches above the ground.
If none of these solutions work, it might be time to consult the manufacturer or consider replacing the sensors.
Maintaining Your Safety Sensors
Once you’ve got everything installed and working, maintaining those safety sensors is key. Here’s how to keep them in tip-top shape:
– Regular checks: Make it a habit to check your sensors monthly for proper alignment and functionality.
– Clean the sensors: Dust and debris can impact their effectiveness. Wipe them down with a soft cloth as needed.
– Inspect wiring: Look for any signs of wear and tear on the wiring every so often. Damaged wires may need replacement to keep your system functioning smoothly.
With just a little bit of routine care, you can ensure that your safety sensors last a long time. They’re small components, but they play a massive role in keeping your garage—and your family—safe.
Wrapping It Up
Connecting your overhead door safety sensor is more straightforward than it may seem. By understanding how these devices work, having the right tools, and following the steps outlined here, you can get everything in sync and operating smoothly. If you run into any hiccups, remember that troubleshooting is part of the process!
Safety sensors are a key feature of your garage door system, making your home safer for everyone. Following the steps outlined can empower you to handle one of those often-overlooked maintenance tasks with confidence. So, roll up those sleeves, and get to it!
