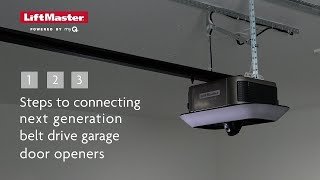
Connecting a Liftmaster motor unit typically involves syncing it to your remote control and ensuring that everything runs like a well-oiled machine. Whether you’ve just purchased a new unit or are troubleshooting an old one, this guide will help you through each step clearly. You’ll be a pro in no time!
Understanding Your Liftmaster Motor Unit
Before you dive into the connection process, it’s essential to understand what you’re working with. Liftmaster offers a variety of motor units, so knowing the specific model can help with troubleshooting or looking up additional details specific to your unit. Most units will include buttons on the motor itself, a power source, and a range of features that might include smart technology.
So, why are these parts important? Well, the motor unit powers the door and provides essential functions like safety reversal and automatic stopping. If you imagine the system as a car engine, the motor unit is like the engine itself—without it, nothing works! Whether your remote is controlled by batteries or is smart-home enabled, understanding these elements will make the upcoming steps much clearer.
Gathering Your Tools
To get started, you’ll need a few basic tools and a little bit of time. Here’s a quick checklist:
- Liftmaster motor unit
- Compatible remote control
- Step ladder (if necessary)
- Owner’s manual (for specific instructions)
- Stepladder or chair (to reach overhead)
Having everything queued up in advance can save you those frustrating trips back to the toolbox. If you forgot the ladder and can’t reach the motor unit, things might get tricky—and we don’t want that! Keeping your tools handy will make the entire process smoother and more enjoyable.
Locating the Learn Button
Most Liftmaster motor units feature a “Learn” button—this is a crucial piece of the puzzle. Think of it as the bridge that connects your remote to the motor unit. But where is it? Typically, you’ll find the Learn button on the back or side of the motor housing.
Look for a colored, round button—often orange, purple, green, or yellow depending on the model. If you have trouble locating it, the owner’s manual should have a diagram. Once you find it, just hang tight; you’ll need it soon.
Connecting the Remote Control
Here’s the fun part: connecting your remote control to the Liftmaster motor unit. Once you’ve located that Learn button, the process is pretty straightforward.
1. Press and Release the Learn Button: This action will start the programming mode. You might notice a light blinking, indicating it’s ready to receive a signal.
2. Press the Button on Your Remote: Within 30 seconds of pressing the Learn button, press and hold the button you want to program on your remote. Make sure you’re doing this for the remote you want to use most often—this ensures seamless access.
3. Wait for Confirmation: After a moment, the light on the motor unit should blink or turn on, confirming that the remote is now connected. If it doesn’t, that may indicate an issue with batteries or compatibility.
If you’re working on a universal remote, ensure it’s compatible with Liftmaster units specifically. Most universal remotes work well, but checking compatibility can save you from a headache later.
Testing Your Connection
Now that you’ve programmed the remote, it’s time for a little test drive! Ensure the area around your garage door is clear of any obstacles.
– Stand within range and press the button you’ve programmed.
– Observe how the door responds. Does it open smoothly? Does it close correctly?
If everything goes as planned, hey, you did it! But if not, don’t worry; let’s troubleshoot some common issues.
Troubleshooting Connection Problems
So, what if the remote doesn’t work? Here are some quick troubleshooting steps:
- Check the Batteries: Sometimes it’s the simplest things. If your remote isn’t responding, it might be time for some fresh batteries.
- Verify Compatibility: Make sure the remote is indeed compatible with your Liftmaster motor unit. Cross-check the model numbers or check online.
- Reset the System: If you’re still having trouble, you can reset the motor unit by holding down the Learn button until the light goes out. This process erases all remotes and will allow you to start fresh.
Using these tips should put you back on the right track.
Why Regular Maintenance Matters
Once you’ve connected your Liftmaster motor unit successfully, it’s good practice to keep everything maintained. Just like regular oil changes are essential for a car, maintaining your garage door system ensures longevity and performance.
Regular checks can include:
– Clearing debris around the door and tracks to prevent jams.
– Examining the remote for signs of wear or damage.
– Checking the safety sensors to ensure they detect obstacles effectively.
Taking these steps not only enhances the operation but can also prevent costly repairs down the line.
Connecting your Liftmaster motor unit doesn’t have to be a challenge. By understanding the components, gathering your tools, and following the steps outlined, you can achieve a seamless connection with your remote control.
The satisfaction of pulling in your driveway and pushing that remote button only to see your garage door glide open is truly rewarding. So, remember to keep the connection strong with regular maintenance, and you’ll be on your way to enjoying a fully functioning garage door system for years to come!