You might be thinking, “This sounds complicated,” but don’t fret just yet! Connecting these sensors is often simpler than it seems. Whether you’re working with a new Craftsman garage door opener or troubleshooting an older model, I’ll walk you through the steps. Grab a cup of coffee, and let’s dive into how these safety sensors work and how to connect them correctly.
Understanding Craftsman Safety Sensors
Craftsman safety sensors are integral components of garage door openers that ensure safe operation. Typically located on either side of your garage door, these sensors use infrared beams to detect any obstructions. If something interrupts this beam—like your pet or a child—the door will stop closing, preventing potential accidents.
Here’s the thing: if the sensors aren’t aligned or connected properly, they can’t do their job effectively. This misalignment can lead to the garage door reversing or not closing at all. So, recognizing clues that something’s off is important before you even think about connecting the sensors. Signs might include blinking lights on the garage door opener or a noticeable gap when the door tries to close.
Understanding how these safety sensors work lays a solid foundation for seamless connections and troubleshooting. This knowledge will also help you identify if issues arise from the sensors themselves or if something else might be wrong with your opener.
Gather Your Tools
Before connecting your Craftsman safety sensor, you’ll want to gather a few tools. Luckily, you won’t need much, just some basic items typically found around the house. Here’s a quick list:
- — Screwdriver (flathead and Phillips will work)
- — Level (optional but very helpful)
- — Wire connectors or electrical tape
- — Safety glasses
- — Your Craftsman garage door opener’s manual
Honestly, having everything ready beforehand will save you from running back and forth, making the process smoother. Think of it like preparing for a race; the less time you spend fumbling around, the quicker you can get started. Plus, wearing safety glasses is a good habit to protect your eyes when you’re working close to the door mechanism.
Identifying the Sensor Components
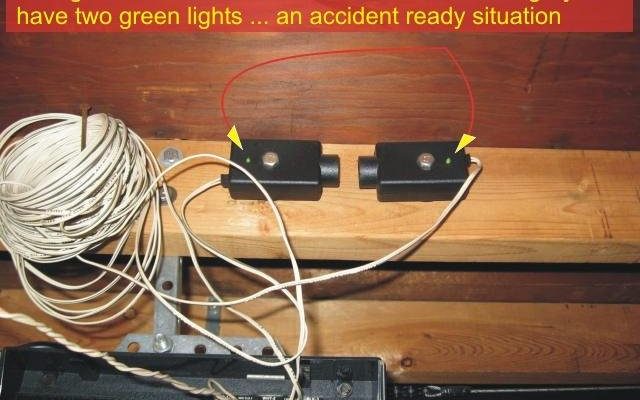
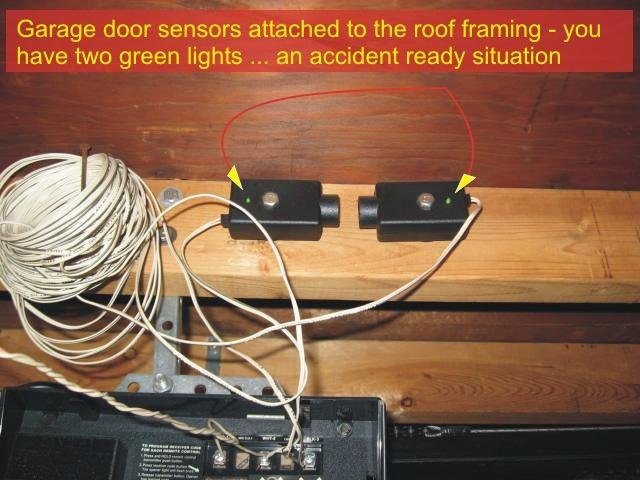
Now that you have your tools, it’s time to identify the key components of your Craftsman safety sensors. Each sensor typically has an emitter and a receiver. The emitter is the one that sends out the infrared beam, while the receiver detects it. If they’re not facing each other correctly, you’ll end up with a non-functioning safety system.
You might notice that the sensors are mounted quite close to the ground—usually about six inches above it. This placement is crucial to catch any large objects, but it also makes them vulnerable to bumps and scrapes. Take a good look at your setup before moving on. If things look askew, a quick adjustment may be all you need before you connect!
And if you spot any broken wires or loose connections, that’ll require more attention before you proceed. Fix potential issues before diving into the connection process to avoid any headaches down the road.
Connecting the Safety Sensors
Alright, let’s get down to business: connecting those safety sensors. The process might vary slightly depending on your specific model, but here’s a general guideline:
1. Power Off the Opener: Always ensure your garage door opener is unplugged before you start any wiring! This prevents any accidental injuries while you work.
2. Mount the Sensors: Use your screwdriver to attach each sensor to the garage door track or wall. If possible, use a level to ensure they’re aligned perfectly. Getting this right from the start saves trouble later.
3. Wire the Sensors: Now comes the wiring part. Connect each sensor using the wire connectors or electrical tape. Make sure to connect the same colored wires together—usually, you’ll find black and white wires. Black typically connects to black, and white to white.
4. Check Alignment: Once wired, position each sensor so that they face each other. You can even use your level again to ensure they’re straight. A slight tilt could mean failure in detecting the infrared beam.
5. Restore Power and Test: Plug everything back in and test the system by operating the garage door. It should close smoothly without reversing. If it doesn’t, you might need to check the connections again.
Connecting Craftsman safety sensors doesn’t have to be intimidating. By breaking it down into manageable steps, you’re paving the way to a properly functioning garage door opener.
Troubleshooting Common Issues
After connecting your Craftsman safety sensors, it’s possible to run into snags. If your door is still misbehaving, here are some common issues to watch for:
– Misalignment: If your sensors aren’t perfectly aligned, the door may refuse to close. A subtle adjustment to the angle of either sensor can often fix this.
– Blocked Sensors: Even small debris can prevent the safety sensors from communicating. Make it a habit to check for dust, spider webs, or anything that could obstruct the sensor’s beam.
– Wiring Problems: Sometimes, the simplest things can lead to major issues. Double-check your wire connections; a loose wire might be the culprit behind a non-responsive system.
– Regular Maintenance: By regularly checking and cleaning the sensors, you can avert potential problems before they become bigger issues.
When troubleshooting, take your time and go through these steps methodically. Rushing can lead to oversight. Just like fixing a car or assembling furniture, thoughtful attention to detail saves lots of headaches and future repairs.
Why Connecting Your Safety Sensors Matters
You might be questioning, “Why put in all this effort to connect the safety sensors properly?” The answer is pivotal for safety and functionality. Garage doors are heavy and can pose serious risks if they malfunction. A correctly connected safety sensor ensures that the door doesn’t close on people, pets, or valuables.
Moreover, connecting your Craftsman safety sensor as intended ensures warranty compliance and maximizes the lifespan of your garage door opener. Think of it like maintaining your car. Regular checks keep everything running smoothly, extending its life and helping you avoid costly repairs.
Remember, with home improvements like this, knowledge is power. By understanding how to connect your Craftsman safety sensor and how they operate, you’re not just fixing an issue—you’re enhancing your home’s safety and convenience.
In conclusion, connecting Craftsman safety sensors doesn’t have to be an overwhelming task. With the right tools and a straightforward approach, you can get your garage door functioning correctly again. If you ever feel stuck, don’t hesitate to reach out for help—whether it’s a friend who’s handy or a professional. Stay safe, and happy connecting!