
Chamberlain garage door openers and their wall buttons are designed to work together easily. If you’ve ever pressed that little button on the wall and wondered how the magic happens, you’re in for a treat. We’re going to break it down step by step, so you can feel confident tackling this on your own. No fancy tools required—just some patience and a couple of minutes of your time.
What You Need to Get Started
Before diving into how to connect your Chamberlain wall button, let’s gather everything you’ll need. It’s like prepping your ingredients before cooking a meal. Here’s what you should have in hand:
- Chamberlain Wall Button: Ensure you’ve got the right model that works with your opener.
- Batteries: If your button is battery-operated, have fresh batteries ready to go.
- Tools: You might need a screwdriver for mounting the wall button, depending on your installation.
- User Manual: Keep your opener’s manual nearby for reference. It’s a handy tool for troubleshooting.
With all the essentials lined up, you’re ready for the next steps. Just like prepping a workspace before you dive into a project, gathering these items will help streamline the process.
Locating the Perfect Spot
Where do you want your wall button? Consider it like choosing the best spot for a picture frame on a wall. The location matters for both aesthetics and functionality. Think about the following:
– Access: Make sure it’s easily reachable from your car and convenient for family members.
– Visibility: Ensure it’s visible enough for nighttime use. A well-lit area or a spot near an exterior light can be really helpful.
– Safety: Avoid placing it too close to the garage door where anyone might accidentally trigger it when standing nearby.
These factors will help you choose the perfect location, ensuring it’s both functional and safe. You want it to feel like an extension of your home, not just an afterthought fixed somewhere.
Connecting the Chamberlain Wall Button
Now, let’s get into the meat of it: the actual connection. Honestly, this part can be as simple as following directions, much like putting together Ikea furniture. Here’s how to proceed:
1. Power Off the Opener: Safety first! Before you touch any wires, unplug the garage door opener from the power source.
2. Attach the Wall Button:
– Remove the cover of the wall button, and expose the wires.
– Connect the wires to the corresponding terminals in the garage door opener. Typically, these will be labeled, making it easier for you.
3. Secure the Button:
– Mount the wall button in your chosen location using screws.
– Replace the cover securely.
4. Reconnect Power: Plugin or turn on the garage door opener again.
This might feel like a lot, but remember, each step is just about getting your button ready for action. Think of it like learning to ride a bike—once you get the hang of it, you’ll wonder why you were ever nervous in the first place.
Syncing Your Wall Button with the Opener
After connecting your wall button, the next step is ensuring that the two communicate properly. This is similar to syncing your remote control with your TV for the first time. Follow these steps to ensure everything is in place:
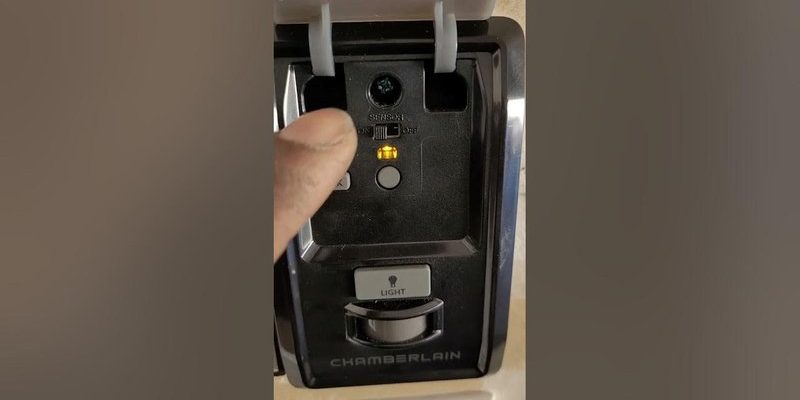
1. Find the Learn Button: Most Chamberlain garage door openers have a learn button located on the back or side. Press it, and you’ll usually see a light turn on.
2. Press the Wall Button: Within about 30 seconds of pressing the learn button, press the wall button you just installed. If done correctly, the light on the opener will flash, indicating it recognizes the button.
3. Test the Button: Give it a try! Press the wall button again to see if the door opens or closes. If it does, congratulations—you’re all set!
Don’t be alarmed if it doesn’t work at first. Sometimes, it takes a few tries before everything syncs up perfectly. If you hit a snag, take a deep breath, and double-check your connections and the learn process.
Troubleshooting Common Issues
Sometimes, things don’t go as planned, and that’s okay. Let’s go through some typical troubleshooting steps. Think of this as a quick guide to finding the hiccup in your connection:
– Button Doesn’t Respond: Check if the batteries need replacing if your wall button is battery-operated. If it’s wired, ensure the connections to the opener are secure.
– Signal Issues: If you’re a bit too far from the opener, the button may struggle to communicate. Moving a bit closer can help.
– Unresponsive Garage Door: If the opener doesn’t respond, ensure it’s plugged in and check your user manual to verify any specific troubleshooting tips for your model.
Remember, troubleshooting is like solving a mystery. You just need to gather clues and follow the trail until you find the answer.
Maintenance and Care
After you’ve got everything up and running, it’s essential to think about how to care for your wall button. A little maintenance goes a long way, much like changing the oil in your car regularly.
– Check Connections Regularly: Periodically ensure all wires are intact and that connections to the opener haven’t loosened.
– Battery Changes: If your wall button runs on batteries, keep an eye on them. Changing them at least once a year could prevent unexpected outages.
– Keep it Clean: Dust and dirt can affect how well your button works. A gentle wipe every now and then can help keep it functioning smoothly.
It’s like having routine check-ups for your health. Just a little bit of maintenance ensures everything keeps running without a hitch.
Connecting your Chamberlain wall button doesn’t need to be overwhelming—it’s a straightforward process that can enhance your garage door operation significantly. With a few simple steps, from choosing the right location to wiring it up and syncing, you’ll have everything under control.
Don’t shy away from troubleshooting if things don’t work on the first try. You’ve got the tools and know-how to make it work. Remember to maintain your installation to ensure long-lasting functionality. Now go ahead and enjoy the convenience of operating your garage door with ease!