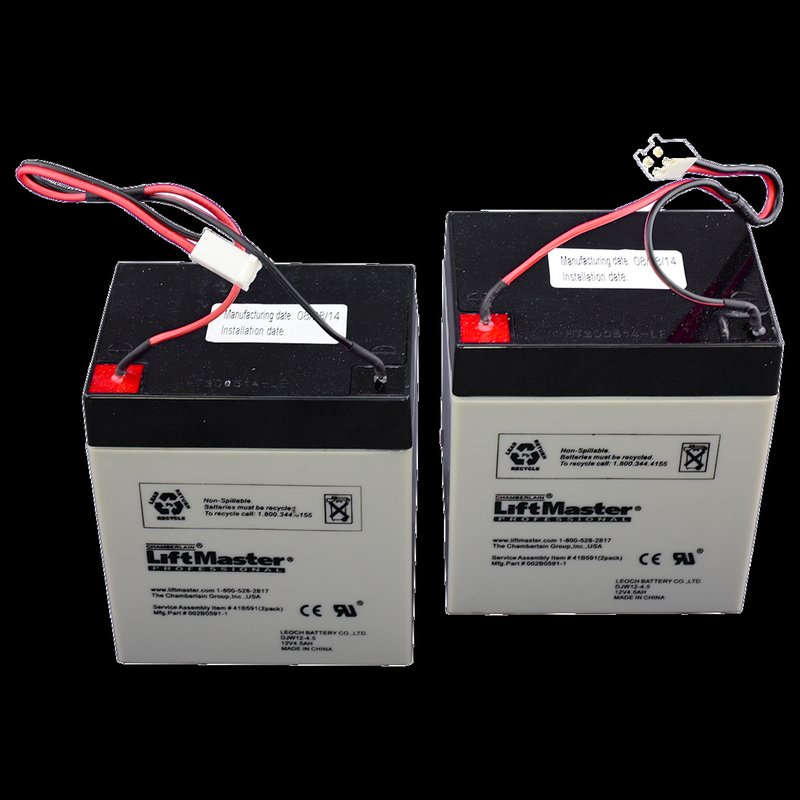
Connecting a Chamberlain battery backup isn’t as daunting as it sounds. If you’re someone who’s a bit intimidated by tech or DIY projects, fear not! In this guide, I’ll walk you through the entire process, from understanding the parts to troubleshooting common issues. By the end, you’ll be well-equipped to tackle this task without a second thought.
Understanding Your Chamberlain Battery Backup System
To get started, let’s clarify what a Chamberlain battery backup system is. Essentially, this system provides power to your garage door opener during a power outage. It’s like a safety net for your garage, ensuring that you don’t get stuck outside or inside when the grid goes down.
The battery backup comes in various models, matching different types of Chamberlain openers. So, if you own a Chamberlain garage door opener, you likely have a compatible battery option available. Be sure to check your model’s specifications before purchasing a battery. If you’re unsure, the model number can typically be found on an information sticker located inside your garage door opener’s motor housing.
Gathering the Necessary Tools
Before diving into the installation, let’s gather everything you’ll need. This will save you the hassle of diving back to the hardware store mid-project. Here’s a quick checklist:
- Chamberlain Battery Backup – Make sure it’s compatible with your opener.
- Screwdriver – You may need a Phillips or flathead, depending on your opener.
- Safety glasses – It’s crucial to protect your eyes while working.
- Wrench (if applicable) – Some models might require this for installation.
- User manual – Keep this handy for specific instructions and troubleshooting.
Having these tools ready will make this process smoother and less stressful. You might be thinking, “Do I really need safety glasses?” Honestly, it’s always better to be cautious, especially when dealing with electrical components.
Installing the Battery Backup
Now that you have everything ready, let’s talk about how to connect the Chamberlain battery backup. Follow these steps for a hassle-free installation:
1. Power Down: Begin by disconnecting your garage door opener from the power outlet. This is vital for your safety.
2. Access the Motor Unit: If you’re not yet familiar with your garage door opener’s motor unit, check your user manual. You’ll usually find it mounted to the ceiling of your garage.
3. Identify the Battery Compartment: This compartment is generally located on the back or side of the motor unit. If you’re having trouble identifying it, your user manual will provide illustrations.
4. Connect the Battery: Insert the battery into its designated slot. Listen for a click indicating that it’s securely in place.
5. Reconnect Power: With everything in place, plug the opener back into the outlet.
6. Test the System: To ensure everything is working, press the remote to see if the door operates as expected. If it doesn’t, don’t panic; let’s troubleshoot together.
Troubleshooting Common Issues
Even with a straightforward installation, sometimes things don’t go as planned. Here are a few common problems you might encounter, along with their solutions:
- The battery isn’t charging: Ensure that it’s properly seated in the compartment. You might need to remove it and replace it again.
- The door won’t open with the remote: Verify that the remote is synced with the opener. If not, you may need to press the *learn* button on the opener and then press the remote button until you hear another click.
- Battery drains quickly: If your battery backup isn’t lasting long, it could be due to a malfunction or age. Batteries typically have a lifespan of about 3-5 years.
Here’s the thing: it’s perfectly normal to hit a snag or two along the way. Take it slow, and consult your manual for specific guidance if needed.
Why Battery Backup Matters
You might be wondering if this setup even matters. The truth? It totally does! Think about it—having a battery backup transforms your garage door opener from a fair-weather friend into a reliable ally. Without it, power outages could leave your garage door stuck, which means serious inconvenience.
Additionally, you’d be able to move in and out of your garage whenever you need to, even during a storm or emergency situation. It’s one of those small upgrades that can provide peace of mind for you and your family.
Comparing Battery Backup to Other Options
You may be considering whether a battery backup is the right choice or if there are alternatives. Garage door openers typically fall into two categories: those with battery backups and universal systems that might need additional adaptors.
Battery backups are great because they are specifically designed for your Chamberlain system. However, if you’re leaning towards universal solutions, remember that they might not offer the same reliability or ease of use.
Ultimately, the best choice depends on your garage door’s requirements and your comfort level with technology. But if you’ve already invested in a Chamberlain opener, a battery backup is often the smartest and simplest choice.
Final Thoughts
Connecting a Chamberlain battery backup might seem complicated at first, but it’s quite manageable with a little guidance. This handy addition can save you time and hassle during unexpected power cuts, ensuring that you can always access your garage.
Take your time, follow the steps, and refer to your manual for any specific instructions tailored to your model. And remember, it’s okay to ask for help if you hit a roadblock. Happy connecting!
