Checking for loose hardware on your garage door opener might sound like a hassle at first. But trust me, it’s simpler than it seems. Picture this: your garage door opener is like a giant puzzle, with lots of pieces working together. If one piece isn’t sitting right—maybe it’s a screw or a bolt—it can throw everything off. From the popular Chamberlain brands to LiftMaster, understanding how to spot loose hardware can save you from bigger headaches later.
Why Loose Hardware Matters
When you think about garage door openers, it’s easy to overlook the hardware that keeps everything together. Loose hardware can create all sorts of issues: it can cause the door to operate sluggishly, lead to unexpected noises, or even result in the door becoming stuck. This isn’t just annoying; it can pose safety risks. Imagine your garage door unexpectedly falling or not closing properly—yikes! Regularly checking for loose hardware helps you catch these issues early before they escalate.
Additionally, garage door openers feature various moving parts, including springs, brackets, and tracks. Each of these components works in tandem, and if one isn’t secured, it can impact the overall performance. It’s similar to trying to drive a car with a flat tire: not going to be a pleasant ride! By keeping an eye on your hardware, you can ensure your garage door opener runs like a well-oiled machine.
Gather Your Tools
Before diving into the inspection, make sure you have the right tools on hand. Here’s what you’ll need:
- Screwdriver – A Phillips or flathead, depending on your garage door’s hardware.
- Wrench – To tighten any nuts and bolts.
- Flashlight – To illuminate any dark areas when examining your equipment.
- Safety Goggles – Better safe than sorry; protect your eyes from dust and debris.
Having your tools ready makes the whole process smoother and keeps you focused. Think of it this way: a chef wouldn’t start cooking without their knives, right? The same goes for checking your garage door opener.
Getting Started: Safety First
Safety should always be your top priority. Before you begin inspecting hardware, ensure the garage door is closed and the opener is unplugged. This prevents any unexpected movements while you’re working.
If your door is automatic, consider disconnecting the opener from the door itself, just by pulling down the emergency release cord. This is like putting your car in park before checking under the hood. A good safety practice sets the tone for a successful inspection.
Once you’ve ensured safety, you’re ready to begin your check. Remember to take your time; this isn’t a race!
Inspecting the Garage Door Opener Unit
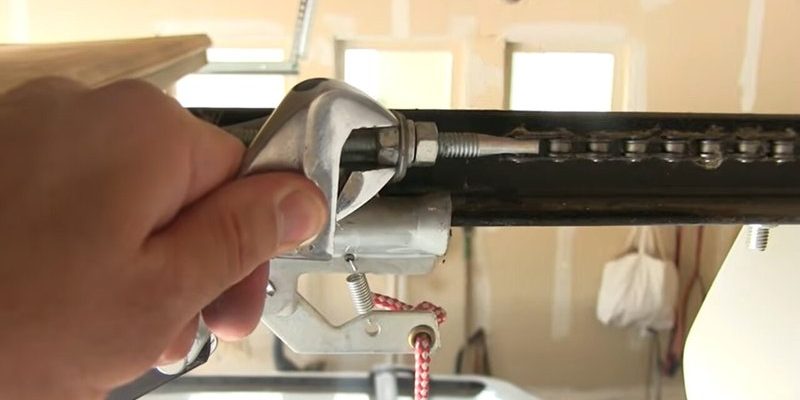
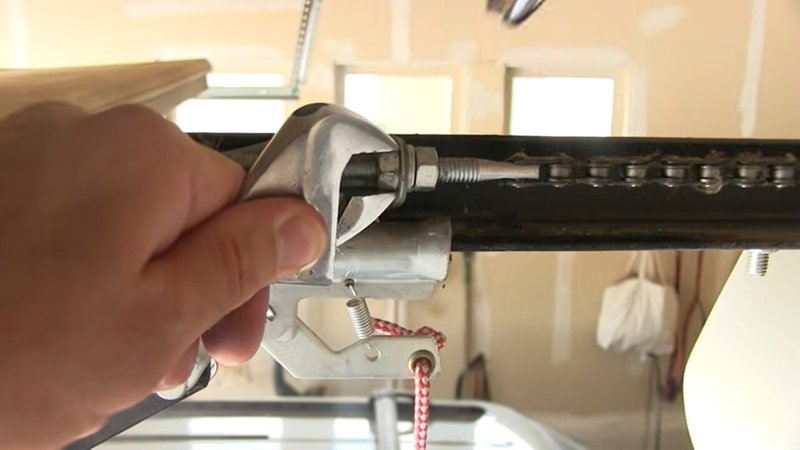
Now, let’s get into the nitty-gritty. Start by examining the garage door opener itself. Look for visible screws or bolts that might seem loose. This is often where problems begin.
If you’re using a Chamberlain or similar brand, these units typically have a large bracket that connects to the motor. Ensure that all screws are tight; it’s the foundation for how well your opener operates. If anything seems loose, it may just need a quick twist with your screwdriver or wrench.
Don’t forget about the force adjustments on the back of most garage door openers. A loose adjustment screw can affect how smoothly the door opens and closes. Tighten these gently as needed, but be careful not to overdo it.
Checking the Tracks and Rollers
The tracks and rollers are what guide your garage door as it opens and closes. Any loose hardware here can lead to alignment problems or even a door that jumps off its tracks—definitely not what you want!
Use your flashlight to inspect the tracks closely. Look for any bolts that are slightly out of place. If they’re loose, pick up your wrench and tighten them. Also, pay attention to the rollers; sometimes, they can get a bit wobbly, too. Give them a gentle push. If they feel loose, consider replacing them.
Think of tracks and rollers like train tracks; if they’re misaligned or shaky, the whole system could derail—literally!
Examining the Springs and Cables
Next up are the springs and cables. These parts bear a lot of weight, literally. Over time, they can experience wear and tear, causing them to loosen or even break. If your garage door opener has extension springs, look for any gaps or bends. These need to be tight and secure to ensure your door opens and closes without a hitch.
Don’t forget to check the cables that attach the springs to the door. If you spot fraying or loosening, it’s time to replace those cables. A broken spring or cable can make your garage door dangerously heavy, which is a huge safety concern.
Here’s the thing: if you’ve never dealt with garage door springs or cables before, consider calling a professional for help. They can be tricky and potentially dangerous if mishandled.
Checking the Mounting Bracket
The mounting bracket is the metal part that keeps your opener fixed to the ceiling of the garage. It plays a crucial role in stabilizing the entire unit. If the screws are loose here, it can lead to a shaky opener, which can cause awkward noises and uneven door movement.
To check it, look for any signs of movement in the bracket while gently pushing against the opener. If you notice it wiggles, grab your wrench and tighten any loose bolts. Just like fixing a wonky chair leg, this minor adjustment can make a world of difference.
Performing a Function Test
After you’ve tightened everything, it’s time for a little test drive. Plug the garage door opener back in and use your remote to open and close the door. Listen closely—do you hear any unusual sounds? Does it move smoothly?
If everything seems to work well, you might be in the clear. However, if you still notice clunking or hesitation, there might be deeper issues at play. In this case, don’t hesitate to call in an expert.
Preventive Maintenance Tips
Now that you’ve tackled your first check-up, let’s talk about keeping your garage door opener in tip-top shape. Regular maintenance can prevent issues from arising. Here are some quick tips:
- Monthly Check-ups – Regularly inspect your hardware for any looseness. It’s easier to catch problems early.
- Lubrication – Use garage door-safe lubricant on the moving parts, such as rollers and tracks. This helps them move smoothly.
- Watch the Weather – Extreme temperatures can put stress on hardware. Be mindful of changes in your area.
- Professional Tune-ups – Consider getting a professional inspection yearly to catch anything you might miss.
By being proactive, you can help extend the life of your garage door opener.
Checking for loose hardware on your garage door opener doesn’t have to feel like a daunting task. With a few tools, a little patience, and this guide, you can perform a simple inspection that could save you a headache down the road. Remember, the smoother your opener runs, the safer and more secure your home will be. Regular check-ups aren’t just about maintenance; they’re about peace of mind. So grab those tools and give your garage door opener some love—after all, it’s working hard for you!