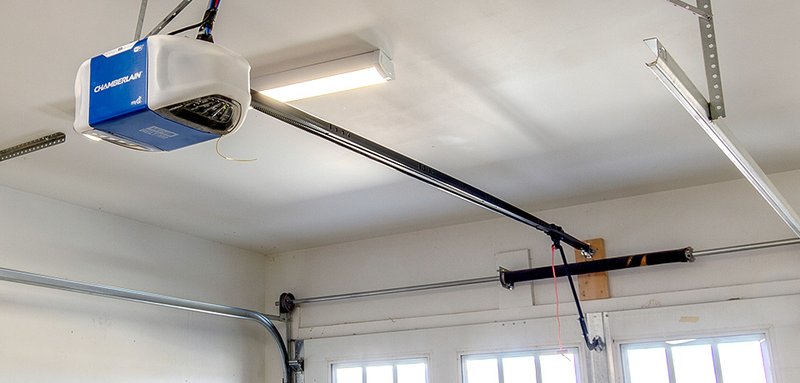
You might be using a popular brand like Chamberlain or LiftMaster, both known for their easy-to-install models. Or perhaps you’re leaning toward something a bit more universal. Whatever your choice, tackling a garage door opener replacement yourself means you can customize it to fit your needs, not to mention the pride that comes with DIY projects. This guide will take you through every step of this project, ensuring you gain the confidence to tackle the task head-on.
Assessing Your Current Garage Door Opener
Before diving into your DIY project, you’ll want to assess your current garage door opener. Is it a model you’re familiar with, or has it been through the wringer? Understanding the specifics will help you choose a replacement that truly meets your needs.
Start by checking the brand and model of your existing opener. This detail can be found on the unit itself, usually on a label located on the side or back. If you’re wondering how long the opener has been in use, remember that most models have a lifespan of about 10-15 years. If yours is older, it might be time for an upgrade. Let’s face it, technology has improved significantly, and you might find a new opener is quieter and more efficient.
Also, remember to take notes. Jot down any features you like about your current opener—this could be the remote range, safety features, or even the way it combines with your smart home system. Identifying these factors will help you make an informed choice for your new garage door opener.
Choosing the Right Replacement
With your current opener assessed, it’s time to dive into picking a replacement. You have two primary options: a brand-specific opener or a universal model. Choosing depends on your previous experience and future needs.
A brand-specific opener can leverage existing features you enjoy, such as compatibility with your current remote. If you have a Chamberlain system, sticking with a Chamberlain model will likely mean a smoother transition. On the other hand, a universal opener can save you money and often includes multiple remote options, making it a versatile choice. Just make sure it’s compatible with your garage door type and weight.
Don’t forget to consider features that make your life easier. Look for models with smart technology, which allows you to open or close your door via an app on your smartphone. You might ask yourself: “Do I want the ability to monitor my garage door from anywhere?” If the answer is yes, then you’ll want to choose a model that features Wi-Fi connectivity.
Gathering Your Tools
Once you’ve made your choice, it’s time to gather the necessary tools and supplies for the installation. Think of this as the recipe checking before you start baking. You wouldn’t want to find out halfway through that you don’t have enough flour.
Here’s a basic list of tools you’ll likely need:
- Socket set or wrench
- Drill and drill bits
- Level
- Measuring tape
- Screwdriver (both Phillips and flat-head)
- Stud finder (in case you need to locate wall studs)
- Safety goggles and gloves
Having these tools ready will save you time and frustration as you move through the project. Gather your supplies beforehand, and you’ll find the installation process flows much more smoothly.
Disconnecting the Old Opener
Now comes the fun part—removing the old garage door opener. Start with safety; unplug the opener and use a ladder to access it easily. Ensure you keep the power source disconnected until the installation of the new opener is complete.
First, locate the mounting brackets, and unscrew them carefully. If your opener is attached to a ceiling-mounted rail, you may need to loosen some additional bolts. You might find your old opener refusing to budge; if that happens, don’t force it—double-check for any hidden screws or clips.
Once free, lower the old opener gently, ensuring you don’t drop it on your foot (trust me, that’s not a fun way to end this project). With the old unit removed, take a moment to clean the area—it’ll help the new installation later.
Installing the New Garage Door Opener
Now that the old opener is out of the way, it’s time to install the new garage door opener. Begin by consulting the manufacturer’s instructions as they often provide specific guidance that’s tailored to the model. This is crucial for a successful installation.
Start by mounting the new motor unit to the ceiling where the old one sat. Use a stud finder to ensure you’re screwing into solid support beams, which will support the weight of the opener. Level it with a carpenter’s level so it’s straight and won’t cause issues later.
After securing the motor unit, it’s time to attach the rail that connects it to the door. Follow the included instructions closely—each model can have unique assembly steps. Once assembled, it’s time to connect the arm to the garage door itself.
Wiring and Connecting Power
With the opener physically in place, it’s time for the wiring. This can feel intimidating, but it’s just a matter of connecting wires according to the included diagram. Typically, you’ll have a power cord and a few smaller wires for the wall control and safety sensors.
When connecting the power, ensure the connections are secure. Here’s a pro tip: use wire nuts to cap the ends—you want to avoid any loose connections that could lead to malfunctioning later.
Next, connect the safety sensors on either side of the garage door. These sensors are crucial—they prevent the door from closing if something is in the way. Finally, plug the unit into a power outlet, and you’re almost ready to test it.
Pairing the Remote Control
Once you plug in the new garage door opener, you can move on to pairing the remote. Most modern openers, like those from Chamberlain or Genie, come with easy-to-follow pairing instructions.
Typically, you’ll start by pressing a button on the motor unit to put it in pairing mode. Once it’s activated, press the button on your remote that you want to use. You might see a flashing light indicating that the remote is connecting to the opener. Most systems only take a few seconds to sync.
If you’re using a universal remote, check its compatibility in the instruction manual. Sometimes, you’ll need to enter a code or set it to learn the specific frequency of your garage door opener.
Testing the New Opener
Before you declare victory on this DIY project, it’s time to test the new garage door opener. Start by using the remote. Does it respond correctly? Open and close the door a few times to ensure smooth operation.
Here’s the thing: while operating the door, closely watch for any unusual sounds or movements. If it seems clunky or doesn’t close all the way, you might need to adjust the travel limits. Consult the manual for specific instructions on how to do this, as each model may have different steps.
If everything is working correctly, celebrate! Your hard work is paying off. But before you finish up, make sure to test the safety sensors by obstructing the door—if it reverses, you’ve installed it correctly.
Cleaning Up and Final Thoughts
With the new garage door opener installed and running smoothly, it’s time to clean up your workspace. Removing all the tools and packaging makes the project feel complete. Plus, no one likes tripping over stray screws later!
As you admire your work, take a moment to reflect. Not only did you save some money by opting for a DIY garage door opener replacement, but you also learned a new skill. Whether it’s a simple fix or a complex installation, every project builds on your experience.
And that’s pretty amazing. So, whether you’re working in your garage or tackling another DIY task down the road, remember this experience. You’ve proven that you can tackle most home repairs—one weekend project at a time.