Picture this: you’re pulling up your driveway after a long day, ready to kick back at home. You hit the remote button, and instead of the reassuring sound of gears whirring, there’s eerie silence or worse, a *clunk*. Scary, right? To keep your opener functioning reliably, you’ll want to check its mounting hardware regularly. Let’s dive into how to do this effectively. Whether you’ve got a Chamberlain or a Genie opener, understanding your mounting system ensures you can handle any commotion—or lack thereof—when you’re heading into or out of the garage.
Why Stability Matters in Garage Door Openers
Stability in your garage door opener isn’t just about aesthetics; it’s about safety. If the opener is wobbling or not secured properly, it might cause the door to become misaligned. This misalignment can lead to unnecessary strain on the system, causing premature wear and tear. Ultimately, a stable mounting allows for smoother operation and reduces the risk of accidents.
Think about it: would you feel secure using a bridge that bounced with every step? Probably not. The same idea applies to your garage door opener. If that hardware isn’t tight, it could lead to malfunctioning or an unexpected door crash—definitely not a fun surprise. So, let’s explore what makes up this critical aspect of your garage door system.
Understanding the Components of Mounting Hardware
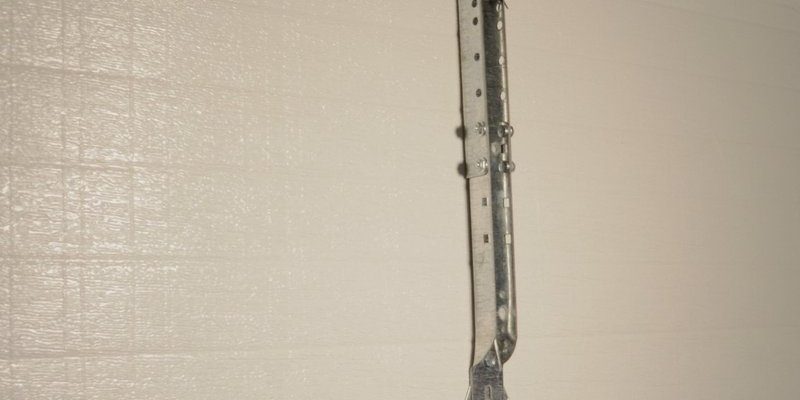
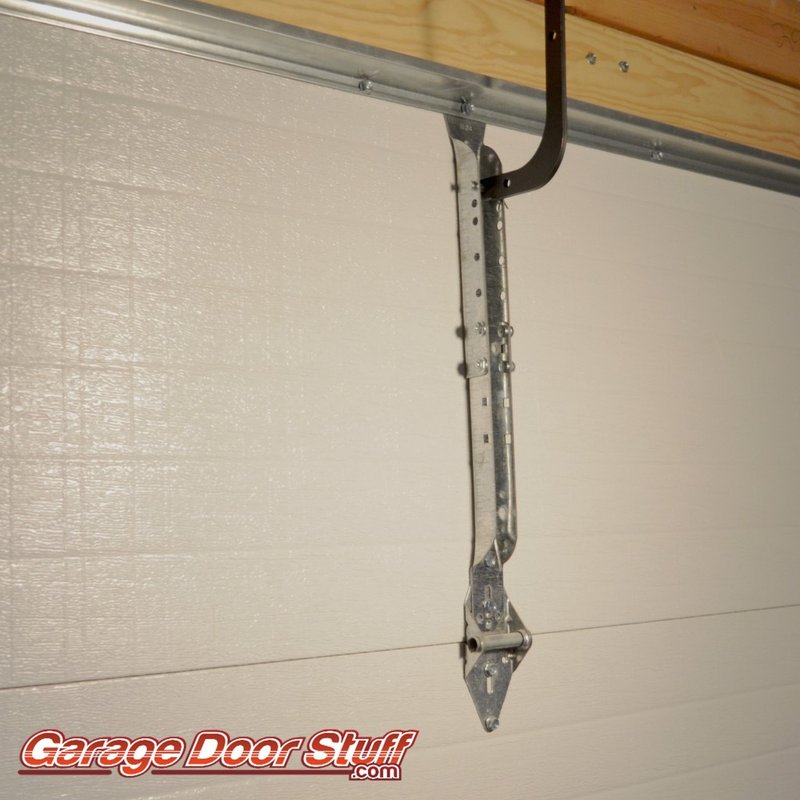
At a glance, the mounting hardware might not seem complex. Typically, it includes brackets, screws, and everything else that keeps your garage door opener in place. Here’s a breakdown of these components:
- Mounting Brackets: These hold your opener to the garage ceiling or wall.
- Screws and Anchors: These secure the brackets to the surface.
- Support Arms: These help prevent sagging, especially in chain-driven models.
- Hangers: Additional pieces that stabilize the system.
These parts work together to ensure that your garage door opener remains firmly in place. Checking each of these components for wear and stability is essential for ensuring the longevity of your opener. The more you know about these individual pieces, the better prepared you’ll be for any maintenance.
Gathering Your Tools for a Check-Up
Before diving into the inspection, it’s a good idea to gather a few essential tools. You don’t need anything fancy, but here’s what you might need:
- A screwdriver (preferably a multi-tool for versatility)
- A torque wrench for tighter checks on screws
- A level to ensure brackets are aligned properly
- Safety goggles to protect your eyes if dust or debris is flying
Having the right tools makes the whole process smoother. It’s like going grocery shopping with a list—you’re less likely to forget important items or make things chaotic. Plus, it helps you feel confident as you inspect and tighten up your garage door opener’s hardware.
Step-by-Step: Inspecting Your Mounting Hardware
Now that you’ve got your tools ready, let’s walk through a thorough inspection of your garage door opener’s mounting hardware:
1. Visual Inspection: Look for any visible signs of wear, rust, or damage. Check if any screws or anchors appear loose or disengaged.
2. Tightening Components: Using your screwdriver, gently tighten any loose screws or brackets. Be careful not to overtighten, as that can strip the screws or damage the hardware.
3. Using a Level: Position a level against the brackets. Ensure that everything is aligned properly. If something seems off, readjust the brackets as needed.
4. Check Support Arms and Hangers: Inspect these elements for any wobbling or loose connections. Tighten them if necessary to keep everything stabilized.
5. Finish with a Final Check: After checking and securing everything, step back and give it a quick overview. Everything should look aligned and secure before you call it a day.
Following these steps not only keeps your garage door opener functional but also helps extend its life.
Common Issues with Garage Door Opener Stability
After years of service, your opener might show some signs of struggle. Let’s go over some common problems that could impact stability:
- Loose Mounting Hardware: This is the most common issue, which can typically be resolved with a good tightening.
- Worn Out Brackets: Over time, brackets can become weak. If they’re significantly rusted or bent, you might need to replace them altogether.
- Improper Installation: If your opener was installed incorrectly, it resists stability. Always reference installation guides when needed.
- Environmental Factors: Water, snow, and extreme temperatures can degrade hardware. Regular checks after inclement weather are a good habit.
It’s crucial to catch these issues early. Ignoring them might lead to more significant problems down the road, and no one wants an unexpected visit from a repair technician!
When to Consider Replacing Your Mounting Hardware
Sometimes, despite your best efforts, existing mounting hardware may just not be up to the challenge anymore. Here are signs you may need replacements:
– Significant Rust or Corrosion: If any part of the hardware is heavily rusted, it might be safer to swap it out rather than risk it breaking.
– Cracks or Damage: If you spot any visible cracks, especially in brackets, it’s a clear sign for replacement.
– Door Misalignment: If your garage door frequently becomes misaligned, and tightening doesn’t help, consider replacing the mounting components along with a comprehensive inspection.
Replacement doesn’t have to be intimidating. Just remember to take it slow; check manufacturer guidelines, particularly if you’re dealing with brands like Craftsman or LiftMaster, as they may have specific recommendations.
Maintaining Your Garage Door Opener
Regular maintenance goes a long way. Here are some tips for ongoing care to ensure your garage door opener’s stability:
– Routine Checks: Make it a habit to check the mounting hardware every few months, particularly during seasonal changes.
– Cleaning: Dust and grime can accumulate; periodically wipe down hardware to keep everything clean.
– Lubrication: Occasionally, applying a light lubricant to moving parts can help keep the opener functioning smoothly.
Taking these small steps now can save you time and avoid potential breakdowns in the future.
Checking your garage door opener’s mounting hardware for stability isn’t just a mundane task—it’s a key component in ensuring your opener’s lifespan and safety. It’s like inspecting your car to prevent a late-night breakdown during a road trip. Regular checks, using the right tools, and knowing when to replace parts can make a huge difference. So, embrace the proactive approach to garage door maintenance; you’re not just opening and closing doors, you’re safeguarding your home.
With just a little effort and understanding, you can keep your garage door opener humming along smoothly. Remember: a stable opener means peace of mind, smoother operations, and less chance of an unexpected hassle. Now, go grab that toolbox and give your garage door a little love!