
These advanced settings can help you customize your garage door opener to your specific needs. Whether it’s adjusting the force it uses to open and close, the speed, or even programming the remote, understanding these features gives you more control and can improve your overall experience. Let’s explore the ins and outs of these advanced settings to make sure you’re getting the most out of your Linear garage door opener.
Understanding Your Linear Garage Door Opener
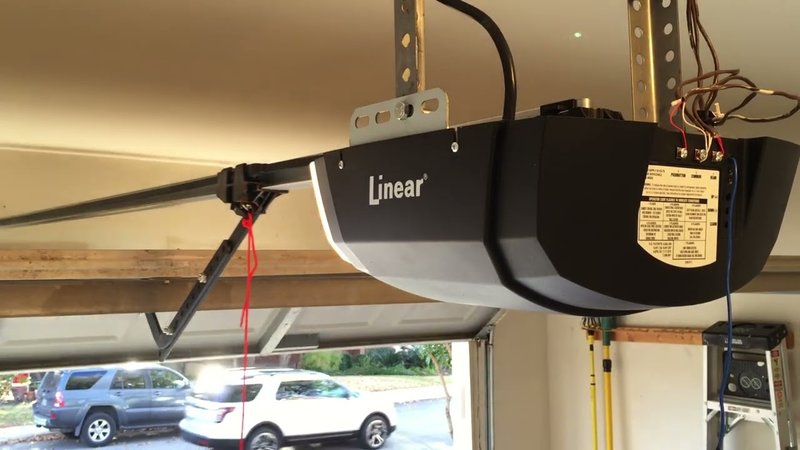
Before we jump into the advanced settings, it’s essential to understand the basics of your Linear garage door opener. Most models come with a remote control that uses a radio frequency to signal the opener. You might be wondering how that little device can make such a heavy door move. It’s all about creating the right connection between your remote and the opener itself.
Each Linear opener is designed with safety features to ensure smooth operation. For example, they usually include a built-in safety sensor to prevent the door from closing if something is in the way. Understanding the core functionality helps you appreciate the value of the advanced settings and how they enhance reliability and safety.
Adjusting Open and Close Force Settings
One of the essential advanced settings on your Linear opener is the ability to adjust the *open and close force*. This setting determines how much power the motor uses to lift the door. If you’ve ever felt like the door struggles or closes too quickly, adjusting these forces can help.
To adjust the open and close force, look for the adjustment screws on the motor unit. Typically, these are labeled “up force” and “down force.” Use a screwdriver to turn these screws clockwise to increase the force or counterclockwise to decrease it. Remember, a door that closes too forcefully can be a safety hazard. Always test the adjustment after each tweak to find the right balance.
Speed Adjustments for Your Opener
Next up, let’s talk about speed. The speed at which your garage door opens and closes can significantly affect convenience and security. A door that moves too slowly can be an inconvenience, especially on a rainy day. Conversely, a too-fast door might scare pets and kids.
To adjust the speed settings, find the speed adjustment screw, usually located near the force adjustments. Like before, turning the screw clockwise will generally increase speed, while counterclockwise slows it down. Be careful not to set the speed too high. You want your garage door speedy but not dangerous.
Programming the Remote Control
If you have multiple remotes or want to add a new one, programming is key. While each Linear model may vary slightly, the basic principles remain the same. Start by locating the program button on the motor unit. Here’s a simplified step-by-step to guide you:
- Press and hold the program button until the light indicator turns on.
- Within 30 seconds, press the button on the remote you want to program.
- Release the program button when you see the light blink and then turn off.
Now, your remote is synced, and you can enjoy hassle-free access to your garage. If it doesn’t work on the first attempt, give it another try. Sometimes, timing is everything!
Resetting Your Garage Door Opener
There can be times when your garage door opener simply isn’t behaving as it should. Maybe it’s not responding, or maybe the remote seems off. In these cases, resetting the opener can solve a lot of mysteries. Think of it as giving your opener a fresh start.
To reset it, look for the reset button on the power unit. Press and hold it until you see the lights flash. After resetting, you’ll have to reprogram the remotes again. It’s a small hassle for a smooth operation afterward, and sometimes it just works wonders.
Diagnostics and Troubleshooting
Understanding the diagnostic signals from your Linear garage door opener is crucial. Your opener may have an indicator light that provides information on its status. If the light is blinking in a specific pattern, it could signal issues, such as a misaligned sensor or battery concerns.
For instance, if you find that the light is blinking quickly, it often indicates a blockage in the safety sensors. Clear any obstructions and see if that resolves the issue. Keeping an eye on these indicators helps you troubleshoot before calling for professional help.
Battery Maintenance for Remotes
Finally, let’s not forget about remote control batteries. It always seems to happen at the worst time, right? The battery in your remote might die unexpectedly, leaving you stranded. Checking battery life isn’t just a good idea; it’s essential for smooth operation.
To change the battery, simply open the remote and swap the old one with a new one of the correct type—usually a CR2032 or similar model. Make it a habit to check your remote battery every few months. It’s a small maintenance step that can save you from frustrating surprises down the line.
Mastering the advanced settings on your Linear garage door opener can profoundly enhance its efficiency and your overall experience. From adjusting force and speed to programming remotes and resetting the unit, each setting plays a critical role. These small tweaks can lead to smoother operation and added convenience in everyday life.
Here’s the thing: investing a little time in understanding your garage door opener pays off. You’ll not only feel empowered in troubleshooting issues but also customize the opener to serve you better. So grab your manual, make those adjustments, and enjoy a beautifully functioning garage door!