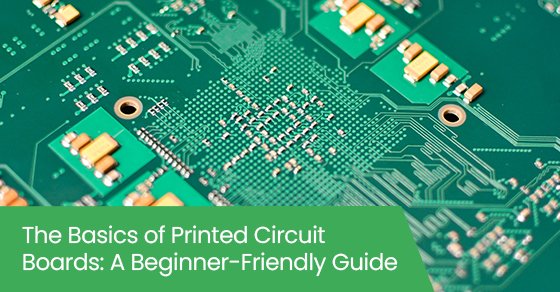
If you’ve got a Chamberlain or LiftMaster garage door opener, you’ve likely encountered the belt drive system, which offers a quieter operation compared to chain drive systems. Understanding the circuit board in this context will empower you to troubleshoot issues, optimize performance, or even tackle replacements. So grab your favorite beverage, and let’s explore this vital component together!
What is a Belt Drive Circuit Board?
A belt drive circuit board is essentially a control panel for your garage door opener. This board is responsible for interpreting signals from your remote control and sending commands to the motor that drives the belt. Think of it as the conductor of an orchestra, directing various instruments to create a harmonious performance.
The circuit board connects to several other components, like sensors and motors, ensuring that the door opens and closes safely and smoothly. If you’ve ever puzzled over why your garage door didn’t respond when you pressed the button, chances are the circuit board played a role in the miscommunication. It’s like the traffic director, ensuring that signals flow smoothly to keep everything in sync.
Common Components of a Belt Drive Circuit Board
Understanding the components of a circuit board can feel a bit like deciphering a secret code, but it’s not as complicated as it sounds. Here are a few key parts:
- Microcontroller: This is the main processing unit that runs the entire circuit board. It decides how to respond to signals from the remote.
- Relay: This component switches the garage door motor on or off when you press your remote.
- Power Supply: It converts your home’s AC power to DC power before distributing it to other components.
- Sensor Inputs: These receive information from safety sensors, ensuring the door doesn’t close on anything in its path.
These parts are all intricately connected, and each performs its own critical duty. If one aspect fails, the entire system can go haywire, making it essential to know what’s going on under the hood.
How Does a Belt Drive Circuit Board Work?
To simplify how a belt drive circuit board works, let’s break it down into a few simple steps—like following a recipe.
*First,* when you press the button on your remote, a signal is sent to the circuit board.
*Next,* the microcontroller on the circuit board processes this signal. It checks whether the door should open, close, or stop depending on the state of the sensors.
*Finally,* the relay activates the motor, which either pulls or releases the belt attached to your garage door. The entire process takes just a few seconds, but it relies on seamless communication between all components.
If things start to malfunction—like the door starts reversing unexpectedly or won’t open at all—it often points back to an issue with the circuit board or connections.
Common Issues and Troubleshooting Tips
Belt drive circuit boards can sometimes be the source of frustrating problems. Here are a few common issues and some simple troubleshooting tips:
1. Remote Not Working: If your remote control suddenly stops working, it may be due to a dead battery, or the remote might need to be synced again with the circuit board. Check the battery first. If that’s not the issue, look up instructions specific to your model on how to reset and sync.
2. Door Not Responding: If your garage door doesn’t respond at all, ensure that the circuit board is getting power. Check to see if there’s a blown fuse or tripped circuit breaker. Sometimes, it’s just a loose wire that needs re-attaching.
3. Intermittent Functionality: If your door works sometimes but not others, check the connections on the circuit board. A cold solder connection might be to blame. If you’re handy, you can try resoldering, or you can call a professional for help.
These issues are frustrating, but many are common and can be fixed without needing a complete circuit board replacement.
Replacing a Belt Drive Circuit Board
When it comes to replacing a belt drive circuit board, it can feel daunting, but it’s quite manageable with patience and care. Here’s a step-by-step guide:
1. Disconnect Power: Safety first! Unplug your garage door opener from the power source.
2. Remove the Cover: Use a screwdriver to take off the cover of the garage door opener, exposing the circuit board.
3. Disconnect Wires: Carefully take note of where each wire connects to the circuit board, and then disconnect them. It may help to take pictures for reference.
4. Remove the Old Board: Unscrew the circuit board from its position and take it out.
5. Install the New Board: Place the new board in the same position and secure it with screws.
6. Reconnect Wires: Attach the wires back in the same order you noted earlier.
7. Test It Out: Plug in the opener and test to see if the circuit board functions correctly. If all goes well, you can put the cover back on.
Remember, the manual for your specific model will be your best friend during this process.
Understanding your belt drive circuit board can dramatically transform your experience as a homeowner. You’re now equipped to troubleshoot common issues and make informed decisions, whether that means fixing or replacing components. Remember, it’s all about clear communication within the system.
As you gain confidence in handling your garage door apparatus, you’ll not only save yourself time and money but also gain some peace of mind knowing you’ve mastered an important part of home maintenance. Embrace your newfound knowledge, and don’t hesitate to dive deeper into the world of garage door technology. Whether it’s just curiosity or necessity, you’re now on the right track!