Think of the advanced settings as customizing your friend’s advice to match your needs. These options can help with everything from improving security to fine-tuning the door’s performance. Whether you’re impatiently dealing with a slow response time or want a more streamlined way to access your garage, digging into these features can be a game-changer.
Let’s dive into everything you need to know about the advanced settings for LiftMaster wall buttons. This guide will break down each feature so you can feel confident and in control of your garage door setup.
The Importance of Advanced Settings
The advanced settings for your LiftMaster wall button aren’t just some fancy extras; they’re crucial for enhancing your garage door’s efficiency and security. Imagine being able to control how your garage door behaves—like choosing the right settings on your smartphone. This customization can make your life a lot easier and safer.
For example, tuning the sensitivity of the door’s safety features ensures that it won’t close on an object or even a pet. This helps prevent accidents that can not only damage the door but also hurt someone. By taking a little time to customize these settings, you gain peace of mind every time you use your garage door.
Another compelling reason to explore these advanced features is to improve the responsiveness of your garage door. If you’ve ever found yourself waiting an eternity for the door to open, you know what I mean. With a few tweaks to the settings, you can enhance the speed and efficiency at which your garage door operates.
How to Access Advanced Settings
Accessing advanced settings on your LiftMaster wall button isn’t as complicated as it may sound. It’s a straightforward process that unlocks a world of customization. Here’s a simple step-by-step guide to get started:
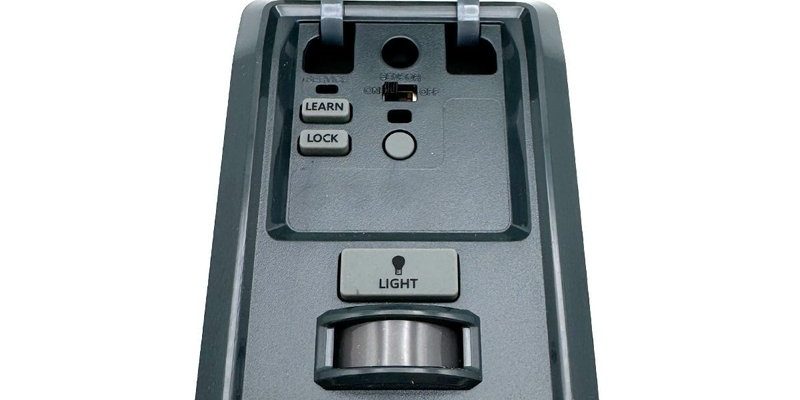
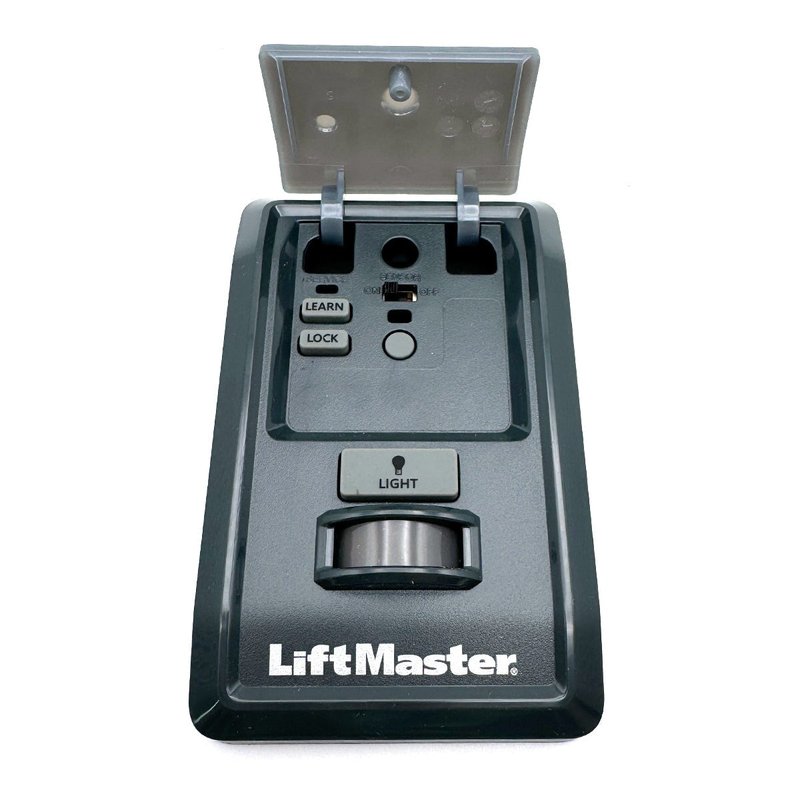
1. Locate the “Learn” Button: First, you’ll need to find the “Learn” button on your garage door opener. It’s typically a brightly colored button on the front panel—easy to spot.
2. Press and Hold: Once you’ve located it, press and hold the button. This puts the device in programming mode and prepares it to accept new settings.
3. Adjust Settings: After entering the programming mode, follow the specific instructions for adjusting each setting. This could involve cycling through options using the wall button or other inputs like your remote.
4. Save Changes: Don’t forget to confirm and save any changes you make. This final step ensures your new settings are applied.
Remember, it’s essential to consult your LiftMaster user manual for specific guidance tailored to your model. Even though the basics remain the same, some details can vary from one type to another.
Common Configuration Options
Once you have access to these advanced settings, you’ll typically find a few common configuration options. Here’s a rundown of some of the most useful settings you can tweak:
- Auto-Close Settings: You might want your garage door to close automatically after a certain period. Adjusting this setting can enhance security and make sure the garage isn’t left open.
- Safety Sensor Adjustments: Fine-tuning the safety sensors ensures that the garage door reverses when it detects an obstacle. You can tweak the sensitivity settings to prevent the door from closing on pets or other objects.
- Infrared Sensor Activation: If your LiftMaster system supports it, enable or disable the infrared sensor which helps detect movement. This can add a layer of safety when the door is closing.
Each of these settings can play a crucial role in how your garage door functions. It’s worth taking the time to understand how these configurations can best serve you and your needs.
Pairing the Wall Button with Remotes
You might be wondering how to ensure that your wall button syncs perfectly with your remote controls. Having a cohesive system is key for smooth operation. The good news? Pairing your LiftMaster wall button with your remotes is usually a painless process.
Start by pressing the “Learn” button on the garage door opener as mentioned earlier, then move to your remote. Press the designated button on your remote, and watch for a change in the LED light on the door opener. This indicates that your programming was successful. Here’s a breakdown of the pairing process:
1. Initiate Learning Mode: Press and hold the “Learn” button until the LED light turns on.
2. Press the Remote Button: Once it’s in learning mode, press the button on your remote that you wish to use.
3. Check for Confirmation: Look for the LED light to blink or turn off as confirmation—it should signify that the remote is successfully paired.
Remember, this process needs to be repeated for each remote you’d like to sync with your wall button.
Resetting Your LiftMaster Wall Button
If things aren’t going quite right with your LiftMaster wall button—maybe it’s unresponsive or acting strangely—resetting it can often solve the problem. Think of it like rebooting your computer; sometimes a fresh start is all you need. Here’s how to reset your LiftMaster wall button:
1. Disconnect Power: Begin by unplugging your garage door opener from the power source. If it’s hardwired, you may need to switch off the circuit breaker.
2. Wait a Moment: Give it about 30 seconds before reconnecting power. This allows any residual energy to dissipate.
3. Repower the Device: Plug it back in or flip the circuit breaker back to the “on” position.
4. Reprogram Settings: After resetting the device, you’ll likely need to reprogram your wall settings and any remotes you’ve been using.
Resetting your system can resolve many issues related to connectivity or settings that just aren’t working right.
Troubleshooting Common Issues
Even with advanced settings, sometimes things can go awry. Here are some common issues and how to troubleshoot them:
- Wall Button Not Responding: If your wall button is unresponsive, start with the basics. Check for loose connections or dead batteries if it has any electronic components. A reset might also help.
- Garage Door Reverse Problems: If the door closes but then immediately opens, adjust the safety sensor settings. Sometimes they can misfire, causing the door to reverse unexpectedly.
- Slow Operation: If your garage door is sluggish to respond, ensure that the advanced settings for speed are adjusted properly. If everything seems okay, it may be worth checking for mechanical issues with the door itself.
Solving these common problems can save you a lot of headaches and keep everything working seamlessly.
Exploring the advanced settings for LiftMaster wall buttons truly opens up a world of options for customization and control. Understanding how to adjust these settings not only makes using your garage door more convenient but also adds layers of safety and efficiency. As you’ve learned, whether it’s pairing remotes, resetting the device, or tweaking sensitivity options, you have the tools to optimize your experience.
Next time you pull into your driveway or press that button, you’ll enjoy knowing that your garage door is set up just the way you like it. Taking the time to learn these advanced features will make you not only a user but a savvy technician of your garage door system. So, dive in, play with those settings, and make your LiftMaster wall button work harder for you!