Understanding how to troubleshoot common LiftMaster circuit board issues is key to keeping your garage door in top shape. Maybe you’ve got a remote that won’t sync or a keypad that’s playing games with you. No worries! In this guide, we’ll go through some common problems and their solutions, using clear examples and actionable steps. By the time we’re done, you’ll feel a lot more equipped to handle these pesky problems.
What Is a Circuit Board in Your Garage Door Opener?
A circuit board is like the brain of your garage door opener. It processes the signals from your remotes and keypads, sending instructions to the motor that opens and closes the door. When everything’s working well, you hardly think about it. But when things go awry, it’s crucial to know what to look for.
There are several components on the circuit board that may fail, affecting your opener’s performance. This includes connectors, relays, capacitors, and the microcontroller itself. If one part of the brain is misfiring, the entire operation can go haywire. It’s like trying to complete a puzzle with a piece missing; without the right connections, it won’t work.
When tinkering with your LiftMaster, unplug the unit first. Safety is critical anytime you’re working on electrical components. After that, you can carefully examine the circuit board for visible signs of damage like burnt spots or severed wires. If everything looks good, you might just need to reset or reprogram your remote.
Common Symptoms of Circuit Board Issues
When things go wrong with your LiftMaster’s circuit board, you might notice specific symptoms. Identifying these early on can save you a lot of headaches down the road.
- Unresponsive Remote: If your remote doesn’t work, it might seem like a dead battery, but it can also indicate a circuit board issue.
- Door Won’t Open or Close: This one’s a classic sign of a malfunctioning circuit board. It means the opener isn’t receiving the right signals.
- Intermittent Functionality: If your opener works sometimes but not always, the circuit board could have a loose connection or be overheating.
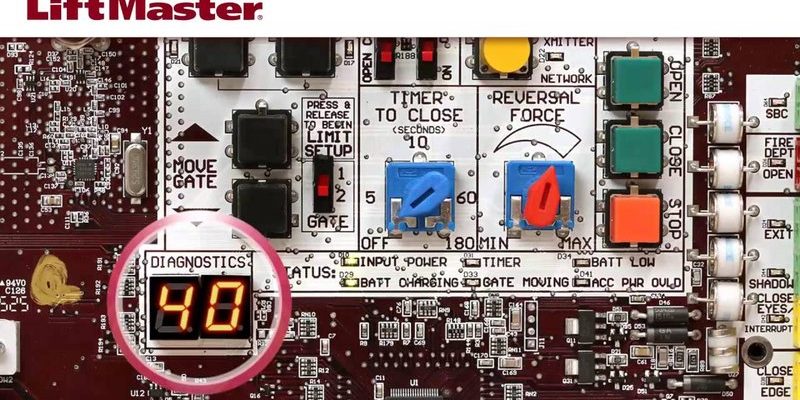
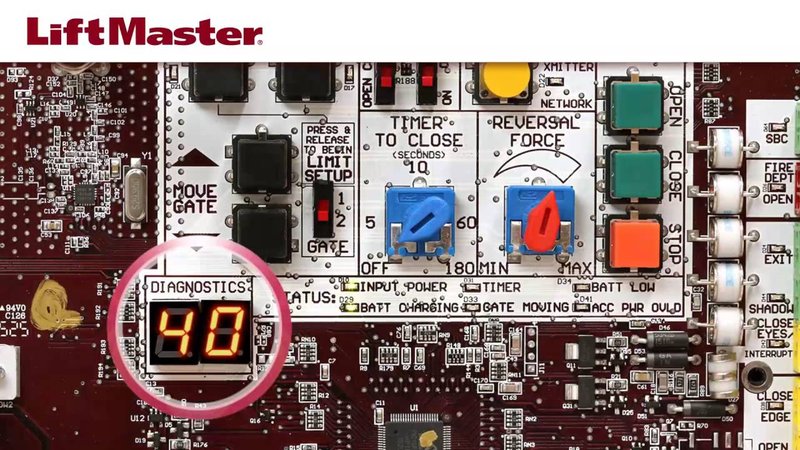
- Flashing LED Lights: Many LiftMaster models have LED lights that indicate specific issues. Flashing lights could signal a problem with the circuit board.
Spotting these symptoms early can help you diagnose the problem. For instance, if your remote becomes unresponsive suddenly, you might want to check the battery first. But if a fresh battery doesn’t help, it’s time to dig deeper into potential circuit board issues.
How to Troubleshoot an Unresponsive Remote
An unresponsive remote can be one of the most frustrating problems. Let’s walk through some steps to get it back in action.
First, start with a simple solution: check the battery. It’s quick, easy, and often the issue. If the battery is fresh and your remote is still acting up, next, check the connection between the remote and the circuit board. Unplug the unit, remove the cover, and ensure all the connections are secure.
If the connections look good, you may need to reprogram the remote. Different LiftMaster models have different programming steps, but generally, it involves pressing the ‘learn’ button on the opener, then pushing the remote’s button. Once it’s paired correctly, you should be back to working order.
If reprogramming doesn’t work, it might be time to consider replacing the remote or seeking professional repair options.
Fixing a Keypad That Won’t Work
A malfunctioning keypad can be especially bothersome, especially when your hands are full. Here’s how you can troubleshoot it effectively.
Start by checking the battery. Just like with the remote, a dead or dying battery can prevent the keypad from sending signals to the circuit board. If the battery is good, the next step is to reset the keypad. This usually involves pressing the “program” button and entering your PIN.
Another common issue could be signal interference. If your keypad is far from the opener or if there are obstructions (like walls or large metal objects), the signal may not reach the circuit board. Ensure the keypad is within range and try again.
Finally, if nothing seems to work, consider checking the wiring between the keypad and the circuit board. Loose or damaged wires could be causing the issue, and securing or replacing them might do the trick.
Dealing with Flashing LED Lights
If you notice flashing LED lights on your LiftMaster opener, it’s a signal that something isn’t right. Different flash patterns indicate different issues, so let’s break those down.
First, consult your user manual. Each model will have specific meanings for the flashing lights. For instance, two flashes may indicate a safety sensor problem, while ten flashes could mean a circuit board issue. Once you’ve identified the pattern, follow the troubleshooting steps outlined in the manual.
Next, if you can confirm that the LED flashes correspond to a circuit board issue, try resetting the system. Unplug the opener for about a minute, then plug it back in. This can sometimes clear minor glitches out of the system.
If the lights keep flashing and you’ve already checked the connections, it might be worth calling a professional. Circuit boards can be intricate, and a technician will have the tools and expertise necessary to fix more complex issues.
When to Seek Professional Help
While there are many DIY troubleshooting steps you can take, there comes a time when you need to call in the pros. If you’ve gone through the basics and your LiftMaster still isn’t working, it might be a sign that the circuit board needs more attention than you can provide.
Professional technicians have specialized tools that allow them to diagnose problems accurately. They can check for issues that might not be visible, such as tiny shorts in the circuit or damaged components that need replacement.
Also, if your opener is an older model, spare parts for your circuit board might be hard to find. A technician will know whether it’s more cost-effective to repair or replace.
Preventing Future Circuit Board Issues
Now that we’ve covered troubleshooting, let’s talk about prevention. The best way to avoid circuit board problems in the future is to maintain your opener regularly.
First, keep your garage door opening mechanisms clean. Dirt and debris can interfere with the signals. Regularly check and clean sensors and connections. It’s also wise to check and replace batteries in remotes and keypads before they run out completely.
Conducting routine checks every few months can nip small issues in the bud. Just like you schedule oil changes for your car, think of this maintenance as keeping the entire system in top shape.
Additionally, if you live in an area with frequent power surges or fluctuations, consider investing in a surge protector. This can shield the circuit board from surge damage that could disrupt its functioning.
In conclusion, troubleshooting LiftMaster circuit board issues is not only manageable but also empowering. By understanding the symptoms, going through the steps, and knowing when to call for backup, you can keep your garage door running smoothly for years to come. Remember, even if you hit a snag, a little patience and some basic troubleshooting can lead you right back to convenience and ease. After all, a functional garage door eliminates the hassle, leaving you free to enjoy life without added stress.