Imagine your remote as a little messenger, sending signals to your garage door motor to open or close. But what happens when that connection goes stale? It’s like trying to yell at a friend across a bustling restaurant—your message just won’t get through. You might be using a popular brand like Chamberlain or LiftMaster, which have their own quirks and steps for reprogramming. Don’t worry! Once you get the hang of it, you’ll feel empowered to tackle this small but important task.
Understanding Your Garage Door System
Before diving into the reprogramming process, let’s understand the components involved. At the heart of your garage door system is the overhead door motor unit, which controls the opening and closing of the door. This unit communicates with a remote control that sends signals to it via radio frequencies.
There are typically two types of remotes: fixed-code and rolling-code. Fixed-code remotes use a single code for communication, while rolling-code remotes change their code each time they are used. If you’ve ever needed to replace batteries or if your remote gets lost or damaged, knowing your remote type helps streamline the reprogramming process.
Another key part of this is your motor unit’s learn button. This small button, often found on the back or side of the unit, is the brain of reprogramming. It allows the motor to “remember” new remote signals and establish a fresh connection.
Gathering Your Tools
Before you start reprogramming your overhead door motor unit, there’s no need for fancy tools—just a couple of simple items.
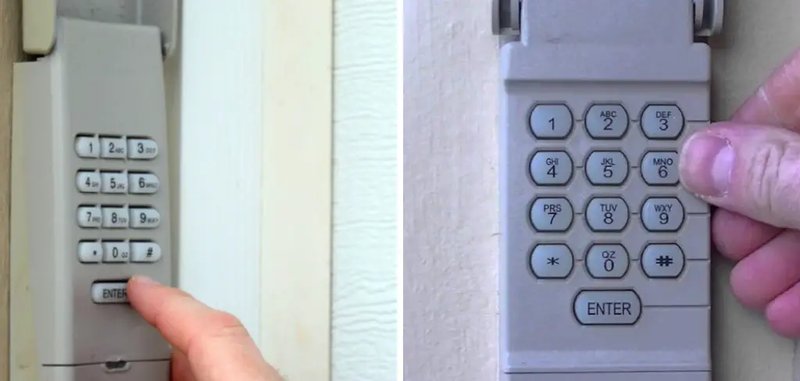
- Your remote control: Ensure it has fresh batteries.
- Your overhead door motor unit: Access is important, as you’ll be pressing buttons on it.
- A ladder: If your motor unit is mounted high, a step ladder can come in handy.
Having these on hand will make the process smoother and quicker. You might also want a pen and paper handy to jot down any codes or steps.
Resetting Your Overhead Door Motor Unit
If you’re having trouble synchronizing your remote, don’t panic! Sometimes, you’ll need to reset the overhead door motor unit before reprogramming. Here’s how to do it:
1. Find the learned button: Look for this button typically located on the back of the motor unit.
2. Press and hold: Use a pen or your finger to press and hold this button until you see the indicator light blink.
3. Release: Once it blinks, release the button and wait for about 10 seconds. The lights should go out, indicating the reset is complete.
Resetting is like refreshing your computer; it clears the slate and ensures everything runs smoothly.
Programming Your Remote Control
Now that you’ve reset your overhead door motor unit, it’s time to reprogram your remote. Here’s how:
1. Press the learn button: Go back to the learned button on your motor unit and press it once. The indicator light should turn on or blink.
2. Push the remote button: Within 30 seconds, press and hold the button on your remote that you want to program. This could be a single button or multiple buttons if your remote has them.
3. Watch the lights: The motor unit light will blink, and then either stay on or go off. If it stays on, hold the remote button for another second and release it.
Success! If the motor unit light goes out, that typically means you have successfully programmed the remote control. If not, don’t fret. Just try the steps again, ensuring you’re within the effective range.
Testing Your New Setup
After going through the reprogramming steps, it’s crucial to ensure everything is working properly. Here’s how to test it out:
– Step outside: Go to your garage door and stand a few feet away.
– Press the remote button: Try using the newly programmed button on your remote to open and close the garage door.
– Observe the response: If the door responds smoothly, you’re all set! If it doesn’t, you might want to go back and check that the learn button was pressed correctly.
Think of this stage as a celebratory dance! If everything is functioning, congratulations—you’ve mastered one of those practical home maintenance tasks.
Troubleshooting Common Issues
Even the best of us run into hiccups sometimes, so let’s address a few common issues you might face when reprogramming your overhead door motor unit:
– Remote won’t sync: Make sure you’re pressing the correct button on the remote and that the motor unit isn’t in a locked mode.
– Motor unit light doesn’t blink: Be sure you’re close enough to the motor when activating the remote. You might need to change the batteries in your remote.
– Door only opens halfway: This often indicates a misalignment or obstruction that needs checking. Ensure no objects are blocking the door’s path.
Remember, troubleshooting is just part of the process. With patience, you’ll find a solution before you know it!
Maintaining Your Garage Door Opener
Once you’ve successfully reprogrammed your overhead door motor unit, it’s wise to keep it maintained for longevity. Regular maintenance can save you from unexpected repairs later. You can do the following:
1. Inspect the batteries: Regularly check the remote’s batteries and change them as soon as they start to weaken.
2. Clean the sensors: Keep the photo-eye sensors clear of dust and debris. This ensures proper signal flow.
3. Lubricate moving parts: Occasionally lubricate the door’s hinges and rollers to keep it running smoothly.
Taking these small steps will keep your garage door functioning beautifully and prolong the life of your system.
Hopefully, this guide has demystified the process of how to reprogram your overhead door motor unit. You’ve learned about the setup, reprogramming steps, common issues, and ongoing maintenance—all to help you become more self-sufficient with your garage door. Embrace this new skill. You never know when it might save you time and a little stress!