In this guide, we’ll explore the ins and outs of this process, particularly for Overhead Door products. These systems can be a bit tricky, but breaking it down step-by-step can make it feel manageable. Think of it like solving a puzzle; once you have the right pieces in place, everything will work smoothly again.
Now, before we dive in, it’s worth noting that each model might have its quirks. Knowing which specific remote or wall button you have will help. Most commonly, you’ll find Overhead Door models with different features, but the core idea of reprogramming remains consistent.
Understanding Your Overhead Door System
Before reprogramming, it’s helpful to be familiar with your Overhead Door system. This system typically consists of three main parts: the wall button, the garage door opener, and the remote control. Each plays a role in how smoothly your garage door operates.
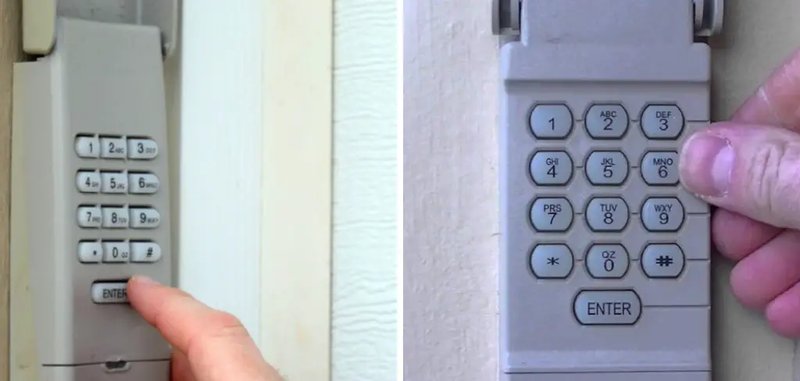
The wall button is often the just-press-and-go solution. You hit it, and *voilà*, the door opens. But what happens when it fails? It can feel like the button has taken a vacation, and that’s usually when you need to step in to reprogram it. Resetting the wall button can address issues ranging from a faulty connection to syncing problems.
The reprogramming process is usually simple, but you’ve got to be patient and methodical. Think of it like learning to bake. If you miss a step, you might end up with a flat cake, or in this case, a garage door that doesn’t open.
Gathering Your Tools
Reprogramming your overhead door wall button doesn’t require a toolbox full of gadgets, but you might want a few basic items on hand. Here’s what to gather:
- Screwdriver: You might need this to access the back panel of the wall button or opener.
- Owner’s Manual: If you’ve got it, keep this nearby. It has specific instructions for your model.
- Fresh Batteries: Always a good idea to have new batteries for remotes or wall units that don’t seem to work.
- Clear Workspace: Make sure you have a clutter-free area to work in, just like when you prepare for a big cooking session.
Having these items ready will save you time running back and forth, making the process smoother.
Locating the Learn Button
Next, you need to find the *learn button* on your garage door opener. This button is an integral part of the reprogramming process. It’s usually located on the back or side of the motor unit—like a secret doorway!
*Here’s the thing:* The learn button is often color-coded. It could be yellow, red, or green, depending on your model. Press this button once, and you’ll see an indicator light turn on. That’s your cue that the opener is ready to accept new commands.
You might be wondering how this piece fits into the whole puzzle of reprogramming. Simply put, the learn button helps your wall button recognize the opener again. Think of it as giving your wall button the new address of the garage door so it knows where to send the open command.
Reprogramming the Wall Button
Now comes the fun part! Here’s how to reprogram your overhead door wall button step by step.
1. Press the Learn Button: Tap it and hold until the light turns on. This tells the system you’re ready to pair.
2. Get Your Wall Button Ready: Go to your wall button. You’ll typically press and hold the button while standing near the garage door opener.
3. Release When Indicated: Once you release the button, the opener’s light should blink. This means it has received the signal from the wall button.
You might feel a sense of accomplishment at this moment. And why not? You’re one step closer to that satisfying *whoosh* of a working garage door.
Sometimes, troubleshooting might be necessary if the light doesn’t blink. Double-check that the batteries in the wall button are good and that you’re close enough to the garage door opener during the sync process. Just like when you’re trying to grab someone’s attention in a crowded room, the closer you are, the better!
Checking the Connection
After reprogramming, it’s essential to ensure everything connects smoothly. Testing the connection is like taking a new car for a spin after buying it; you want to ensure everything runs well.
To check the connection:
– Press the Button: Stand in front of the wall button and press it. If the door opens or closes, you’re in good shape!
– Observe the Light: If the light on the garage door opener blinks, it confirms a successful sync.
If the door doesn’t respond, don’t despair. Check your wall button; it could need a quick battery change or a more thorough reset. Sometimes the simplest solutions make the biggest difference.
Common Issues and Solutions
Sometimes, things don’t go as planned, and that’s okay! Here are some common issues you might encounter when reprogramming your overhead door wall button, along with solutions:
– Wall Button Lights Up But Door Doesn’t Move: This could be due to a connection issue. Try reprogramming it again to see if the sync is successful. Ensure you’re close to the opener when doing this.
– Door Moves Inconsistently or Hesitates: This can occur if there’s interference from other devices nearby. Think of it like a crowded café where you can’t quite hear your friend. Check for any devices transmitting signals that could disrupt your opener.
– Wall Button Still Isn’t Working: If you’ve reprogrammed and nothing seems to change, consider a faulty wall button. Testing it with another opener or swapping batteries may reveal the issue.
Troubleshooting can be a little detective work. Keep experimenting and stay patient. You’ll likely figure it out in no time!
Alternative Options: Universal Remotes
If you’ve tried troubleshooting and still find yourself frustrated, it might be worth considering a universal remote. These devices work with various brands and models, giving you more flexibility. They can often be programmed to work with multiple garage door openers, making them a fantastic backup option.
The process for syncing a universal remote is also fairly straightforward, but be sure to check the instructions specific to your model. It may involve similar steps to what we covered, but the extra feature of compatibility makes it a security blanket option.
Think of universal remotes as a backup plan in life—sometimes it’s good to have an alternative in your back pocket when things get a bit sticky.
Reprogramming your overhead door wall button may initially seem daunting, but with a few simple steps, it can become a quick task instead of a frustrating ordeal. By following the straightforward instructions above and knowing what tools to prepare, you can reclaim control of your garage door with confidence.
Remember, every hiccup along the way is just part of the learning curve. With patience, you’ll have your overhead door wall button reprogrammed and ready to roll again. So the next time you’re balancing groceries and car keys, a simple press of the button will have you soaring into your garage without a hitch. Happy reprogramming!