So, why might you need to reprogram your Chamberlain wall button? There are a couple of common reasons: perhaps you just installed a new garage door opener or the previous code has been lost. Whatever the case is, this process is essential to ensure your garage door works seamlessly. You might find yourself a little apprehensive, but trust me, it’s easier than it sounds!
Understanding Your Chamberlain Wall Button
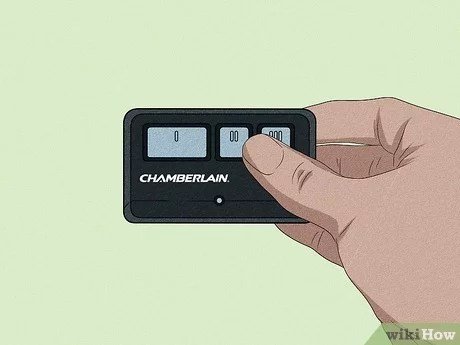
Before we dive in, let’s take a moment to understand what a Chamberlain wall button is and what it does. It’s a small device, often mounted on the garage wall inside, that allows you to open and close your garage door without needing a remote control. Some people find it easier to use, especially when they are inside the vehicle already.
Just so you know, your wall button communicates with the garage door opener through a coded signal. When you press the button, it sends a signal that tells the door to either open or close. If that signal is interrupted or changed (for instance, if you change the opener), you may need to reprogram the wall button so that it knows how to communicate effectively with the opener again.
Gathering Your Tools
You might be wondering what you’ll need to tackle this task. Thankfully, reprogramming your Chamberlain wall button doesn’t require a toolkit filled with gadgets. In fact, all you really need is *your wall button* and the *garage door opener*. Sometimes, you might want a ladder if your button is installed high up.
1. Wall Button: This is your main device that you’ll be reprogramming.
2. Garage Door Opener: The opener is what you’ll sync the button with.
3. A Ladder: Only if your button is out of reach.
4. A Helper (optional): If you’ve got someone around, they can help you press buttons at the right time!
With a clear workspace and your tools at hand, you’re already halfway there.
Resetting Your Chamberlain Garage Door Opener
To reprogram the wall button, it’s best to start with a clean slate. This involves resetting your Chamberlain garage door opener. It sounds more complicated than it is! Just like hitting “refresh” on your browser, this clears out any old codes.
Follow these steps to reset your opener:
1. Look for the “Learn” button on your garage door opener. It’s usually located on the back or side of the motor unit.
2. Press and hold this button until the indicator light turns off (approximately 6 seconds).
3. This effectively clears the memory of the opener and is essential for the next steps.
Congratulations, you’re ready to reprogram!
Programming Your Wall Button to the Opener
Now that you’ve reset the opener, let’s get the wall button talking to it again. This process brings everything back into sync.
– First, get to the wall button. Make sure it’s accessible and nearby.
– Then, head back to the garage door opener. Locate the “Learn” button again.
Here’s how to sync them:
1. Press the Learn Button again. The indicator light should blink.
2. Within 30 seconds, head to your wall button and press the button on it. You may hear a click or see the garage door move slightly, indicating it has been successfully paired.
3. Test it! Go back to the wall and give it another press. You should see the door responding.
Pretty nifty, right? If it works, then you’re all set! If not, don’t sweat it—we’ll troubleshoot in a bit.
Troubleshooting Common Issues
If you followed the steps and still find the wall button isn’t working, it’s time to troubleshoot. It can be frustrating, but hang in there. Here are a few common issues and fixes:
1. No Power to the Wall Button: Check if it lights up when pressed. If there’s no light, the button might not be getting power.
2. Wall Button Not Responding: Make sure you waited the right amount of time after pressing the “Learn” button before hitting your wall button.
3. Wall Button Placement: Sometimes, the placement of the wall button can affect performance. Make sure there are no obstructions or interference.
If you’re still having issues, take a look at the battery in your wall button. Sometimes a simple battery change can solve several problems!
Alternatives to Wall Button Reprogramming
You might be wondering if you really need the wall button for your setup. While they’re handy, there are alternatives available if you find them to be more hassle than they are worth.
– Remote Control: If you prefer using a remote from your car, that’s a great option. Many find it more convenient.
– Smartphone Apps: Some modern garage door openers allow you to control your door via smartphone apps. This tech-savvy option lets you open or close your garage on the go.
Regardless of the choice you make, remember that reprogramming the wall button doesn’t have to be the only solution if it doesn’t fit your lifestyle.
Maintaining Your Garage Door System
Once you’ve successfully reprogrammed your wall button, it’s a great idea to keep your system well-maintained. Regular checks will help ensure everything continues to work smoothly.
1. Inspect the Wall Button: Regularly check for any signs of wear or damage.
2. Adjust the Garage Door: Make sure it’s balanced and moving hydraulically without any obstructions.
3. Change Batteries: If you’re using a battery-operated wall button, change the batteries at least once a year.
A little preventive maintenance goes a long way, keeping your system efficient and reliable.
When to Call a Professional
Even with a step-by-step guide, there might be times when a bit of professional assistance is needed. If troubleshooting doesn’t yield results, or you notice odd noises from your opener, it’s probably a good idea to call in a technician.
Garage door systems can get complex, and sometimes a small issue can lead to safety hazards if not addressed. Trust your instincts—if something feels off, don’t hesitate to reach for help.
In conclusion, reprogramming your Chamberlain wall button doesn’t need to be stressful. Just follow the outlined steps and take your time. With a bit of patience and some simple troubleshooting, you’ll have your garage door back in action! Happy programming!