In this guide, we’ll walk through the steps to reprogram your Liftmaster circuit board and get you back on track. Whether you’re working with a wall-mounted unit or a remote control, understanding this process will save you time and maybe even help you impress your neighbors. Trust me, the feeling of satisfaction when that garage door finally clicks and opens is worth the effort!
Understanding Your Liftmaster Circuit Board
Before dive into the reprogramming process, it’s essential to grasp exactly what the Liftmaster circuit board does. Think of it as the brain behind your garage door opener. This small but powerful component controls everything from the remote signals to the door’s motor functions. When you press a button on your remote, the circuit board decodes the signal and tells the garage door to move.
Every option or function—like opening, closing, or stopping the door—rely on this tiny electronic genius. So, when it stops communicating with your remote, it creates a problem. Common reasons for a failure can include worn batteries in your remote, mere miscommunication between devices, or even changes in your home’s electrical environment.
If your garage door has recently stopped responding to your remote, don’t panic. Often, a simple reprogramming of the circuit board can resolve the issue quickly and efficiently.
Gathering The Necessary Tools
Before you dive into the reprogramming process, make sure you have everything you need at hand. This is similar to the way you wouldn’t bake a cake without having all the ingredients ready first.
Here’s a quick checklist:
- Screwdriver: A flathead or Phillips screwdriver (depending on your model) will help you access the circuit board.
- New Batteries: Fresh batteries for your remote will ensure that communication is at its best.
- Step Ladder: You may need to reach up high to access the opener unit.
- Instruction Manual: If you have it, your Liftmaster’s manual might have specific details and codes useful for your model.
Gathering these supplies will set you up for success, making the process smoother and less frustrating. As they say, preparation is key!
Disconnecting Power For Safety
Safety first! Just like how you wouldn’t dive into a pool without checking the water depth, it’s essential to disconnect power to your garage door opener to prevent any accidents while you’re working on it.
To do this, locate the power supply for your Liftmaster opener. It’s usually an electrical outlet nearby that powers the unit. Unplugging it is straightforward; however, if you have a hardwired opener, you may need to turn off the circuit breaker that powers it.
Once power is disconnected, wait about a minute before moving on. This brief pause allows the system to reset, which can be beneficial when reprogramming the circuit board. There’s no need to rush—taking your time ensures your safety and the successful reprogramming of your opener.
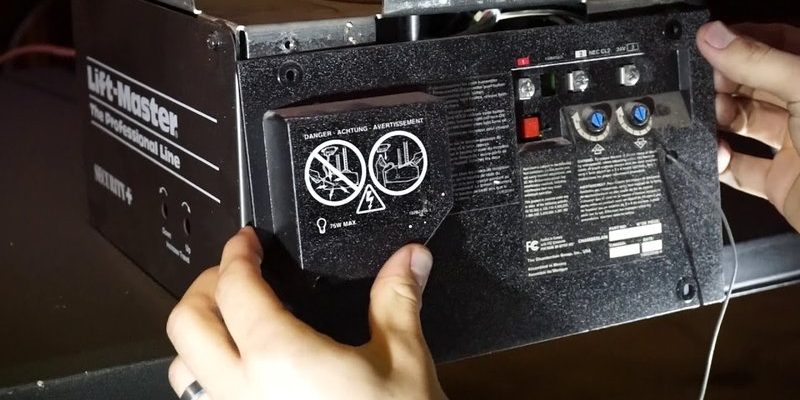
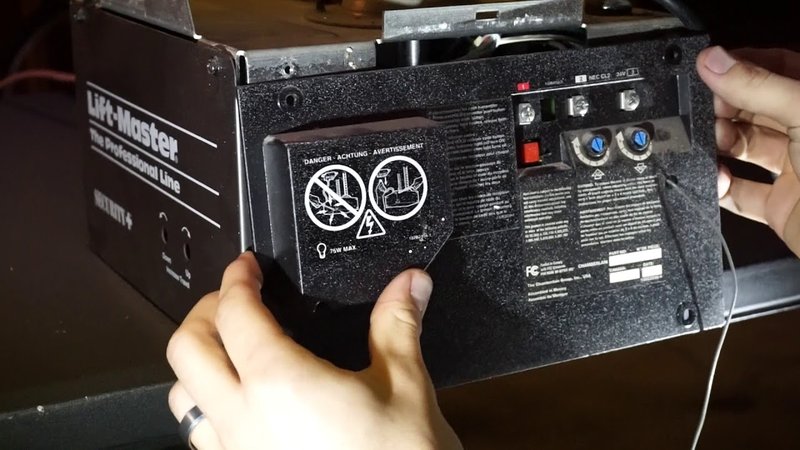
Accessing the Circuit Board
Now that you’re all set, it’s time to access the circuit board, which is usually located inside the motor unit of your Liftmaster opener. Grab your screwdriver, and let’s get to it!
Begin by finding the cover of the motor unit. You’ll likely see a couple of screws holding it in place—remove these using your screwdriver. Keep them in a safe spot; trust me, you don’t want to lose them halfway through!
Once the cover is off, you’ll see the circuit board. It might look like a small green panel filled with shiny components. If you’re seeing a lot of wires, don’t be intimidated. Just remember: you’re only here to work with the circuit board, not to rewire the whole opener.
Reprogramming The Circuit Board
Now comes the moment we’ve all been waiting for: reprogramming the circuit board! This process itself varies slightly depending on your Liftmaster model, but the general concept is quite similar across units.
Here’s a simple way to do it:
1. Locate the Learn Button: You’ll find this tiny button on the circuit board. It’s usually red, yellow, or orange, but check your manual if you’re unsure.
2. Press the Learn Button: Press and hold the learn button for about 5 seconds or until the LED light flashes. This action clears all existing remote signals.
3. Pairing Your Remote: Now, it’s time to sync your remote. To do this, press and hold the button on your remote that you want to use for the garage door. Watch for the LED light on the circuit board; it should flash, indicating that the remote is successfully paired.
Remember, you might need to repeat this step for each remote you want to use. After you finish, the circuit board should be ready to go, just like putting the last layer of icing on a cake!
Testing The System
After you’ve reprogrammed the circuit board, it’s time for the big moment—testing your labor of love!
Plug the opener back in or turn on the circuit breaker to restore power. Stand clear and hit the button on your remote. The door should respond immediately. If it opens smoothly, congratulations! You’re now a garage door opener pro. Just like that!
However, if the door doesn’t budge, don’t fret just yet. A few adjustments might be necessary. Ensure that the batteries in your remote are fresh and that you performed the steps without missing anything. Sometimes, a simple reset of the power supply can work wonders, too.
Common Troubleshooting Tips
Even the best plans sometimes go awry, right? If you’re struggling to get the system to work after reprogramming, here are a few troubleshooting tips to consider:
- Check Remote Batteries: Weak batteries can affect performance. It’s worth swapping them out, even if they don’t seem low.
- Inspect Connections: Look at all the wiring connected to your circuit board; make sure nothing’s loose or damaged.
- Ensure the Learn Button is Working: If the learn button on the circuit board doesn’t respond, your circuit board may have issues that need further investigation.
Most issues can be resolved with a little patience and persistence. If things still aren’t working after trying these tips, it might be a sign to consult a professional.
Why Reprogramming Matters
Reprogramming your Liftmaster circuit board isn’t just about convenience; it plays a vital role in ensuring home safety. When your remote isn’t communicating properly, you’re left vulnerable to potential intruders. By keeping your system updated and functioning smoothly, you protect your property and keep your family safe.
Plus, learning how to handle reprogramming gives you a sense of empowerment. You now have the skills to fix issues as they arise without always calling in a technician. It’s a great tool for any homeowner to have in their kit—like learning to change your car’s oil!
In conclusion, reprogramming the Liftmaster circuit board is a simple yet essential task that can save you time and money. With a little guidance and patience, you can master this skill and ensure that your garage door remains a handy asset rather than a frustrating barrier. So next time your remote doesn’t work, you’ll know exactly how to reprogram that circuit board with confidence!
Originally posted 2025-02-13 04:33:01.