Liftmaster’s wall buttons are popular for a reason—they’re user-friendly and effective. However, there are times when they may need reprogramming. You might have recently changed your garage door opener’s code for security reasons, or maybe the button just isn’t working like it used to. Whatever the case, don’t worry! I’ll walk you through the process step-by-step, making it super easy to understand.
Understanding Your Liftmaster Wall Button
Before we dive into reprogramming, it’s good to know what you’re working with. A Liftmaster wall button is usually attached inside your garage, allowing you to open or close the door with just a press. These buttons connect directly to your garage door opener, either wirelessly or through a wired format.
You might be wondering why your wall button needs reprogramming in the first place. Over time, batteries can die or connections can become loose. Also, if you’ve recently moved into a new house, it’s wise to reset the code to enhance security. Think of it as ensuring your home is safe from unwanted visitors—just like locking your doors.
Gathering What You Need
To get started, you’ll need a few things on hand:
- Liftmaster Wall Button: Make sure you have the appropriate model for your garage door opener.
- Access to Your Garage Door Opener: This is typically mounted on the ceiling of your garage.
- A Ladder: Depending on your setup, you might need a ladder to reach the opener.
- Tools: A screwdriver may help take off coverings if needed.
Having everything ready will make the process much smoother. Think of this like prepping for a recipe—you don’t want to start cooking without having all of your ingredients laid out!
How to Reset Your Liftmaster Wall Button
Resetting your Liftmaster wall button is a straightforward procedure. Here’s how to do it:
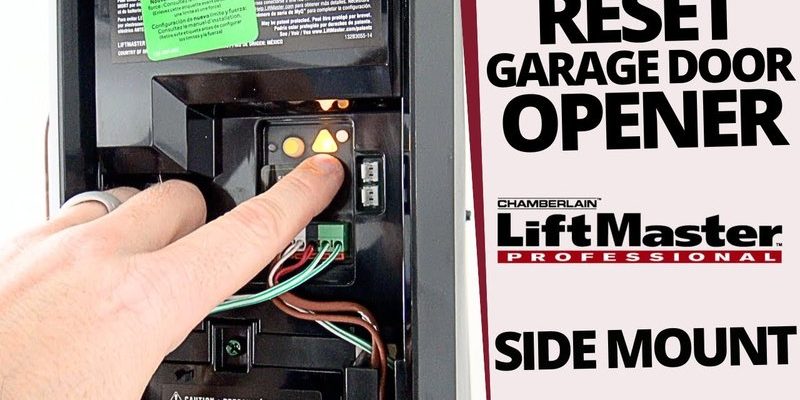
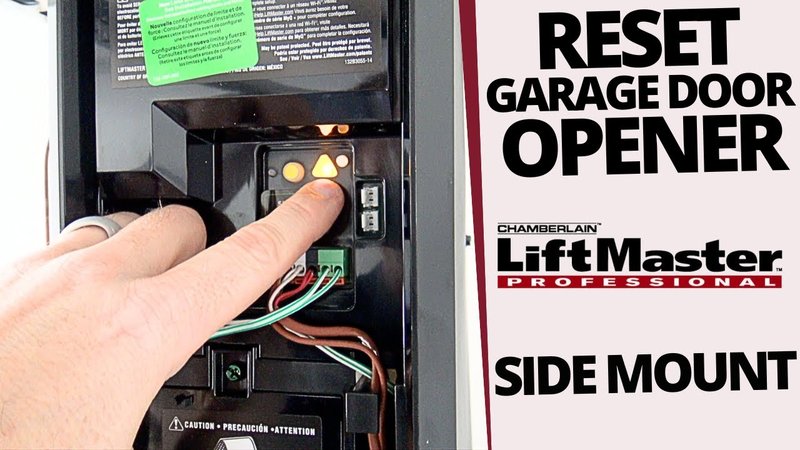
1. Locate the Opener’s Learn Button: This is usually on the back of the garage door opener. You might need to use that ladder if it’s out of reach.
2. Press the Learn Button: You’ll notice an LED light blinking. This indicates the opener is ready to receive new codes.
3. Push the Wall Button: Within 30 seconds, press your wall button once. If it’s successful, the light on the opener will turn off, indicating the code is stored.
You might be thinking, “What if it doesn’t work?” If the light keeps blinking or doesn’t respond, double-check your connections. Sometimes a loose wire is all it takes to cause a hiccup in the reprogramming process.
Testing the New Connection
After you’ve reprogrammed the wall button, your next step is to see if it works. This is a crucial part of the process, as it confirms whether everything’s aligned correctly.
1. Close the Garage Door: If it’s open, press the wall button and watch closely. The door should start moving down smoothly.
2. Open the Garage Door: Once it’s completely closed, press the button again. The door should react and rise without hesitation.
If the door doesn’t respond as expected, consider whether you might need to troubleshoot further. Sometimes, repeated attempts may help establish a stronger connection, much like tuning a guitar to get the right note.
Troubleshooting Common Issues
Even the best systems can have hiccups. If your wall button isn’t working after reprogramming, here are some things to check:
– Check the Battery: If your wall button has a battery, make sure it’s fresh. A weak battery is often the simplest solution.
– Inspect Wiring: If you use a wired wall button, make sure there are no loose connections.
– Interference: Sometimes, appliances like radios or microwaves can interfere with signals. Make sure there’s nothing blocking the communication.
If you’ve gone through these checks and still face roadblocks, remember you can always reach out to customer service for Liftmaster support. They often have additional tips tailored to your specific model.
When to Call for Professional Help
If you find that your reprogramming attempts continuously fail, it might be time to call in the professionals. There could be underlying issues that require more than a DIY approach. Here are a few signs it’s time to get expert help:
– The opener itself isn’t functioning—like a car that won’t start.
– You see sparks, hear strange noises, or notice any burning smell.
– Multiple attempts have led to no success in getting the wall button to work.
Trusting an expert isn’t a sign of failure—it’s being smart about your safety and home functionality!
In Summary: Keeping Your Garage Functional
Reprogramming your Liftmaster wall button is a handy skill that can save you time and hassle. By understanding your wall button, gathering your tools, and following the steps to reset and test, you can easily ensure your garage door functions smoothly. Always remember to troubleshoot and reach out for help when needed.
Taking these small steps keeps your home safe and your daily life running smoothly. You will feel empowered knowing you can manage simple tasks around your garage, like a mini home improvement project! So grab those tools and get started—you got this!