Sears garage door openers typically come equipped with safety features that keep your family safe, but sometimes, the sensors can misbehave. Think of them like overly cautious friends who fuss too much about every little detail. If your sensor is causing the door to malfunction or if you simply want to disable it for a bit, this guide will walk you through the steps clearly and carefully.
Understanding Safety Sensors
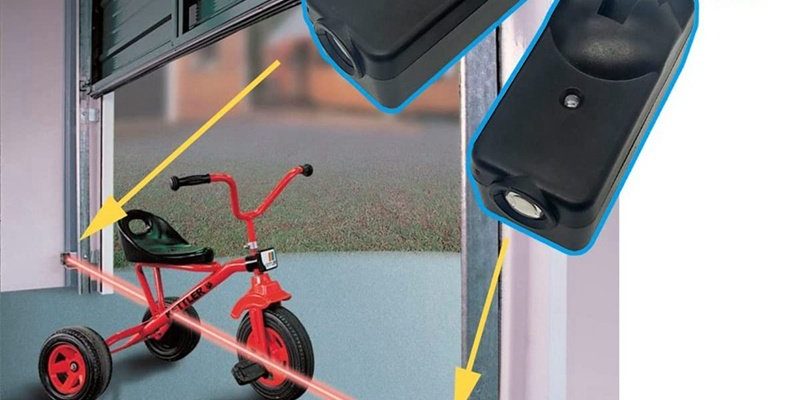
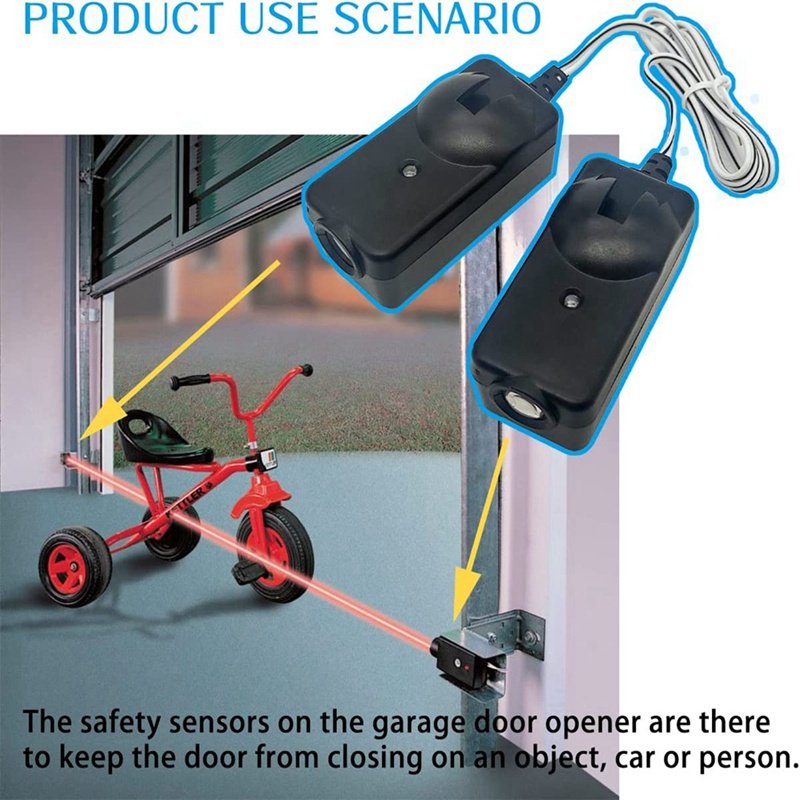
Before we jump into the process, it’s important to know how safety sensors work. Usually sitting at the bottom of the garage door tracks, these sensors emit beams of light. When something interrupts this beam—say, your cat nonchalantly strolling through your garage—the door will stop and reverse. It’s a useful feature designed to prevent accidents, but sometimes, they may need to take a break from duty.
When you disable the safety sensors, you’re essentially telling your garage door opener to ignore that pesky interruption. However, keep in mind that doing this can compromise safety, so it’s crucial to only disable the sensors temporarily and exercise caution. If you’re troubleshooting, it’s good to know what other options you have for resolving issues without compromising safety.
Reasons to Disable the Safety Sensor
There are various situations where disabling the safety sensor makes sense. Here’s a quick rundown:
- Troubleshooting Issues: If your garage door keeps reversing or won’t close, the sensors might be at fault.
- Temporary Adjustments: In some circumstances, like painting or heavy lifting, you may need the door to stay open without making adjustments.
- Testing Equipment: If you’re experimenting with garage door opener settings or trying to sync a new remote, temporarily disabling the sensor can help.
However, stopping the sensors permanently is not recommended unless you’re sure of the implications. It’s like choosing to take the safety gear off while doing a risky sport; you can do it, but make sure you really know what you’re getting yourself into.
How to Disable the Safety Sensor
Disabling the safety sensor on your Sears garage door opener requires a few careful steps. Let’s break it down simply:
1. Power Off the Opener: Before you start working, unplug the garage door opener from the electrical outlet. This keeps you safe from accidentally triggering the door while you’re working.
2. Locate the Safety Sensors: Look at the bottom of your garage door tracks. You’ll see two sensors facing each other—one on each side. They look like small eyes watching over the door.
3. Disconnect the Wires: Gently unplug the wires connected to the sensors. This will disable them completely.
4. Test the Door: After unplugging, plug the opener back in and test the door. It should now close without interruption from the sensors—but remember, it’s not safe to leave it like this for long!
It’s important every step is done carefully. It’s a little like when you’re baking—follow the recipe correctly, and you’ll avoid a sticky mess.
Testing with the Safety Sensor Disabled
Once you’ve disabled the safety sensor, you can check if there were any issues causing problems. Open and close the garage door a few times to see if it works correctly without the sensor input. Here are a few things to note:
– Observe the Door’s Movement: Make sure the door opens and closes smoothly without getting stuck.
– Listen for Odd Noises: Any strange sounds? They could be signs of underlying mechanical issues.
– Check for Blockages: Look around the door tracks and the area around it for anything that could be causing interference.
If everything seems normal, congratulations! You’ve successfully disabled the safety sensor. If there’s a problem, it might be time to consider troubleshooting further to find out what went wrong.
Re-enabling the Safety Sensor
After you’ve finished testing or troubleshooting, you should definitely re-enable the safety sensor. Leaving it disabled can be dangerous. Here’s how to do it:
1. Power Off Again: Unplug the garage door opener to ensure a safe reconnection.
2. Reconnect the Wires: Plug the sensor wires back into their original ports. They should fit snugly without pinching.
3. Plug in the Opener: Once everything is connected, plug the opener back into the outlet.
4. Test the Sensors: With the door closed, block the sensors with an object to see if the door stops. If it does, you’re all set!
Think of it as reversing a decision. You’ve put safety back in place, much like buckling your seatbelt before starting the car.
Common Troubleshooting Tips
If your safety sensors still act up even after reconnecting them, don’t panic—sometimes, it just takes a little troubleshooting. Here are some things you can check:
– Alignment: Make sure both sensors are properly aligned. If they’re slightly off, they might not communicate effectively.
– Clean the Lenses: Dust and dirt can block the sensor’s beam. A simple wipe with a soft cloth can do wonders.
– Check for Wiring Issues: If the wires seem frayed or loose, they might need replacing. This is especially true if you have pets or kids who play around the garage.
These steps are like giving your car a quick check-up before a long road trip. It can save you from bigger headaches down the line.
Disabling safety sensors on your Sears garage door opener can be straightforward if you take it step by step. Whether you’re troubleshooting problems, making temporary adjustments, or just curious about how your system works, understanding the process makes all the difference.
However, always remember the importance of keeping safety in mind. Once you’re done, re-enable those sensors and ensure your door operates safely. By doing so, you’re not just taking care of your garage door opener—you’re helping protect everything and everyone that passes under it. If you take a careful approach, you’ll keep your garage door working smoothly for years to come!