Whether you’re using a LiftMaster, Genie, or any other brand with a remote control, there are straightforward steps to take. The motor unit is the heart of your garage door system, controlling everything from the opening to the closing. Sometimes, you may want to disable it temporarily, either for maintenance or troubleshooting issues. Let’s break it down step by step.
Why You Might Want to Disable the Motor Unit
Before we dive into the how-tos, it’s important to understand why you’d want to disable your overhead door motor unit. Honestly, there are a few key reasons:
- Maintenance: Keeping everything in top shape requires occasional checks. Disabling the motor allows you to inspect the door tracks and springs without interference.
- Safety Concerns: If your door is behaving erratically—like opening or closing randomly—it’s best to disable the motor until you can troubleshoot or fix the issue.
- Emergency Situations: If you ever get locked out or need to manually access your garage, knowing how to disable the motor is invaluable.
Think of it like pausing your favorite show to fix the remote. It’s frustrating, but necessary to keep enjoying the viewing experience later!
Identifying Your Motor Unit and Remote Control
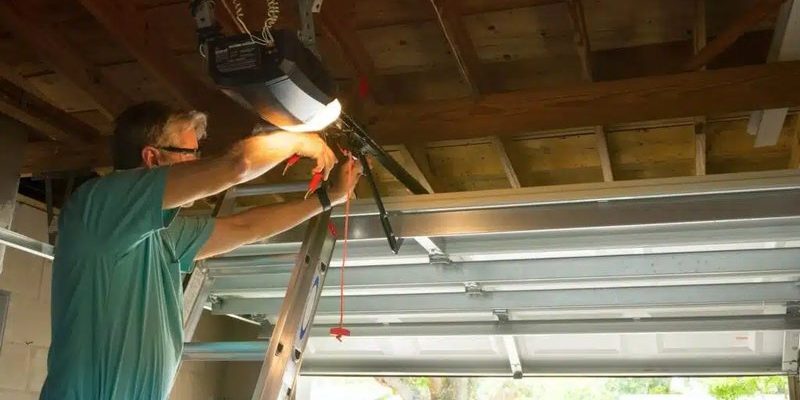
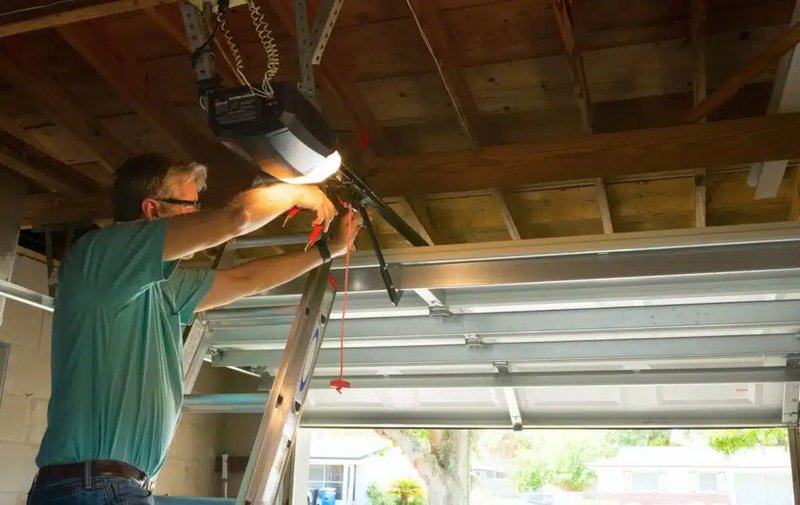
Next up, not all garage doors are created equal. Your overhead door motor unit is probably mounted on the ceiling of your garage, and it could be one of many popular brands. Familiarizing yourself with your specific model will make the process easier, so check the user manual if you have it.
Look for a label on the motor unit. Is it a LiftMaster or a Genie? Each brand has its way of operating, so knowing this helps immensely.
When it comes to your remote, is it a handheld device or a wall-mounted panel? Most remotes have a code or button combination to disable the motor. Knowing your specific type can save you time and frustration.
Basic Steps to Disable Your Overhead Door Motor Unit
Now that you’re aware of why and what you’re working with, let’s get into the actual process. Disabling your overhead door motor unit can be done in just a few straightforward steps. Here’s how:
1. Locate the Power Source: Check where your motor classically plugs in or connects to a power source. This might involve pulling a cord or turning off a breaker switch.
2. Use the Disconnect Switch: Most motor units have a disconnect switch that you can pull or flip. This option is usually found on the unit itself. When activated, this switch stops the electrical flow to the motor, effectively disabling it.
3. Check Your Remote Control Settings: For brands like Genie or LiftMaster, accessing your remote’s settings might require pressing a specific button combination. Consult your remote’s manual for exact details.
4. Verify the Disabling Action: After you’ve done the previous steps, try to operate the garage door using the remote or wall switch. If it doesn’t respond, you’ve successfully disabled it!
It’s like a light switch—once it’s off, it won’t affect anything until you turn it back on.
Troubleshooting Common Issues
Even with clear instructions, things can go awry. If you’ve followed all steps and the motor still shows signs of life, don’t worry! Here are some troubleshooting tips:
– Check the Power Source: Ensure that the motor is completely disconnected from the electrical source. Sometimes circuits can be a bit tricky.
– Inspect the Remote Control: Make sure the batteries in your remote are not dead. A low battery can sometimes lead to unexpected behavior.
– Look for Error Codes: Some modern units have a display panel that shows error messages. Refer to your user manual for a list of codes and their meanings.
These issues can be akin to a comic book character trying to decipher the villain’s revenge plot—baffling but solvable!
Re-enabling Your Overhead Door Motor Unit
Once your task is complete and you’re ready to re-enable the motor, it’s just as simple. Here’s how to turn it back on:
1. Restore Power: If you unplugged the unit, plug it back in, or turn the breaker back on.
2. Reset Connections: If you used the disconnect switch, make sure to flip it back into the operational position.
3. Re-sync Your Remote: If needed, follow the steps to sync or pair your remote with the motor unit again. This usually involves pressing a button on the motor and then on the remote.
4. Test the Door: Try opening and closing the door a couple of times to ensure everything is working smoothly.
Re-enabling the motor can feel like restoring order after a chaotic day—it’s satisfying when everything functions as it should.
When to Call for Professional Help
Sometimes, despite your best efforts, things may still not work as expected. Here are some signs that it’s time to call in a professional:
– If your garage door makes unusual noises or doesn’t move smoothly.
– If your remote control is consistently unresponsive, even after replacing batteries.
– If the motor unit itself appears damaged or worn out.
Let’s face it: just like your car, sometimes systems just need expert attention. A professional can diagnose tricky issues you might overlook and ensure everything is safe.
Final Thoughts on Disabling Your Overhead Door Motor Unit
Disabling your overhead door motor unit can seem intimidating at first, but with these steps in mind, it doesn’t have to be. Whether you’re troubleshooting a pesky problem or performing regular maintenance, you now have the knowledge to take care of it confidently.
In the end, our home mechanisms, including motor units for our garage doors, serve to enhance our lives. A little understanding can ensure they work smoothly for years to come. So, grab your tools if needed, and remember, with a bit of patience, you can handle this task like a pro!