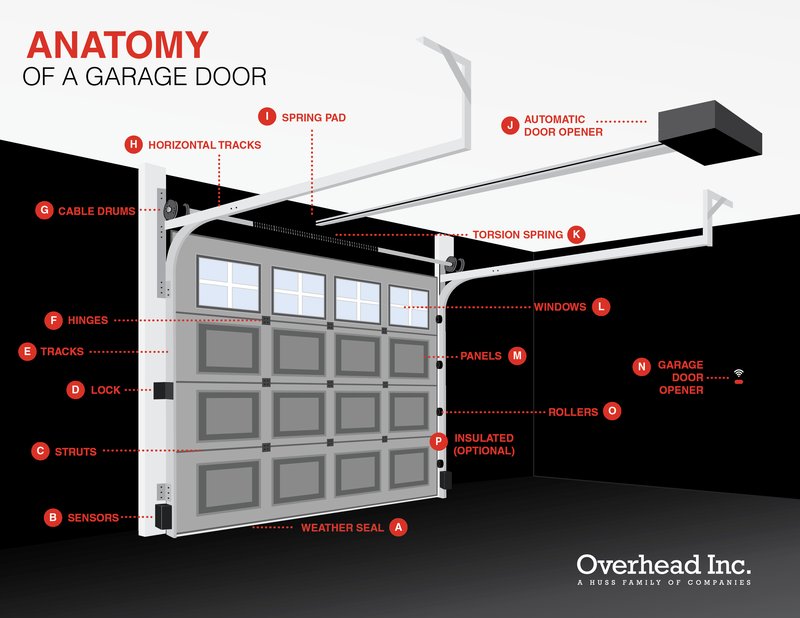
Perhaps you have a garage door opener from brands like Chamberlain or LiftMaster. If that’s the case, you’ll find that disabling the control panel is quite manageable with a bit of guidance. Think of it as switching off a light; all you need is the right approach. In this article, we’ll break down exactly how to do it and cover some common issues you might face when using your overhead door control panel.
Why You Might Want to Disable the Control Panel
You might be wondering why anyone would need to disable the control panel in the first place. There are a few practical reasons. First off, if you’re conducting maintenance on the door or the electronic mechanisms, shutting it down ensures no accidental openings while you’re working. It’s like turning off a power tool before you start tinkering—safety first!
Another reason is security. If you’re heading out on vacation or simply don’t want anyone to use the door temporarily, disabling the control panel is a smart move. It prevents anyone, even you, from using the remote or the wall switch during that time. Let’s face it—sometimes you just want to make sure everything stays as it is until you’re ready for it to move again.
Lastly, you might be troubleshooting issues with your door or remote. A little reset can go a long way in problem-solving, and disabling the panel is often part of that process.
Identifying Your Overhead Door Control Panel Type
Before you dive into the process, it’s important to identify which type of control panel you have. Most garages use either a wired wall mount or a wireless remote control.
– Wired Wall Mount: This is usually fixed to the wall within your garage. It will typically have buttons for opening and closing the door and may even include features like a light switch.
– Wireless Remote: This is handheld and convenient, allowing you to control your door from a distance, like your car or porch.
Understanding which type you have will help clarify how to disable it since the steps may differ.
Steps to Disable the Wired Control Panel
Disabling a wired control panel is relatively straightforward. Here’s a step-by-step guide to help you out:
- Locate the Control Panel: Find the panel mounted on the wall, usually near the door itself.
- Unplug the Unit: If the panel has power, simply unplugging it from the wall socket will do the trick. This action is similar to killing the power to a TV by unplugging it—no more controls until it’s plugged back in!
- Remove the Cover (if necessary): Some models might require you to remove the cover to access the wiring. Always be careful here—if you’re unsure, it’s best to consult the manual or call a professional.
- Disconnect the Wires: If you choose to go this route, make sure you know where each wire connects. Take a picture for reference! Disconnecting them will fully disable the panel.
Make sure to remember where everything goes if you need to reconnect it down the road.
Steps to Disable the Wireless Remote Control
For those using a wireless remote, disabling it is a little different. Here’s how you can do it:
- Remove the Battery: This can usually be done by sliding open the cover on the back of the remote. It’s quite similar to changing a battery in a TV remote. Just pull the battery out, and it’ll stop sending signals.
- Deactivate the Remote’s Code: Many remotes and garage door openers have a “learn” or “code” button. Press it to erase the memory of the remote, effectively deactivating it. Follow the specific instructions in your model’s manual.
- Store the Remote Safely: If you’re done for a while, keep the remote in a safe place so you don’t misplace it. It’s like putting away your tools after a DIY project.
Now that you’ve disabled it, you can conduct your repairs or just enjoy the peace of mind knowing that nobody can mess with it!
Troubleshooting Common Issues
Sometimes, disabling your overhead door control panel might not go as planned. Here are a few issues you could run into, and how to solve them:
– Control Panel Won’t Turn Off: If you’ve unplugged it, but it still seems active, ensure you’ve unplugged the correct socket and haven’t missed any hidden or secondary options on the panel.
– Remote Isn’t Responding: If your remote isn’t working even when you try to disable it, check that the battery is inserted correctly and that the contacts are clean.
– Safety Features: Many modern systems have safety features that prevent disabling under certain conditions, especially if the door is in use. Always ensure the door is closed before attempting to disable the system.
Hiccups happen, and it’s often just a matter of troubleshooting what’s going wrong!
Re-enabling the Control Panel When You’re Ready
Once you’ve done your work or ensured that everything is secure, re-enabling the control panel is usually simple as pie. For the wired panel, just plug it back in and check if it’s responsive. For the wireless remote, simply pop the battery back in, or re-pair it if you had unpaired it.
Here’s the thing: it’s crucial to test the entire system after you’ve re-enabled everything. Make sure the doors open and close smoothly, and that all features are functioning properly. No one wants to deal with a surprise when they expect a smooth operation!
Final Thoughts
Disabling your overhead door control panel doesn’t have to be complicated. Whether you’re working on repairs, securing your space, or troubleshooting issues, knowing how to properly disable your control panel is valuable knowledge. Always remember to take safety precautions, and consult your manual for specifics to your model.
You’ve got this! With a little patience and a clear understanding, you can manage your garage door like a pro. So sip that coffee and get to work knowing you’ve got the confidence and know-how to tackle this task.
