In this guide, we’ll walk through the steps to disable the circuit board on your Craftsman garage door opener. We’ll break down the process so that even if you’re new to DIY projects, you’ll feel comfortable tackling this task. Craftsman openers come with various remote types, and understanding how to disable the circuit board can save you time and money, whether you’re trying to sync a new remote or troubleshoot problems. So grab a cup of coffee, and let’s get started on this handy project!
Gather Your Tools and Safety Gear
Before diving into the disassembly of your Craftsman garage door opener, you’ll want to gather a few essential tools and safety gear. Taking the time to prepare will make the process smoother and safer. Here’s what you’ll need:
- Screwdriver: A Phillips and flathead screwdriver are usually required.
- Safety glasses: Protect your eyes from any debris as you work.
- Gloves: Wearing gloves will keep your hands safe from sharp edges.
- Voltmeter (optional): This can help you check for electrical issues before proceeding.
It’s like prepping for a big meal: gather your ingredients, and the cooking process will be much easier. With your tools ready, you’re one step closer to effectively managing your garage door opener.
Locate the Circuit Board
Now that you have your tools at the ready, the next step is locating the circuit board within your Craftsman garage door opener. This part can vary slightly based on the model, but generally, it’s pretty consistent.
1. Head to the motor unit: This is usually mounted on the ceiling of your garage.
2. Remove the cover: Use your screwdriver to unscrew the cover of the unit, exposing the internal components.
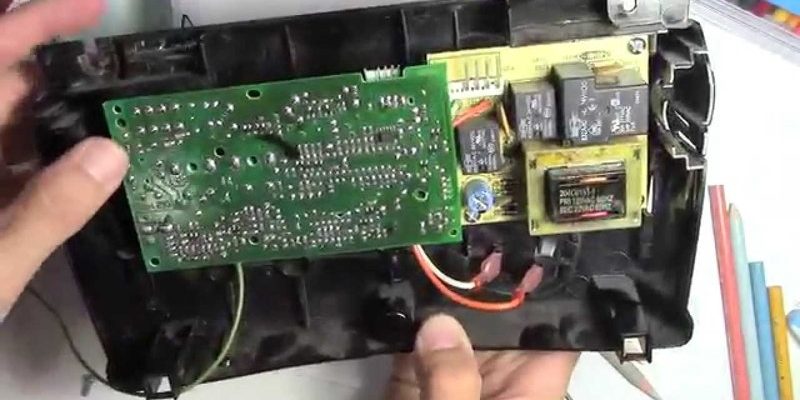
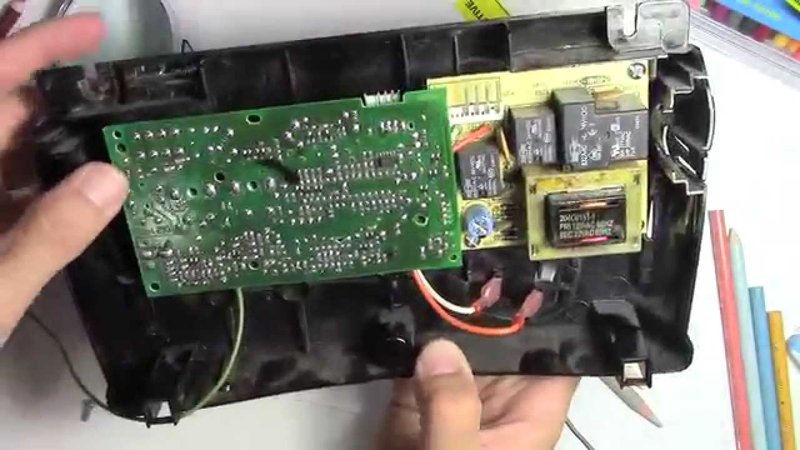
3. Identify the circuit board: It’s typically a rectangular board with various wires connected to it. You might see little buttons, lights, and connectors—it looks a bit like a mini city of electronics.
Understanding where the circuit board is located is crucial as it’s the heart of your garage opener. When you disable it, you’re letting the rest of the components know to pause and take a break.
Turn Off Power Supply
Before you start disabling the circuit board, ensure that your garage door opener is completely safe to work on. That means turning off the power supply.
1. Unplug the unit: Pull the plug from the outlet—this eliminates any chance of electrical shock while you’re working.
2. Cut the breaker: Alternatively, locate the circuit breaker that powers the garage door opener and switch it off.
Turning off the power is like putting your phone on airplane mode before fiddling with your device—safety first. Once you’ve removed power, you can confidently proceed.
Disconnect Wires from the Circuit Board
With the power off, the next step is to carefully disconnect the wires from the circuit board. This process can feel a bit like untangling a bunch of Christmas lights, but don’t worry—just take your time.
1. Label wires (optional): If you’re concerned about reconnecting them later, use tape to label each wire as you disconnect it.
2. Use caution: Gently pull the wires off the terminals. Some may need a bit of wiggling, but don’t yank them.
3. Keep track of connections: It’s wise to remember where each wire goes, as proper reconnection is crucial later on.
Taking things slow here is essential. You wouldn’t want to break a wire or forget where it goes; that could lead to more troubleshooting down the line.
Disable the Circuit Board
Now we’re at the main event. It’s time to disable the circuit board. This step will effectively halt any electronic signals being sent to the opener’s components.
1. Remove circuit board: Depending on your model, the circuit board may be secured with screws or clips. Use the appropriate screwdriver to remove any screws carefully.
2. Lift the board: Once free, gently lift the circuit board away from the opener.
At this point, you’ve successfully disabled the circuit board! Think of it like taking a break—letting the opener reset while you address any problems.
Troubleshoot or Repair Components
With the circuit board disabled, now’s the ideal time to troubleshoot or repair components of your garage door opener.
– Check wiring: Look for frayed or damaged wires. Sometimes, it’s just a loose connection that causes a malfunction.
– Test the motor: Using your voltmeter, ensure the motor is functioning correctly. If something feels off, take the time to examine it.
– Inspect the sensors: Dirty sensors can prevent your garage door from functioning well. Clean them gently with a soft cloth.
This phase is like attending to a plant in your garden—taking care now will help it flourish later.
Reassemble and Reconnect Everything
After making the necessary adjustments or repairs, you’ll want to reassemble your Craftsman garage door opener. Here’s how:
1. Reattach the circuit board: Place the circuit board back into its position and secure it with screws.
2. Reconnect wires: Referring to your labels (if you made them), connect every wire back to its original terminal.
3. Replace the cover: With everything back in place, secure the cover of the unit, ensuring that you don’t have any loose screws left over!
Reassembly is the final step, similar to putting the last piece into a puzzle. You’ll want to make sure everything is snug and secure.
Restore Power and Test the Opener
You’re almost there! Before celebrating your handiwork, let’s restore power and check if your Craftsman garage door opener is functioning as intended.
1. Reconnect power supply: Either plug the unit back in or flip the circuit breaker to the “on” position.
2. Test the remote: Press the appropriate buttons on your Craftsman remote to see if the garage door responds.
Testing your work is like taking your car out for a spin after a tune-up—you’ll want to be sure everything runs smoothly. If all goes well, congratulations! You’ve successfully disabled and re-enabled your Craftsman circuit board.
Closing Thoughts
Disabling the circuit board of your Craftsman garage door opener doesn’t have to feel daunting. By breaking the process down into manageable steps, you can troubleshoot issues, make necessary repairs, and even save on service costs. Remember, safety is paramount, so always take necessary precautions when working with electrical components.
Whether you’re a DIY enthusiast or just looking to maintain your opener, following these steps can empower you to handle minor issues with confidence. If all else fails, don’t hesitate to consult a professional. After all, sometimes it’s better to let the experts take over!