You might be wondering why anyone would want to disable such a crucial feature. Here’s the thing: sometimes, troubleshooting a malfunctioning garage door requires a bit of experimentation. Or maybe you’re replacing the old sensor and simply want to test the door’s movement. No matter the reason, understanding how to disable your Craftsman safety sensor can give you a bit of control over your garage door system.
Understanding the Safety Sensor Functionality
Before we get into the nitty-gritty of disabling the safety sensor, it’s important to grasp how it works. The safety sensor is designed to keep your garage door from closing on objects—including, unfortunately, pets or small children. This feature uses infrared beams; if the beam is interrupted, it signals the door to stop and reverse.
Imagine it as a pair of invisible traffic signals. When everything’s clear, the door can go down; if something crosses the path, it red-flags the situation. It’s a valuable feature, but one that can be a nuisance if it doesn’t function properly. So, here’s where you need to evaluate if you truly need to disable it, even temporarily.
Deciding When to Disable the Safety Sensor
Now, you might be asking yourself when is it appropriate to disable your Craftsman safety sensor. Here are a few scenarios where you might want to consider it:
- Troubleshooting Problems: Sometimes, diagnosing issues with your garage door means isolating components, including the safety sensors.
- Replacing the Sensors: If you recently switched out a broken sensor, you’ll need to disable the old one during the replacement process.
- Testing Door Functionality: If you want to see how the door operates without sensor interference, disabling them is a way to do it safely.
In any case, always remember that once you disable the safety sensor, you should keep a close eye on the door’s operation. Use extra caution—especially if kids or pets are around.
Steps to Disable the Craftsman Safety Sensor
Alright, let’s get into the actual process of disabling your Craftsman safety sensor. This is something you can tackle on your own, but it’s essential to follow each step carefully. Here’s a straightforward guide to help you:
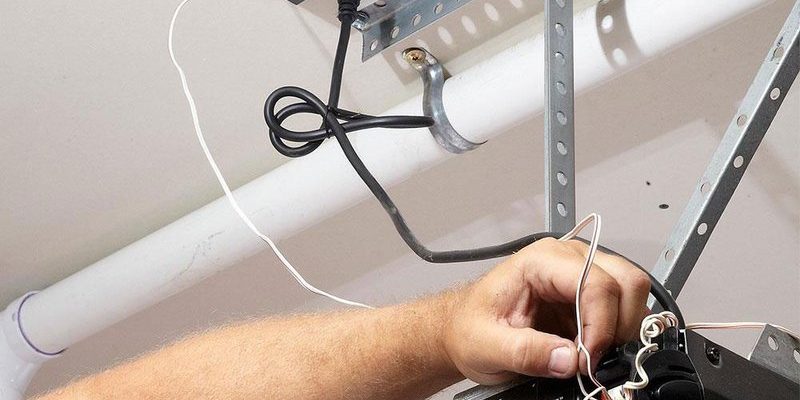
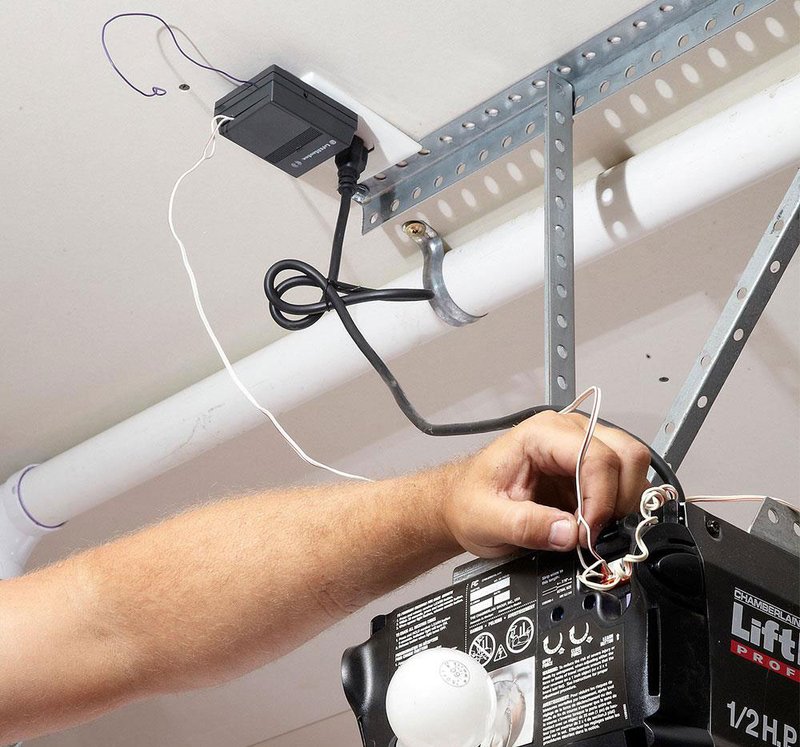
1. Identify the Safety Sensors: Locate the two sensors on either side of your garage door—they’re usually mounted near the ground.
2. Disconnect the Wiring: Using a screwdriver, detach the wires from each safety sensor. These will typically be connected via a simple terminal, so gently loosen the screws.
3. Check Your Remote: Some Craftsman models allow you to override the sensor through remote settings. Refer to your user manual, as it may contain specific instructions on bypassing the sensor feature.
4. Test the Door: Once the sensors are disconnected, press the remote to operate the door. It should move without any obstructions.
If at any point you feel unsure about the process, don’t hesitate to consult your user manual or consider reaching out to a professional.
Common Issues to Look Out for While Disabling
While disabling the safety sensor can be quite simple, there are a few common issues you might run into:
– Door Doesn’t Move: If your garage door isn’t responding at all, double-check that the power supply is intact and that you’re using the correct remote code. Sometimes troubleshooting a non-responsive door requires checking other components, not just the sensors.
– Safety Light Not Working: If the indicator light on the sensors doesn’t switch off after disconnection, there might be a wiring issue. Inspect the wires and connections thoroughly for any damage.
– Reinstalling Later: Once you finish testing or maintenance, remember to reconnect the safety sensors. Otherwise, you risk accidents if someone inadvertently walks under the door.
Alternative Solutions if Disabling is Too Complicated
If you find the whole disabling procedure to be a bit daunting, don’t worry! There are alternatives you could consider.
– Manual Activation: Instead of disabling the sensor, simply use the manual operation mode of the door, if your model has that feature. This way, you avoid the risk associated with disabling safety features.
– Adjust Sensor Settings: Some Craftsman models come with sensitivity settings. Instead of disabling the sensor, you could try adjusting its sensitivity, making it less likely to react to minimal obstructions.
– Universal Remotes: If you’re using a universal remote, think about syncing it with your Craftsman opener. Sometimes, reprogramming the remote can help with sensor issues.
Finishing Up Safely
Once your maintenance or testing is complete, it’s crucial to ensure everything is working as it should. After you’ve reconnected your Craftsman safety sensor, perform a quick test. Close the garage door and observe if the sensor is functioning correctly.
In the world of garage door openers, safety shouldn’t be compromised. A temporary disablement of the safety sensor can be useful, but always remember to keep it reactivated once you’re done.
Knowing how to disable the Craftsman safety sensor gives you a useful tool in your garage door management toolkit. With this newfound knowledge, you can keep your garage door network running smoothly, all while ensuring your home stays safe.
If you encounter further issues or the sensor settings seem too tricky, don’t hesitate to reach out to a professional. Safety always comes first, even if it means asking for help.