Chamberlain is one of the leading brands in the garage door opener market, known for features like smart technology and remote access. Whether you’re looking to reset your unit, troubleshoot an issue, or just need to make adjustments to your garage door system, understanding how to manage the circuit board is essential. Let’s break it down.
Understanding Your Chamberlain Garage Door Opener
Before diving into the *how-to* of disabling the circuit board, it’s crucial to understand what this component does. The circuit board is essentially the brain of your garage door opener. It communicates with everything—from the remote control to the safety sensors. Let’s think of it like the conductor of an orchestra, ensuring all parts work together to create a harmonious function.
You might be wondering when you’d need to disable the circuit board. Common reasons include troubleshooting when your garage door won’t open or close, or maybe you’ve seen some strange flickering lights or other odd behavior suggesting a reset is in order. Having a basic understanding of the circuit board will help you not just in this task but in future maintenance as well.
When preparing for this operation, ensure you’re equipped with some basic tools: a screwdriver, perhaps a pair of pliers, and your manual for specific guidance on your model. Having a helper can also make this process easier, especially if you need someone to hold components while you work.
Locating the Circuit Board
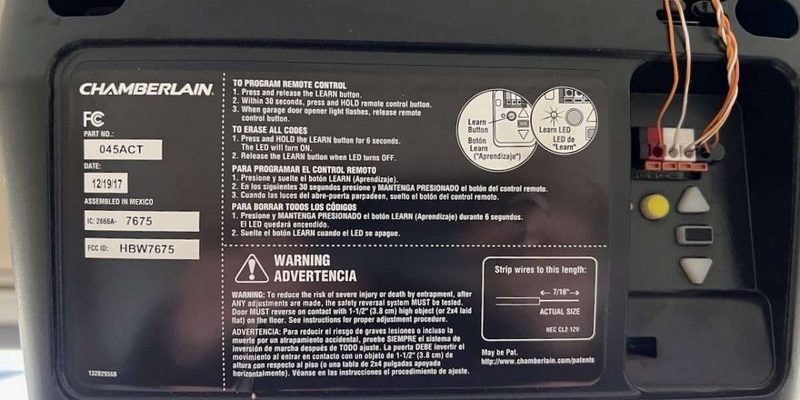
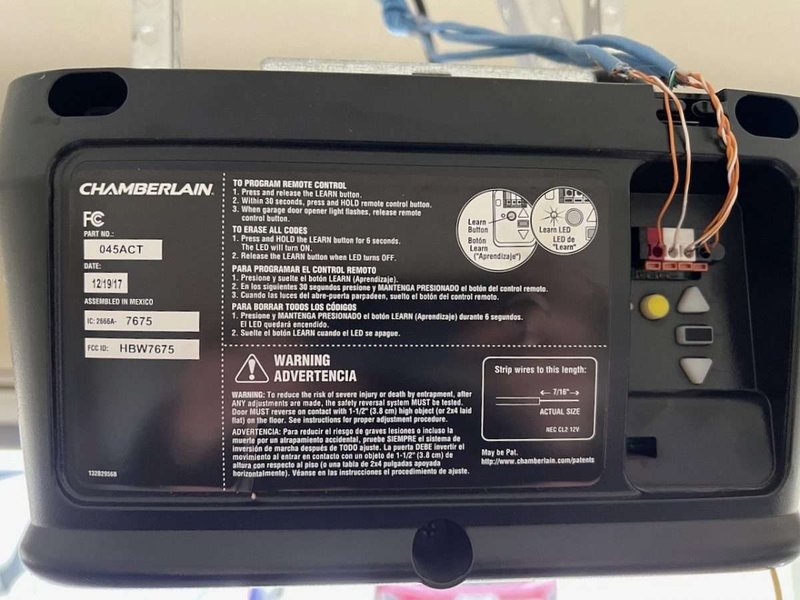
Now that you’re geared up, let’s find that circuit board. Typically, the circuit board is housed inside the garage door opener unit itself—usually mounted on the ceiling of your garage. Start by locating the main housing of your Chamberlain opener; it’s often rectangular and installed near the center of your garage ceiling.
Once you’ve found the unit, you’ll likely need to remove the cover to access the circuit board. This part can be as simple as unscrewing a few screws or unclipping the casing. It’s crucial to handle this with care. Make sure you’re on a stable ladder, as balance is key when working overhead.
If you’re finding it tricky to access the board, refer to your owner’s manual. It often contains diagrams or photos that give a clearer picture of where everything is located. Remember, each Chamberlain model might slightly differ, so verification is crucial.
Disconnecting Power Safely
Before doing any work on the circuit board, you must disconnect the power. Safety first, right? To do this, head to your garage’s circuit breaker and switch off the power to the garage door opener. This helps prevent any accidental shocks and keeps you out of harm’s way.
If your circuit board has a battery backup system, remove the battery as well. This is especially helpful for models that will maintain power even when plugged in. Once you’ve turned off the power, you’ll see a light indicating that no electricity is flowing to your opener, assuring you that it’s safe to proceed.
You might also want to add a warning tag or note on the circuit breaker that you’re working on the door opener. This isn’t just good practice; it also keeps others from accidentally restoring power while you’re in the middle of your task.
Disabling the Circuit Board
At this point, you’re ready to disable the circuit board. Start by carefully removing the connectors from the board. You may find it easier to use a small set of pliers to gently pull off wire connections; however, use caution to avoid damaging any wires or the connectors themselves.
Next, take note of any connections you’re removing. It might help to take a picture or label the wires, as you’ll want to remember where they go for reassembly. Once everything is disconnected, you can safely remove the circuit board from its housing.
This may involve unscrewing a few additional screws. Be sure to store these screws in a safe place, so you won’t lose them when it’s time to put everything back together. Remember, this is a moment where precision counts, so take your time.
Troubleshooting and Maintenance Tips
Now that the circuit board is disabled, you might be thinking about troubleshooting some issues. If your goal was to address a malfunction, inspect the board for any visible damage like burn marks or broken components. This can give you hints on whether repairs are necessary or if you’re looking at a replacement.
Consider taking the opportunity to clean the circuit board with a soft, dry cloth. Dust and debris can interfere with its operation. Just be cautious not to use any liquids. If you find any components that look damaged or worn out, it could be time to consult with a professional or explore options for replacement parts.
It’s also a good idea to periodically check the circuit board even when things seem to be working fine. Regular maintenance can prevent unexpected breakdowns, extending the life of your garage door opener.
Reconnecting the Circuit Board
After you’ve completed your assessment or repairs, it’s time to reconnect everything. Start with the circuit board and reference any notes or pictures you took during disassembly. Reattach the connectors in the same order you removed them; this will help ensure each part plays its role correctly.
Make sure everything is secure, and double-check that no wires are pinched or pulled too tightly. A loose connection can lead to further issues down the line, so it’s worth taking that extra moment to make sure everything is snug. Once reconnected, replace the cover of the opener and secure it with screws.
You can now head back to the circuit breaker and turn the power back on. Listen for the sounds of your opener powering up; if you hear any unusual noises or see flickering lights, it’s time to reassess your connections.
Disabling and working on your Chamberlain circuit board might seem like a hefty task, but breaking it down step-by-step makes it manageable. With the right tools, a bit of patience, and careful attention to detail, you can successfully disable, troubleshoot, and reconnect your garage door opener’s circuit board. Remember, safety is paramount, so don’t hesitate to consult a professional if you ever feel stuck.
Whether you’re trying to solve a quirky issue, clean your board, or simply fulfill the need for maintenance, taking these steps empowers you to keep your garage door functioning smoothly. Now that you’re armed with this knowledge, tackling future issues will feel like a walk in the park!