In this guide, we’ll explore how to disable Liftmaster circuit boards, which can come in handy if you’re facing issues with syncing your remote, or if you just want to perform some necessary maintenance. Whether you’re using a standard wall switch or a remote, understanding the circuit board’s role is key to keeping your garage door operating smoothly. So, grab a cup of coffee, and let’s dive into it!
Understanding the Liftmaster Circuit Board
First, let’s break down what a circuit board actually does in your Liftmaster garage door opener. Picture it like the conductor of an orchestra, ensuring that all the components work in harmony. The circuit board takes signals from the remote, wall switch, or even safety sensors, and tells the motor to open or close the garage door. Without it, your door wouldn’t budge an inch.
Common Components of the Circuit Board:
- Microcontroller: This is the brain that processes signals.
- Relay: Controls the power to the motor.
- Transmitter/Receiver: Allows communication with your remote.
- Sensors: Detect obstacles and prevent accidents.
You might be wondering, why would anyone want to disable the circuit board? There are a few scenarios—maybe you’re troubleshooting a problem, or you need to reset the system after installing a new remote. Understanding how to disable it can help you take control of your garage door situation.
Preparing to Disable the Circuit Board
Before you jump into disabling the Liftmaster circuit board, it’s crucial to prepare. Here’s what you need to gather:
Tools and Supplies:
- A flathead screwdriver
- A Phillips screwdriver
- A multimeter (optional but helpful)
- Safety glasses
Wearing safety glasses is a good precaution while you’re working on your opener. You never know when a small piece might pop up! Also, make sure your garage door is closed before starting, as you’ll be working closely with the motor and wiring.
Now that you’re all set, it’s time to locate the circuit board.
Locating the Circuit Board in Your Liftmaster Opener
The circuit board is usually found inside the motor unit of your Liftmaster opener. Here’s how to get there:
1. Disconnect Power: First and foremost, unplug the opener from the power source. You don’t want any unexpected surprises while working.
2. Remove the Cover: Using your Phillips screwdriver, carefully unscrew the cover of the motor unit. Be sure to keep those screws in a safe place—losing them can turn your project into a headache.
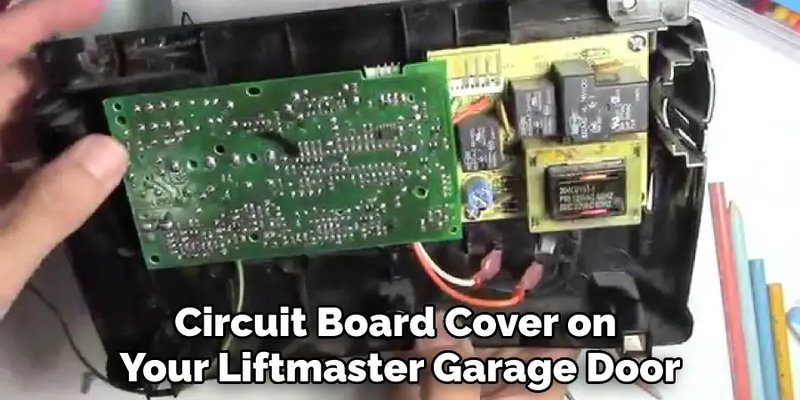
3. Find the Circuit Board: Inside the motor unit, you’ll see various components. Look for a rectangular board secured in place, often with a few wires attached. That’s your circuit board!
Once you’re face-to-face with the circuit board, you can proceed to disable it.
How to Disable the Circuit Board
Disabling the circuit board is straightforward. Follow these steps:
1. Disconnect the Wires: Gently pull off any wires connected to the circuit board. Take note of where each wire goes; a photo can be helpful.
2. Remove the Board: If the board is attached with screws, unscrew them and lift the board out carefully.
3. Keep It Safe: Put the circuit board in a safe location where it won’t be damaged. You’re basically giving it a little vacation!
By doing this, you’ve effectively disabled the circuit board. It’s a bit like shutting off your computer—it’s now resting while you figure out your next steps.
Testing Your Garage Door Opener Without the Circuit Board
Once the circuit board is disabled, you might want to test your garage door opener to see how it behaves without it. While this won’t mean much for operation, it can reveal whether other components are the issue.
Here’s what to do:
1. Reconnect Power: Plug the opener back in and see if it still operates at all, likely it won’t respond because you’ve removed the brain.
2. Check for Errors: If you had issues (like a door that wouldn’t close), note whether they persist. Sometimes, the problem lies outside the circuit board.
If everything runs smoothly, your circuit board might need a reset or possibly replacement.
Returning to Normal: How to Reconnect the Circuit Board
When you’re ready to put your Liftmaster garage door opener back together, reconnecting the circuit board is just as easy as disabling it. Here’s how:
1. Place the Circuit Board: Align the board with any mounts or holes, securing it in place with screws you saved earlier.
2. Reconnect the Wires: Refer to your photo if needed; reconnect each wire to its original spot. One loose wire can cause problems!
3. Replace the Cover: Screw the cover back into place, ensuring everything is tidy and secure.
4. Test the Opener: Plug the opener back in and test your remote or wall switch. Hopefully, it’s back to working like a charm!
Troubleshooting Common Issues
Even with your circuit board disabled or reconnected, you might run into some hiccups. Here are a few common issues and how to address them:
– Remote Won’t Sync: If your remote refuses to sync after everything’s reconnected, try resetting the remote and the opener. Look for a “learn” button on the unit to pair them again.
– Door Won’t Open: Ensure the safety sensors are aligned and clear of obstacles. Sometimes, simply adjusting the sensor can solve the issue.
– Unusual Sounds: If you hear grinding or clicking noises when operating your opener, it might be a sign of a mechanical problem, not electrical.
If these troubleshooting steps don’t work, don’t hesitate to reach out to customer support or consult a professional technician.
Wrapping Up: The Power of Knowing
Disabling your Liftmaster circuit board may seem like a daunting task, but honestly, it’s pretty straightforward if you take it step by step. Understanding how to do this empowers you to maintain your garage door opener better and tackle any issues that arise down the line.
Whether you needed to troubleshoot a problem or just wanted to reset some settings, you now have the skills to navigate your Liftmaster opener confidently. Remember, your garage door is more than just an entryway; it’s a part of your home, and taking care of it makes all the difference. So next time something goes awry, you’ll know just what to do!