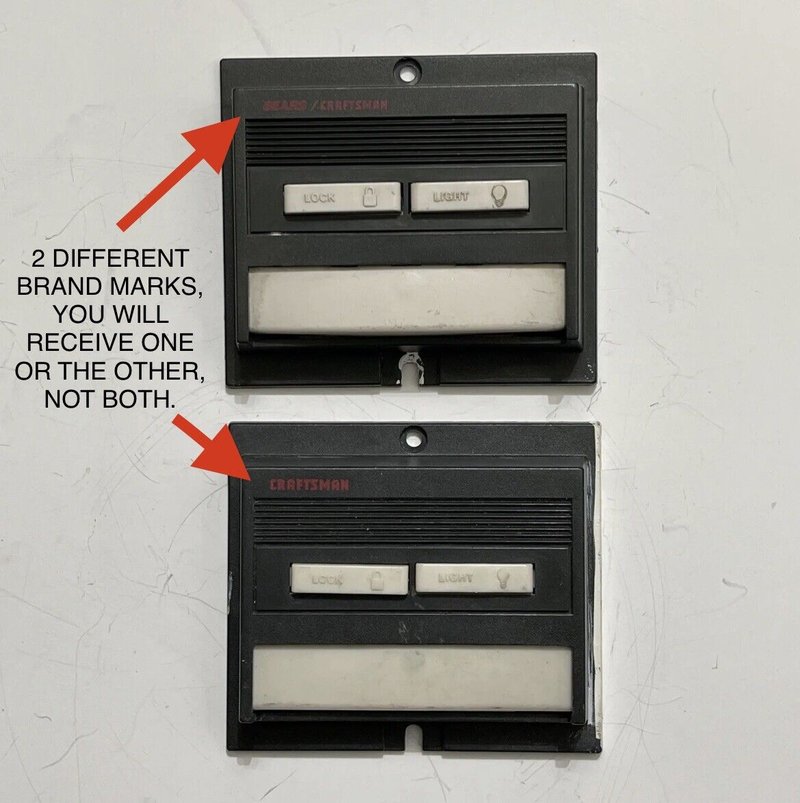
So, whether you’re troubleshooting a malfunction or just curious if it’s time for a replacement, understanding how to test the wall button can save you a lot of future headaches. The Sears wall button is typically a straightforward device, and honestly, it’s about as friendly as it gets when it comes to garage door systems. Let’s dive into how to put that button to the test!
Why Testing Your Wall Button Matters
You might be wondering why you should bother testing your wall button at all. A wall button seems simple, but it plays a crucial role in the performance of your garage door opener. If it fails, you can’t open or close your door manually, which could lead to security issues or even stuck cars in the garage.
Most importantly, testing the wall button helps you identify whether the problem actually lies with the button itself or somewhere else in the system—like the remote, the door’s motor, or even the power supply. By isolating the issue, you save time and resources. After all, who wants to pay for a repair when a simple button test would do?
Gathering Your Tools
Before you get started, it’s good to gather what you need. Fortunately, testing the Sears wall button doesn’t require a toolbox full of gadgets. Here’s what you’ll need:
- Multimeter: This handy device can measure voltage and continuity. If you don’t have one, you can borrow or buy it easily.
- Screwdriver: Typically a Phillips head, this will help you access the wall button if needed.
- Replacement Battery: If your button uses batteries, having a spare on hand can save you a trip to the store.
Having these tools ready will make the testing process a whole lot smoother. Now you’re prepared to roll up your sleeves and uncover what’s really going on.
How to Remove the Wall Button
To get started, you’ll need to access the wall button itself. If it’s mounted on the wall, remove it carefully. Use your screwdriver to loosen any screws securing it in place. As you work, make sure to note how the wires are connected; you can take a quick picture for reference!
Pull the button away from the wall gently. You want to avoid damaging any wires or the button’s housing. Take a good look to ensure that there are no visible signs of damage, such as frays or loose wires. If everything looks good, it’s time to test the button itself.
Testing for Continuity with a Multimeter
Here’s where the multimeter comes into play. This little device is your best friend for testing electronic components. Set your multimeter to the continuity setting. This typically displays a sound symbol or a connection icon.
Next, place one probe on one terminal of the wall button and the other probe on the opposite terminal. Press the button down while watching your multimeter. If you hear the beep or see the light indicator, your wall button is functioning correctly. If not, it may signal that the button is faulty and might need replacing. This step can save a ton of guesswork!
Checking the Power Supply
If your wall button doesn’t respond properly, it’s a good idea to check the power supply. Sometimes, the issue isn’t the button at all, but rather a problem with the power source.
Make sure the garage door opener is plugged in, and check for any tripped breakers in your electrical panel. If everything looks good, you can also examine the wiring that connects the wall button to the power source. Look for any loose connections or damaged wires. Remember, a little bit of curiosity can lead to a quick fix!
Common Issues and Solutions
It’s not uncommon to run into a few hiccups during your testing. Here are some common issues and what to do if they happen:
- No Power: If the garage door opener isn’t responding at all, check the circuit breaker first. You’ll be surprised how often that’s the root of the issue.
- Stuck Button: If the button feels stuck or won’t click, dirt or grime may be the problem. A little cleaning with a damp cloth can often do the trick.
- Wiring Issues: If you discover damaged wires, they’ll need to be replaced. Be cautious here; if you’re not comfortable, getting a professional is the way to go.
In many cases, these simple fixes can save you a frustrating trip to the repair shop!
When to Consider Replacement
If testing reveals that the wall button is consistently failing despite troubleshooting efforts, it might be time to consider a replacement. Wall buttons are relatively inexpensive and easy to replace, so don’t let an old button hold you back.
When selecting a new button, make sure it’s compatible with your Sears garage door opener. You can find specifications online, at hardware stores, or directly from the manufacturer if you’re unsure. Also, consider investing in a universal remote if you’d like a backup option.
Final Thoughts
Learning how to test the Sears wall button for your garage door is an essential skill that can save you time, money, and hassle. By following these steps, you can quickly determine whether the issue lies with the wall button, the power source, or even the opener itself. Over time, you’ll become more comfortable with troubleshooting common issues, and who knows? You might just earn the title of “Garage Door Whisperer” among your friends and family.
Taking these proactive steps keeps your garage door running smoothly, and that’s a win-win for everyone! Now, next time your garage door’s not cooperating, you’ll know just what to do. Happy testing!
