In this guide, I’ll walk you through how to test your Craftsman keypad step-by-step. By the end, you’ll be confident in troubleshooting any keypad issues that pop up. Let’s get started, so you can get your garage door opening as it should!
Understanding Your Craftsman Keypad
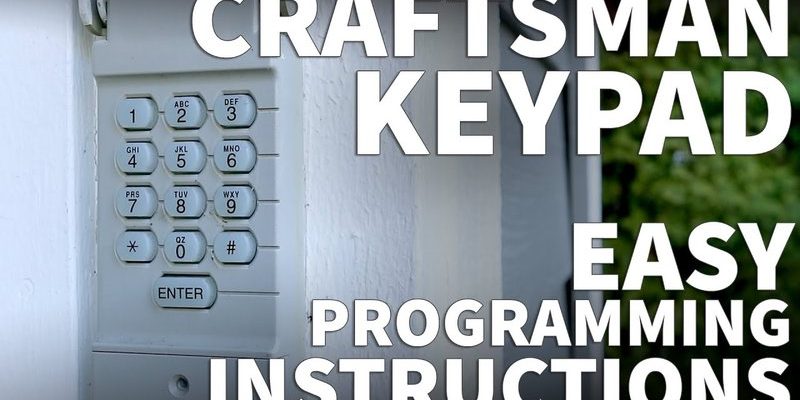
Before jumping into testing, it’s essential to understand what you’re working with. The Craftsman keypad is typically wireless and allows you to control your garage door without needing to fumble for your remote. Essentially, it sends a code to your garage door opener, telling it to open or close. If this connection fails, it can prevent your door from responding.
A few common features of Craftsman keypads include a backlit display and weatherproof casing, which helps it stand up to whatever Mother Nature throws at it. Knowing this can ease your mind if you live in a rainy climate—your keypad should still perform reliably.
But why might it stop working? Common culprits include dead batteries, bad connections, or issues with the opener itself. So, how do you diagnose the problem? Let’s dive deeper into the testing process.
Step 1: Check the Power Supply
First things first: let’s make sure your keypad is getting power. If it’s acting sluggish or doesn’t respond at all, the batteries might be the issue. Here’s how to check this:
- Open up the battery compartment: Most keypads have an easy-to-open battery panel at the back. You might need a small screwdriver, depending on your model.
- Inspect the batteries: Remove the batteries and check for any corrosion or leaks. If they look old or damaged, replace them with fresh, high-quality batteries.
- Replace and test: Put the batteries back in and try using the keypad again. If it still doesn’t work, it’s time to troubleshoot further.
If your keypad has a backlight, check if it turns on after changing the batteries. That’s a good sign it’s powered correctly!
Step 2: Reprogram the Keypad
Sometimes, the connection between your keypad and the garage door opener needs a little refresher. Reprogramming can help re-establish that link. Here’s how you can do it:
- Locate the “learn” button: This button is often found on the garage door opener itself, usually near the motor unit. It may be red, yellow, or orange.
- Press the learn button: Wait for a light to turn on and then release it. This puts your opener into “learn” mode.
- Input your code on the keypad: Within 30 seconds of pressing the learn button, enter the code you’ve set for your keypad. Listen for a click or watch for the light to blink—this indicates it’s successfully paired.
After reprogramming, test your keypad by entering the code. If the garage door responds, you’re back in business!
Step 3: Check for Interference
Every electronic device is at the mercy of interference. Other devices or radio signals can mess with your Craftsman keypad operation. If it still isn’t working after checking the batteries and reprogramming, here’s what to consider:
- Assess the surroundings: Is there anything new nearby, like a Wi-Fi router, a neighbor’s garage door opener, or even a large metal object that might block signals?
- Move closer: Stand directly next to your garage door opener and try using the keypad again. If it works here, interference is likely the culprit.
- Relocate devices: If possible, reposition any nearby electronics to see if that resolves the issue.
Understanding the space where you’re operating the keypad can reveal potential issues.
Step 4: Test the Keypad Functionality
Sometimes the keypad itself might be malfunctioning. Take a moment to test its buttons: that means checking for responsiveness and functionality. Here’s how to do that:
- Press individual buttons: Go through each button to make sure they all function. If one button feels sticky or doesn’t press well, it might be stuck or broken.
- Listen for sounds: While testing, listen for any beeping or feedback sounds indicating it’s registering your input. No response is a red flag.
- Check for physical damage: Inspect the keypad for any visible breaks or water damage. If you find anything concerning, you may need a replacement.
If you discover any non-functioning buttons, it might mean that the keypad itself requires repair or replacement.
Step 5: Reset the Keypad
If all else fails, a reset can sometimes bring things back to life. Resetting your Craftsman keypad returns it to factory settings, eliminating any previous programming that might be causing trouble. Here’s how:
- Find the reset button: This could be inside the battery compartment or on the back of the keypad. Refer to your user manual for the exact location.
- Press and hold the reset: Use a pointed tool to press and hold the reset button for several seconds. You should see the indicator light flash or change color.
- Reprogram it: Once reset, follow the earlier steps to reprogram the keypad. Test for functionality afterward.
Resetting can often resolve software glitches or programming issues that may cause your keypad to misbehave.
Testing your Craftsman keypad doesn’t have to feel overwhelming. By following these simple steps—checking the power supply, reprogramming, identifying interference, testing functionality, and resetting—you can troubleshoot and resolve most common issues.
Remember, if you’ve tried all of this and the keypad still isn’t working, it might be time to look into a replacement or consult a professional. But, for the majority of problems, these steps will help you restore your keypad functionality quickly.
It’s all about getting your garage door back to opening with the simple press of a button. With a little patience and these handy tips, you’ll be back on track in no time!