Picture this: it’s a rainy night, and you pull into your driveway, ready to escape the elements. You reach for your remote, but nothing happens. You check the battery, but it seems fine. This scenario highlights why understanding how to test your control panel is so important. It’s about peace of mind and avoiding surprises when you least expect them. In this article, we’ll walk through the steps of testing your Chamberlain control panel, so you can keep your garage door in top shape.
Understanding Your Chamberlain Control Panel
First, let’s get familiar with your Chamberlain control panel. It’s the hub of your garage door opener, directing signals from your remote and controlling the actual mechanics of opening and closing the door. When you push a button on your remote, you’re essentially sending a command to this panel. If things aren’t syncing properly, your door might not budge at all.
Chamberlain offers various models, each with its unique features. Whether you have a standard option or one equipped with smart technology, knowing how your specific model operates is essential. You can usually find the model number on the back of the unit or in the user manual that came with it. Just like knowing the type of coffee you prefer helps your barista get your order right, knowing your model helps you troubleshoot effectively.
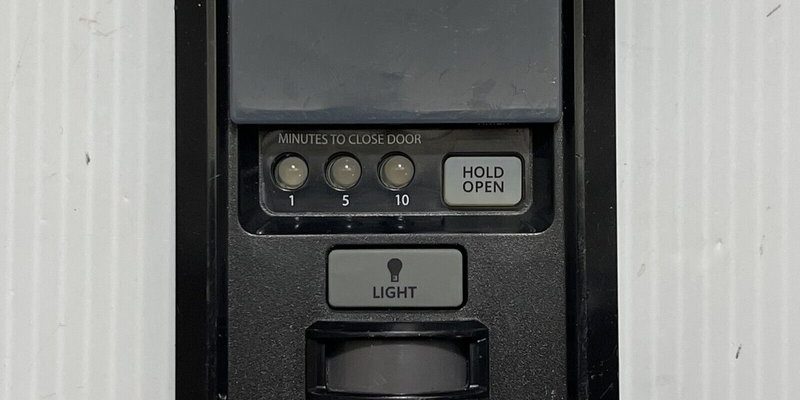
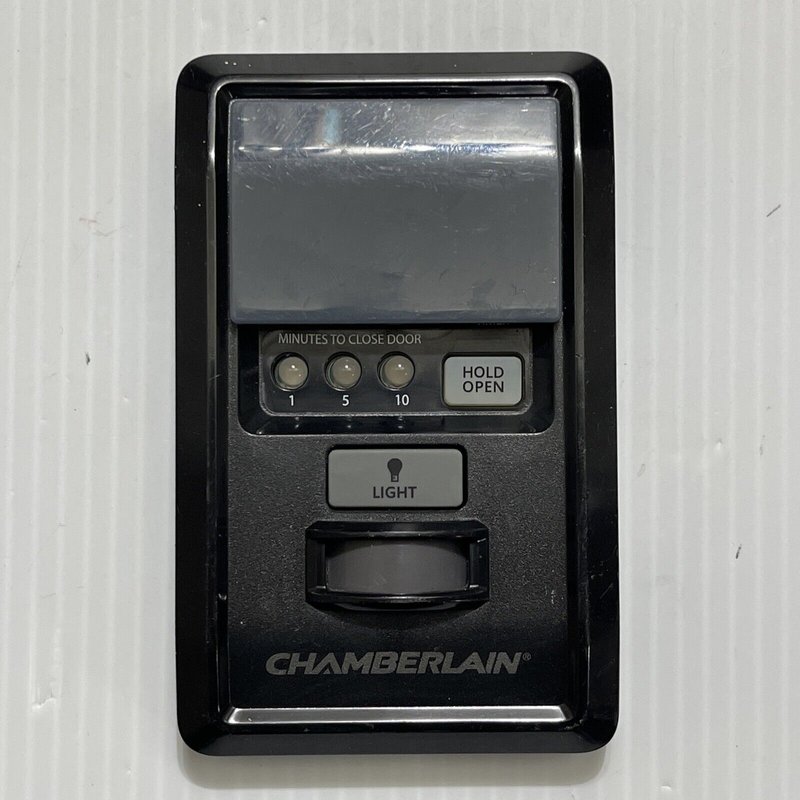
Remember, the control panel contains buttons, indicators, and sometimes LCD screens that can illuminate a lot about its functionality. These features are there to help you assess whether the panel itself is working normally.
Gathering the Right Tools for Testing
Before diving into testing your control panel, make sure you have a few tools handy. You don’t need much—just a screwdriver, a good battery, and possibly a multimeter if you want to get more technical. Here’s a quick list of must-haves for the job:
- Screwdriver (to access the control panel, if needed)
- Fresh batteries (for your remote control)
- Multimeter (for checking voltage, optional)
Having fresh batteries is crucial. Even if your remote looks like it’s a go, an old battery could be at fault. Testing with a new battery ensures it’s not just a weak connection. If you’re capturing data with a multimeter, you’ll be able to measure the electrical output, giving you a clearer picture of what’s going wrong if something isn’t right.
Let me explain how each tool can help in testing your control panel. A screwdriver allows you to get inside the control panel and check connections. Fresh batteries rule out one of the most common issues—low power. And if you opt for a multimeter, you can look at any power issues more closely.
Checking the Remote Control
Before you dive into the control panel, start by checking your remote. It’s often the first suspect when things go awry. A good way to check if the remote is functioning properly is to look for an LED light on the device. Most Chamberlain remotes have this feature. When you press a button, the light should flash. If it doesn’t, the battery is likely dead or incorrectly installed.
If the light does flash, but the garage door still won’t respond, it’s time to troubleshoot further. If you have another Chamberlain remote or a compatible universal remote, try that. This can quickly tell you if the issue lies with the original remote.
Another trick is to ensure you’re within the proper range. Sometimes, being too far from the control panel can prevent the signal from getting through. So, try to be close when testing your remote.
Inspecting the Control Panel Indicators
Now it’s time to examine the control panel itself. Look closely at the indicator lights and any buttons that may be present. If your control panel is equipped with LEDs, these lights serve as a communication tool, telling you whether the panel is functioning correctly.
For example, a solid green light usually indicates the system is operational, while a blinking light may suggest an issue or need for reprogramming. Check your manual for specifics related to your model, as the meanings can vary slightly across versions.
Here’s the thing: if your control panel indicators aren’t lighting up, it could point to power issues—like a tripped fuse or a blown circuit. In this case, examine your home’s breaker box to see if anything needs resetting. If power is flowing and indicators are still off, the panel itself might need further inspection.
Testing the Wiring Connections
Loose or damaged wiring can be a hidden culprit behind a malfunctioning control panel. Start by using your screwdriver to carefully open the control panel casing. This will expose the wiring connections inside. Ensure that all wires are securely connected and that there are no frayed ends.
If you’re comfortable using a multimeter, now’s the time. Set it to check continuity and touch the leads to the relevant connectors. If you get no reading, this could indicate a wiring issue. Ensure you’re following proper safety precautions while doing this—turn off power to the panel before you start poking around.
If the wiring appears in good shape, but the problem persists, it might be worth calling in a pro. As with any home repair, sometimes it’s better to let the experienced hands handle it, especially when electrical safety is involved.
Resetting the Control Panel
Resetting your Chamberlain control panel can often solve lingering issues. It’s like rebooting a computer—sometimes a fresh start is all it needs! To perform a reset, look for the reset button on your panel (check your manual for its exact location).
Press and hold this button for the recommended time—usually around 10 seconds. After that, the control panel should reboot. You may need to re-sync your remote afterward. This process can clear up simple glitches that might be affecting operation.
If after resetting you still face challenges, re-evaluate everything we’ve discussed. Each test you complete builds to an understanding of what’s going wrong. Remember, troubleshooting is often a process of elimination.
When to Call a Professional
Sometimes, despite trying everything, the control panel may still fail to respond. If you’ve tested the wiring, changed batteries, and reset the system, it may be time to call in a professional. Look for a certified technician who specializes in Chamberlain products.
When reaching out for help, be specific about what you’ve tried. This will save time and may help the technician pinpoint the issue faster. It’s not uncommon for older control panels to require replacement, especially if they’re struggling to communicate with modern remote systems.
Remember, safety is paramount. If you’re ever uncomfortable with any steps in this process, get professional help. Your garage door is an important aspect of your home, and ensuring it’s working correctly is essential.
In conclusion, testing your Chamberlain control panel doesn’t have to be daunting. By following these steps, you can troubleshoot and possibly solve issues easily. Think of it as a way of maintaining a valuable part of your home that keeps you safe and secure. Keep those doors opening smoothly!