The Sears Safety Sensor is a critical part of your garage door opener system, specifically designed to detect any obstructions in the door’s path. If you’re using a remote, like the Sears garage door opener remote, then understanding how to use and troubleshoot these safety sensors becomes essential. And don’t worry; getting familiar with these components is easier than you think.
In this guide, we’ll walk through everything you need to know about the Sears Safety Sensor—how it works, how to install it, and how you can troubleshoot common issues. So grab your favorite coffee and let’s dive right in!
What is a Sears Safety Sensor?
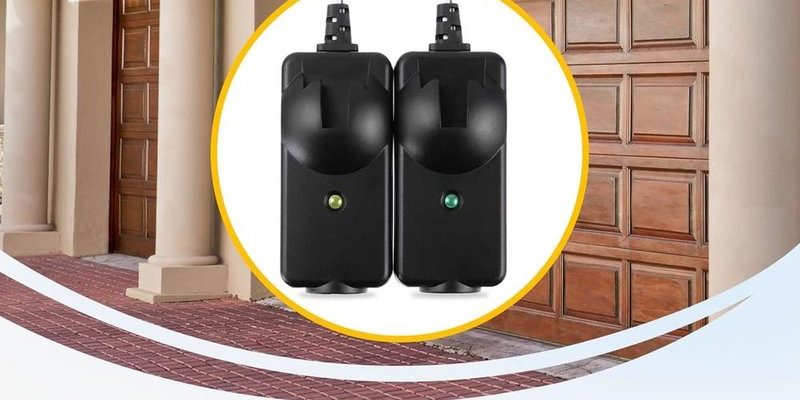
First, let’s break down what a Sears Safety Sensor actually is. In essence, it’s a small device installed near the bottom of your garage door tracks, typically on both sides. Its job is simple yet crucial; it emits an invisible beam that detects when something blocks the door’s path. If the beam is disrupted, the sensor sends a signal to the garage door opener to stop—preventing any damage or injury.
But how does it do this? Each safety sensor has a sender and a receiver. The sender emits the beam, and when an object breaks this beam, the receiver stops the door. Picture it like a tiny superhero watching over your garage, ensuring that your family, pets, and belongings stay safe when you operate the door.
How to Install Your Sears Safety Sensors
Installing your Sears Safety Sensors isn’t rocket science, but it does require some attention to detail. Here’s how you can set them up:
1. Gather Your Tools: You’ll typically need a screwdriver, a level, some wire connectors, and possibly a drill.
2. Position the Sensors: Determine where to place them. The sensors should be mounted about 6 inches off the ground on each side of the garage door. Make sure they’re aligned with each other.
3. Connect the Wires: After mounting, connect the wiring. Running the wires can be tricky—take your time to prevent any tangling or kinks. Follow your garage door opener manual as a guide here.
4. Test the Sensors: Once everything is in place, test the sensors to ensure they’re working. You can do this by manually breaking the beam and observing if the door stops.
The joy of installing these sensors is similar to putting on a seatbelt—you know it’s there for safety, and once it’s done, you can drive with peace of mind.
How to Sync Sears Safety Sensors with Your Garage Door Opener
Once your sensors are installed, the next step is syncing them with your garage door opener. Here’s a clear, step-by-step approach to get this done:
1. Power Off the Opener: Ensure the garage door opener is unplugged from the power source to avoid any electrical mishaps during the sync process.
2. Check Compatibility: Before proceeding, verify that your sensors are compatible with your opener model.
3. Press the Sync Button: Locate the “learn” or “sync” button on your garage door opener. Press this button until the indicator light blinks.
4. Activate the Sensors: Now, press the button on one of the safety sensors. You should see the light on the garage door opener blink again, indicating a successful connection.
5. Test Functionality: Plug the opener back into the power and test the functionality of the door. Make sure it stops when something interrupts the sensor beam.
Honestly, syncing these sensors feels like solving a puzzle. Once everything fits, you can confidently operate your garage door knowing it has an extra layer of protection.
Common Troubleshooting Tips for Sears Safety Sensors
Even the best systems can encounter hiccups. Let’s look at some common issues you might run into with your Sears Safety Sensors and how to address them:
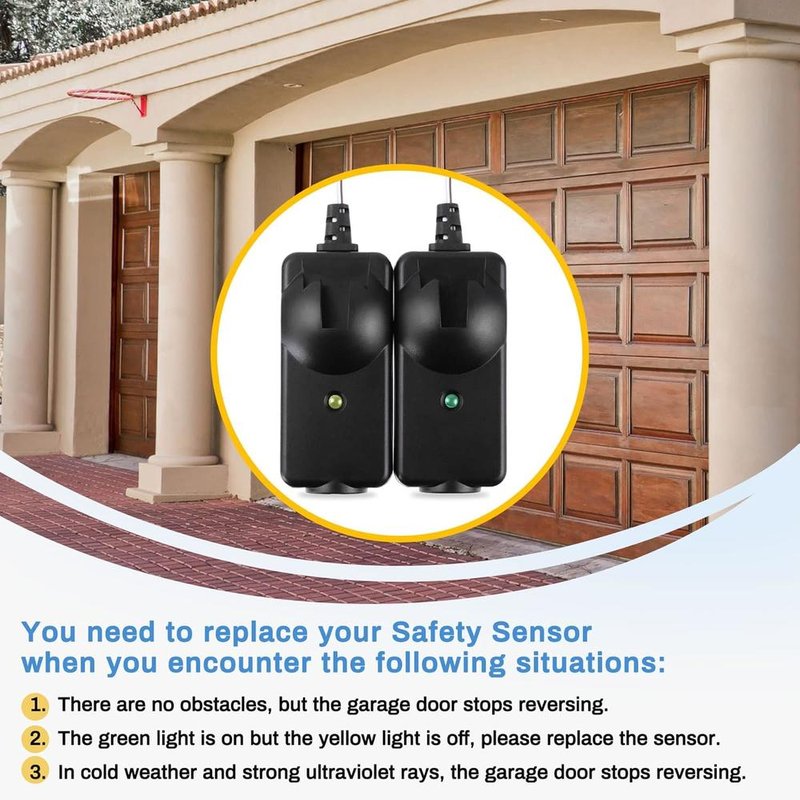
– Sensor Misalignment: This is a frequent culprit. If the sensors aren’t aligned correctly, the door won’t operate. Adjust them so they face each other directly.
– Obstructions: Sometimes, dirt or debris can block the beam. Make it a habit to check the area around your sensors regularly. A good wipe with a cloth can make a huge difference.
– Wiring Issues: A loose or broken connection can cause functionality problems. Inspect all connections and wires carefully. Tightening them up might solve the issue.
– Indicator Lights: Both sensors should show a steady green light. If one is blinking or not lit, check for alignment or any physical blockages immediately.
Here’s the thing: troubleshooting doesn’t have to be daunting. Most solutions are simple band-aids that can bring your sensors back to peak performance.
Why Having a Safety Sensor Matters
You might be wondering, “Is having a safety sensor really that important?” The short answer is yes! Here’s why:
– Accident Prevention: The primary reason for these sensors is to prevent accidents. Whether it’s a child, pet, or even just your car, keeping potential obstacles detected means fewer accidents.
– Insurance: Having a sensor installed can be a huge plus for your homeowner insurance. It proves you’re taking measures to ensure safety.
– Peace of Mind: There’s something comforting about knowing your garage door won’t crush anything—it lets you rest easy when you’re away from home.
Think of your safety sensor as a silent partner—always there, always looking out for you. It’s an essential part of the garage door opener system and a small investment with big safety dividends.
Maintenance Tips for Your Sears Safety Sensors
Once you have everything set up, you might be curious about how to keep your safety sensors in top shape. Here are a few simple maintenance tips:
– Regular Cleaning: Use a damp cloth to remove any dust or dirt that might accumulate on the sensors. This keeps the beam clear and functional.
– Check the Wiring: Every few months, just do a quick inspection of the wiring. Make sure everything is tight and there’s no fraying.
– Aligning the Sensors: Your sensors can get knocked out of alignment. A simple visual check can save you from future headaches.
– Test Functionality: Make it a practice to test the sensors every few weeks. You can do this by placing an object in the path of the door to ensure it stops correctly.
It’s similar to routine car maintenance—taking small steps to ensure everything runs well means fewer surprises down the road.
Final Thoughts
Using and maintaining your Sears Safety Sensors is not just about convenience; it’s about ensuring safety for you and your family. From installation to maintenance, taking the time to understand these components will serve you well in the long term.
Whether you’re syncing your sensors for the first time or handling a minor hiccup, always approach the task with patience. After all, safety is worth it. With your Sears Safety Sensors in place, you can operate your garage door confidently, knowing that you’ve taken a significant step in protecting those you care about most. So go ahead, open that door—you’ve got this!