
Using the wall button is straightforward, but if you’re new to it, you might have a few questions. How does it work? What should you do if it isn’t responding? Let’s break down everything you need to know about the Chamberlain wall button so you can enjoy hassle-free access to your garage.
Understanding Your Chamberlain Wall Button
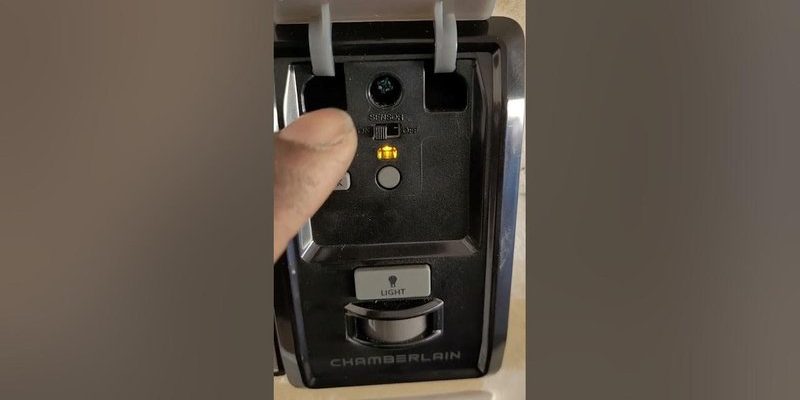
The Chamberlain wall button is designed to provide a direct means to control your garage door opener. Unlike the remote, which you carry around, the wall button is mounted on your garage wall near the door, making it very accessible. Think of it as the command center for your garage door—just push it to send the signal to your opener.
Typically, this button may have features like a light that indicates whether the door is opening or closing. Some models even include a lock function, allowing you to secure your garage door so it doesn’t open with the remote control anymore. This extra layer of security can be really handy if you’re concerned about unauthorized access.
Most basic operations involve just one simple button. Press it, and the garage door opens or closes. Some models feature two buttons—one for opening/closing and another for light control. This means you can illuminate your garage without getting out of your car, which is super convenient during late-night arrivals.
How to Install Your Chamberlain Wall Button
Installing your Chamberlain wall button is a straightforward task that typically doesn’t require professional help. Before you start, make sure you have a screwdriver, and, optionally, a drill if you need to make pilot holes.
Here’s a simple step-by-step guide:
- Choose the Right Location: Select an area near your garage door where it’s easy to reach. Ideally, it should be at a height that’s comfortable for both kids and adults—about 4 to 5 feet off the ground is standard.
- Mark the Holes: Once you’ve decided where to place the button, hold it against the wall and mark the locations of the screw holes with a pencil. Use a level to ensure it’s straight.
- Drill the Holes: If your buttons come with anchors, drill holes into the wall at your markings and insert the anchors before attaching the button.
- Connect the Wires: Following the instructions that came with your device, connect the wiring. Make sure to double-check the color matching—this is essential for proper functioning!
- Secure the Button: Screw the button into place, ensuring it’s snug. This prevents it from becoming loose over time.
After installation, it helps to test the button immediately to assure it’s working properly.
How to Sync Your Chamberlain Wall Button
If you’ve recently installed your wall button and it doesn’t seem to work, it might need to be synced with your garage door opener. This process is usually simple.
Here’s how to sync your wall button:
- Locate the Learn Button: First, find the “Learn” button on your garage door opener. It’s often located on the back or side panel and might be hidden behind a removable cover.
- Activate Learn Mode: Press this button until the opener’s light blinks on and off indicating it’s in learn mode. You usually have about 30 seconds to sync your wall button.
- Press the Wall Button: Within that time, press the wall button once. The opener’s light will typically blink again to confirm successful syncing.
If your wall button doesn’t respond, check the wiring connections. Sometimes a loose connection can interrupt the process.
Troubleshooting Common Issues
Even the best devices can run into hiccups. If your Chamberlain wall button stops working, don’t panic! Here are a few common issues and how to resolve them.
1. Button Not Responding:
– Check if there’s power to the wall outlet. Sometimes a tripped breaker could be the culprit.
– Inspect the battery (if your model has one). A dead battery means no operation.
2. Garage Door Won’t Close/Open:
– Ensure that nothing is blocking the door’s path. Safety sensors on the bottom may prevent the door from closing if they detect an obstruction.
– If all else fails, you might need to reset the garage door opener. Look up your model’s instructions for a reset.
3. Wall Button is Flickering:
– A flickering light on the wall button may indicate it’s not getting the right power supply. Check for loose wires or a faulty connection.
With proper maintenance, your wall button should work seamlessly for years, but always refer to your manual for your specific model details.
Why Use the Chamberlain Wall Button Over a Remote?
You might be wondering why you’d want to use the wall button instead of the remote that comes with your Chamberlain garage door opener. Here’s the thing: while remotes are convenient, the wall button has its own advantages.
– Always Accessible: It’s permanently mounted, meaning you don’t have to search through your bag or pockets to find a remote.
– Less Likely to be Stolen: Since it’s bolted to the wall, it’s much harder for someone to steal or misplace it.
– Multiple Users: If you have a family, everyone can easily access the wall button without the need for multiple remotes.
So while the remote is great for convenience when you’re pulling in, the wall button provides constant access and security.
Final Tips for Getting the Most Out of Your Wall Button
To ensure you’re always getting the best performance from your Chamberlain wall button, keep these tips in mind:
– Regularly Test It: Make it a habit to check the button’s functionality periodically. This is a good practice to ensure everything works correctly before you really need it.
– Keep the Area Clear: Make sure there are no obstructions near the wall button. This helps maintain smooth operations and prevents accidental activations.
– Read the Manual: Chamberlain products come with specific manuals that provide valuable information tailored to your model. Don’t skip on reading for any specific quirks your device might have.
In the end, the Chamberlain wall button can be a reliable part of your garage door system. Understanding how to install, sync, and troubleshoot it means you’ll never be left in the lurch when you’re in a hurry. Enjoy the effortless access to your garage, knowing you’ve got the hang of it!