In this guide, we’re diving into the nuts and bolts of connecting your Raynor remote. Raynor remotes are known for their durability and functionality, but each model might have its own quirks. Understanding how to sync it with your garage door opener will save you time and give you peace of mind. So, grab a cup of coffee, and let’s get started!
Understanding Your Remote Control and Garage Door Opener
Before you jump into the connection process, it’s important to familiarize yourself with your Raynor remote and the garage door opener itself. Raynor remotes typically come in different models, such as the Raynor 372 or the Raynor 373. Each remote may have unique features or buttons, so having the model number handy will help as you go through the setup.
Your garage door opener is the motor unit that does the heavy lifting of opening and closing the door. Look for the Learn or Program button on the opener—this is often where the magic happens in connecting devices. Understanding where these components are will make the entire process smoother.
In most cases, the remote communicates with the garage door opener using a specific frequency. This is similar to how a TV remote controls your television by sending signals over a distance. Having that basic knowledge helps demystify the process of syncing the devices.
Gather Your Tools for the Connection Process
Before you begin, let’s gather a few essential tools and items that will make your life easier. While the process is pretty straightforward, having everything on hand ensures you won’t have to make unnecessary trips to grab stuff.
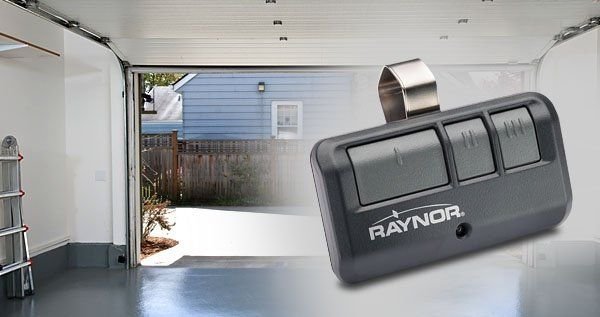
- Your Raynor remote: Make sure you have the correct model.
- Stepladder: If your garage door opener is mounted high, you might need a ladder to reach it safely.
- Owner’s manual: Keep this handy for specific instructions related to your model.
- Tools: You might need a screwdriver to remove any covers if applicable.
With these tools ready, you’re prepared to dive right into connecting your Raynor remote. Having everything in one spot will make the process smooth and enjoyable.
Steps to Connect Your Raynor Remote
Connecting your Raynor remote typically involves a few basic steps. Don’t worry if you trip up along the way; I’ll walk you through it as simply as possible.
1. Locate the Learn Button: Head to your garage door opener and find the Learn or Program button. This is usually located on the back or side of the motor unit.
2. Prepare the Remote: Take your Raynor remote and ensure it has a fresh battery. If you’re unsure how to replace it, consult your remote’s manual.
3. Press the Learn Button: Now, push the Learn button on the garage door opener. After pressing, you’ll usually see a light come on or hear a beep—this indicates the opener is in programming mode.
4. Activate Your Remote: Within 30 seconds, you’ll want to press the button on the Raynor remote that you wish to use to operate the garage. If successful, the light on the opener will blink or stay on briefly.
5. Test the Connection: Finally, press the button again. If done correctly, your garage door should respond by opening or closing.
That’s it! If your garage door opens, congratulations—you’ve successfully connected your Raynor remote. If not, don’t worry; let’s troubleshoot.
Troubleshooting Common Connection Issues
Sometimes things don’t go according to plan. If your Raynor remote isn’t working as expected, here are a few troubleshooting tips that might help.
– Check the Battery: The most common issue is a dead battery. Replace it with a fresh one and try the connection steps again.
– Reset the Remote: Hold down the button on the remote while simultaneously pressing the Learn button on the garage door opener. This resets connections and may solve syncing problems.
– Distance Matters: Ensure you’re within a reasonable distance from the garage door opener when trying to sync. Being too far away can lead to weak signals.
– Interference: Check for any electronic appliances nearby that might interfere with the signal. Sometimes, devices like Wi-Fi routers or microwaves can cause disruptions.
By following these troubleshooting tips, you can often resolve any connection issues, and your Raynor remote should be up and running in no time.
Why Connecting Your Raynor Remote Matters
You might be wondering why it’s essential to connect your Raynor remote properly. Well, think of it this way: your garage door remote is like a key to your home. If it doesn’t work, it can lead to frustration or even security concerns.
Having a properly synced remote saves you time and effort—no more jumping out of the car just to open the garage door manually, especially in bad weather! Plus, it enhances the overall convenience of managing your home.
In a world where technology makes life easier, ensuring that your devices work harmoniously is key. That’s what makes understanding this connection process worthwhile.
Exploring Alternatives to Raynor Remotes
While Raynor remotes are reliable, you may want to explore alternatives if you’re seeking different features. One option is a universal remote that can operate multiple garage door brands. This can simplify your life if you have different garage doors or gates around your property.
Another option is using smart garage door openers that connect to smartphone apps. Imagine controlling your garage door from your phone while you’re still in your car! These smart solutions often come with added benefits, like monitoring and remote access.
Before switching, consider whether your needs would truly benefit from an alternative. Sometimes, sticking with your Raynor remote is the most straightforward route.
Final Thoughts on Connecting Your Raynor Remote
Connecting your Raynor remote is a straightforward process when you break it down into manageable steps. With the right tools and a little patience, you’ll have your garage door opening and closing smoothly. Remember to check your battery, ensure you’re in range, and troubleshoot as necessary.
So, now that you know how to connect your Raynor remote, you can enjoy the convenience that comes with it. Every time you pull into the driveway and effortlessly open your garage door, you’ll appreciate the smooth operation, all thanks to a little connection magic. Happy opening!