Marantec remotes are designed to operate garage doors smoothly, adding a layer of convenience to your life. If you’ve just purchased a Marantec remote or perhaps lost your old one and are hoping to sync a new one, you’re in the right place. Let’s dive in and break down the steps together!
Understanding Your Marantec Remote
Before diving into the connection process, it’s important to familiarize yourself with your Marantec remote. Marantec offers several remote models, often distinguished by color, shape, or button layout. Most have either one or multiple buttons that you can press to control your garage door.
Understanding the buttons can help you avoid confusion later on. Some remotes might have a single button for opening and closing, while others have separate buttons for different doors. If you’re using a model with multiple buttons, make sure you know which one corresponds to which door.
Every Marantec remote runs on a battery, typically a small CR2032 or similar. If your remote isn’t functioning, it could be as simple as needing a battery replacement. Always check the battery first if you experience issues!
Preparing to Connect Your Remote
Here’s the thing: before you can connect your remote, there are a few preparations involved. First, locate your garage door opener. This is usually mounted on the wall inside your garage, close to the overhead door. You’ll also need to have your new Marantec remote handy.
Next, look for a small button on your garage door opener. Often labeled as “Learn,” “Program,” or “Set,” this button is your ticket to pairing the remote. Make sure you also have a ladder or step stool if your opener is mounted high up. Safety first!
Disconnecting your garage door from its power source can also be a wise move to avoid any erratic behavior during setup. This isn’t mandatory but gives added peace of mind. Once you’ve got everything ready, you’re just a few steps away from successfully connecting your remote.
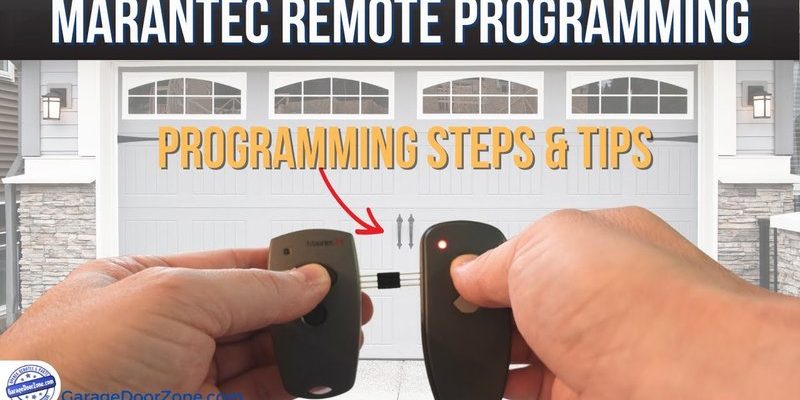
Steps to Connect Your Marantec Remote
Connecting your Marantec remote can be done easily by following these steps:
- Locate the “Learn” Button: This is typically found on the back or side of your garage door opener unit.
- Press and Hold the “Learn” Button: Doing this usually causes an indicator light to illuminate. This light indicates that the opener is in learning mode.
- Press a Button on Your Marantec Remote: Within 30 seconds, press the button you want to program on your remote. The indicator light should flash. If it doesn’t, repeat the process from step one.
- Test the Connection: Press the same button on your remote to see if the garage door responds. If it opens or closes, congratulations! You’ve successfully connected your remote. If not, go back and see if you might have missed a step.
This process can feel a bit like learning to ride a bike; it may take a couple of tries, but once you get it, you’ll never forget!
Troubleshooting Common Issues
Even the best plans can run into hiccups, so let’s cover a few common issues you might face when connecting your Marantec remote.
First, if nothing happens when you press the remote button, check your battery. A dead battery is the most common culprit. Swap it out for a fresh one and try again. Also, ensure you’ve followed the connection steps accurately; if you pressed the “Learn” button too quickly or waited too long, the process might have been interrupted.
Another common problem is interference. Sometimes, nearby electronics can mess with the signal. You might want to try moving closer to the garage door opener or checking if there are any other signals around that could be interfering.
Lastly, ensure that the remote you are trying to connect is compatible with your garage door opener model. While Marantec makes a range of remotes, not all remotes work with every model of opener. Check the manual or the manufacturer’s website for compatibility details.
What to Do If You Lose Your Remote
Losing your Marantec remote can feel like losing a vital part of your day. Luckily, you’ve got options. First, if you have a smartphone, consider investing in a smartphone app that can control your garage door. Many modern garage systems have this feature, offering a high-tech replacement for traditional remotes.
If that’s not feasible, you can also purchase a replacement remote directly from Marantec or authorized resellers. Make sure to choose one that’s compatible with your specific opener model.
Lastly, if you’re dealing with a faulty remote or an older model, consider upgrading to a universal remote. These can often work with multiple garage door systems and may deflect the worry of compatibility issues.
Maintaining Your Marantec Remote
To ensure your Marantec remote serves you well for years to come, regular maintenance is key. Here are a few simple tips:
- Change the Battery Regularly: Every six months to a year is a solid time frame for changing the battery.
- Clean the Remote: Dust and dirt accumulation can interfere with the buttons. A quick wipe with a damp cloth can keep it in good shape.
- Store Properly: If you’re not using the remote for a while, store it in a safe place to prevent damage or loss.
These easy maintenance steps might seem small, but they can go a long way in extending the lifespan of your remote.
Final Thoughts on Connecting Your Marantec Remote
Connecting a Marantec remote doesn’t have to be a headache. By following the steps outlined above, you should be able to navigate through the process smoothly. Remember, take your time, and don’t hesitate to refer back here if you hit a snag.
Once connected, you’ll enjoy easy access to your garage, and you can take pride in having successfully completed the connection process. Bye-bye confusion — hello, convenience!