In this guide, we’ll walk through how to connect an overhead door keypad, focusing on popular brands like Chamberlain and LiftMaster. Don’t worry if you’re a complete beginner; we’ll take it slow and clear up any confusion you might have. So, grab a cup of coffee, and let’s dive into this together!
Understanding Your Overhead Door Keypad
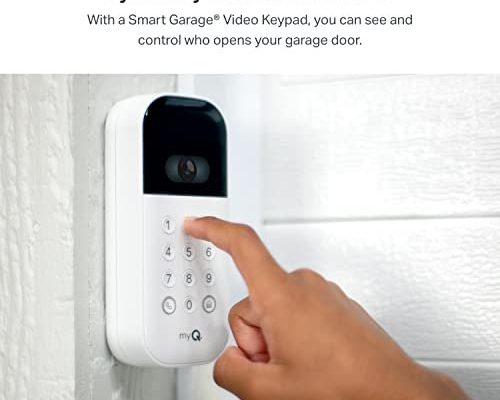
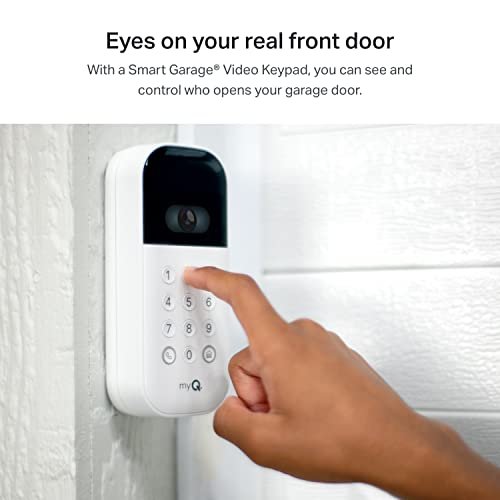
Before we jump into the setup, it’s good to know what you’re working with. An overhead door keypad is designed to give you quick access to your garage without needing a remote control or a physical key. It’s like entering a secret code to unlock a treasure chest—only, this treasure chest is your garage!
These keypads typically come with a numerical pad, allowing you to enter a specific code. When you hit the right combination, you’ll hear a beep, and voilà, the garage door opens. Different brands may have slight variations in design, but the basic idea remains the same. Plus, most keypads run on batteries and connect directly with your garage door opener.
Key Features of Overhead Door Keypads
Here’s a quick breakdown of some key features:
- Wireless Technology: Most keypads use a wireless signal to communicate with your garage door system.
- Multiple User Codes: Some models let you set codes for multiple family members, so everyone can enter without hassle.
- Backlit Display: This feature can be a lifesaver when you’re trying to enter a code at night.
Understanding these features can help you choose the right keypad for your needs and make the connection process smoother.
Gathering Your Tools
You don’t need a toolbox full of fancy tools for this task, but having a few essentials on hand makes everything easier. Here’s a quick checklist of what you’ll need:
- Overhead Door Keypad: Make sure you have the right one compatible with your garage door opener.
- Owner’s Manual: This little booklet is your best friend for specific instructions tailored to your model.
- Battery (if required): Some keypads need a battery to function, so check if yours comes with one.
Having these items ready means you can stay focused and get your keypad connected without constant interruptions.
Connecting Your Keypad: The Step-by-Step Process
Now, let’s get into the meat and potatoes of connecting your keypad. Don’t worry; I’ll walk you through it step-by-step.
1. Locate the “Learn” Button
– On your garage door opener motor, look for the “Learn” button. This is usually a round, colored button located near the antenna. Press this button and hold it for about 2 seconds until the LED light turns on.
2. Entering the Code
– Now, go to your keypad and enter a 4-digit code that you’d like to use. This can be any number, but try to choose something memorable and avoid easy-to-guess combinations. Once you press the last number, the LED light on the garage door opener should blink to indicate it’s learning the code.
3. Test It Out
– Try pressing the keypad’s enter button after inputting your new code. If done correctly, the garage door should open or close. Testing this is crucial to ensure everything is synced.
4. Adjusting Settings
– Some models allow you to customize settings like how long the door stays open or whether it auto-closes. Check your owner’s manual for details.
Remember, patience is key here. If something doesn’t seem to be working, take a deep breath and double-check your steps.
Troubleshooting Common Connection Issues
Even with the best instructions, you might run into some bumps along the way. Here are a few common issues you might face while connecting your overhead door keypad, along with solutions:
- Continuous Beeping: If your keypad keeps beeping, it may not be properly synced with the opener. Try redoing the connection steps.
- Wrong Code Error: If you’re sure you’re entering the right code but it won’t open, check if the code is being entered correctly and ensure you hit the ‘Enter’ key afterwards.
- Battery Problems: If the keypad isn’t responding at all, the battery may be dead. Replace it and try again.
Don’t hesitate to consult the owner’s manual for model-specific troubleshooting tips. Sometimes it’s all about a little fine-tuning!
Maintaining Your Keypad for Long-Term Use
Once you’ve successfully connected your overhead door keypad, you don’t want to forget about it! Keeping it in great shape ensures consistent performance. Here are a few maintenance tips:
1. Regular Battery Checks:
Change the battery at least once a year, or whenever you notice a significant drop in responsiveness.
2. Clean It Up:
Keep the keypad free from dirt and grime. A damp cloth will do the trick to wipe off any dust that may accumulate.
3. Test the Code:
Every few months, run a quick test to ensure the code still works as expected.
Regularly maintaining your keypad not only enhances its use but also extends its lifespan.
Exploring Alternatives: Universal Keypads
While I’ve shared the steps for connecting specific overhead door keypads, you might be wondering if there are alternatives. Universal keypads are an option to consider. They work with various brands and models, allowing for some flexibility if you change your garage door opener in the future.
However, installation for universal keypads can sometimes be more complex, so make sure to read the manual thoroughly. They offer the added benefit of not needing a specific code for each brand since they can be paired with multiple systems.
Connecting your overhead door keypad can open up a world of convenience for you. Once you go through the steps, it’s like having a personal doorman at your garage! It only takes a little time and patience, but the rewards are well worth it. Whether you’re running late for work, carrying groceries, or just want easy access, a keypad makes it all easier.
So, take these steps, tackle any challenges, and enjoy the ease of your new overhead door keypad. After all, everything worth having in life requires a little effort to set up—just like this!