If you’ve ever wondered about connecting that essential circuit board in your Chamberlain opener, you’re not alone. Whether you’re struggling with a new installation, troubleshooting a glitch, or upgrading an older model, knowing how to connect the circuit board can save you time, money, and a headache. In this guide, we’ll dive into the steps needed, the tools required, and some tips to make this process as smooth as possible.
Gather the Necessary Tools and Materials
Before you even think about connecting your Chamberlain circuit board, you need to want to gather the right tools. This ensures you won’t be scrambling halfway through the process. Here’s what you’ll typically need:
- A screw driver (usually a flat-head or Phillips, depending on your model)
- Insulation tape (for safe connections)
- Multimeter (in case you need to check voltage)
- Your user manual (for reference)
- Safety goggles (just in case of any mishaps)
Having these tools on hand will set you up for success. Remember, rushing through the gathering process can lead to errors later, which can be frustrating. So take your time and double-check you have everything.
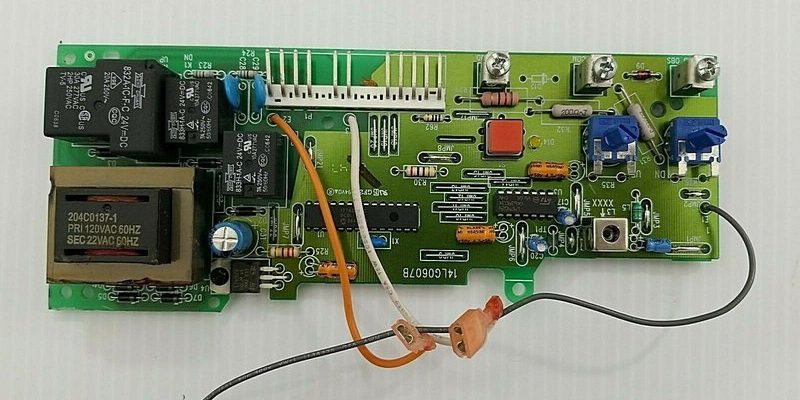
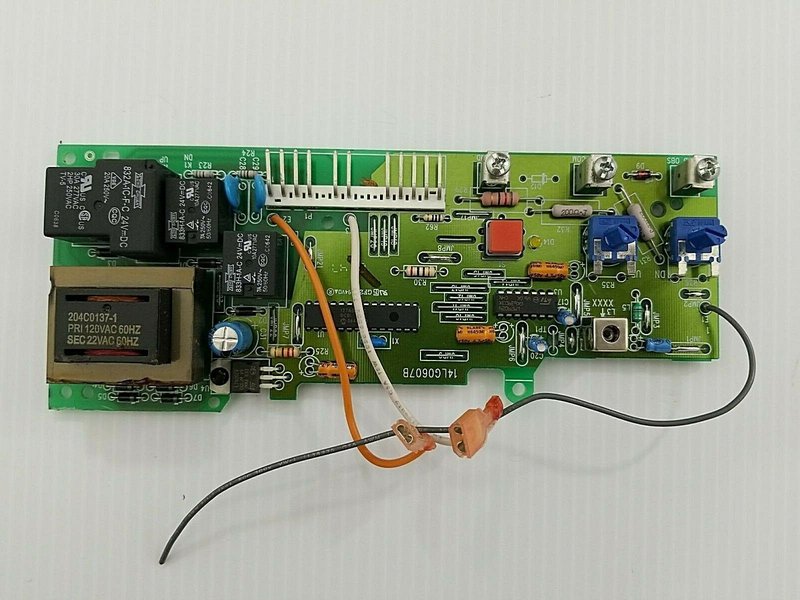
Understanding Your Chamberlain Circuit Board
Now, let’s talk a bit about the circuit board itself. The Chamberlain circuit board is where all the magic happens. It contains various connections for your garage door’s motor, lights, and remote control system. There are typically labeled terminals for each connection.
You might notice labels like “motor,” “light,” and “remote,” which detail where to hook everything up. Understanding this layout is crucial. If you’re looking at it and thinking, “What do I do with all these wires?” don’t worry—it’s simpler than it seems once you break it down.
For instance, the motor terminal is typically colored differently, making it easier to identify. When connecting, it’s important to match the wires to the correct terminal. The last thing you want is to create a messy setup that’s hard to troubleshoot later.
Disconnecting the Power Source
Before you start any work on the circuit board, the first step is to disconnect the power source. This is crucial because you definitely don’t want to fry your new circuit board or risk injury while connecting everything.
To do this, locate the power plug that connects your garage door opener to the electrical outlet and unplug it. If your model connects differently (like a hardwired connection), you might need to turn off the circuit breaker instead.
Once you’ve done this, it’s a good idea to test the system by trying to operate the door. If it doesn’t respond at all, you’re in the clear to proceed with connecting the circuit board. Always remember: safety first!
Making Connections
Now that everything is unplugged and you’re ready to dive in, it’s time to connect the wires to the new chamberlain circuit board. Start by carefully removing the old board if you haven’t already. This might involve loosening screws or simply lifting it out of place—refer to your user manual for specific details for your model.
Once the old circuit board is out, it’s time to place the new one in the right position. Ensure that it sits snugly against any mounting brackets. You’ll want to reconnect the wires to their respective terminals, which we previously discussed. Here’s a general guide:
1. Motor Wire: Connect it to the motor terminal.
2. Power Wire: Look for either a labeled terminal or a connection point for the power source.
3. Remote Control Wires: If your model uses specific wires for additional remotes, make sure you connect these as indicated.
You might be wondering, “How do I know I’ve got a solid connection?” A simple tug on each wire can confirm it’s secure. Just make sure not to pull too hard, as this can damage the wires.
Testing and Troubleshooting Your Connections
After connecting everything, it’s essential to test whether your new circuit board is working correctly. This process is quite straightforward but should be done patiently. Reconnect your power source and observe:
– Does the motor respond when you press the remote?
– Are the garage lights functioning properly?
– Any strange sounds or delays?
If things aren’t working as they should, it’s time to troubleshoot. You might consider:
1. Checking Wire Connections: Make sure no wires are loose or improperly connected.
2. Using a Multimeter: If you have a multimeter handy and are comfortable using it, you can check if there’s power coming to the circuit board or specific connections.
3. Referencing Your Manual: This can be a great resource for troubleshooting specific issues related to your model.
And if all else fails, don’t hesitate to contact Chamberlain customer support. They can offer guidance specific to your model and situation.
Final Touches: Secure the Circuit Board and Close Up
Once everything is tested and working, it’s time for the final touches. You want to make sure the circuit board is securely in place. Here’s what you should do:
1. Tighten screws: If your model requires screws for mounting, make sure they are securely fastened.
2. Replace the cover: If your unit has a cover, put it back on carefully.
3. Organize wires: If any wires are protruding awkwardly, tuck them back to avoid anything getting snagged when the garage door operates.
Finally, give everything one last check to ensure everything looks right and nothing is dangling around unnecessarily.
Connecting the Chamberlain circuit board is an essential skill for any garage door owner. It’s not just about making your opener work; it’s about understanding how everything fits together. Armed with the knowledge of how to gather materials, connect wires, and troubleshoot issues, you can confidently tackle your garage door opener project.
So, the next time you hear that garage door creak to life, you can take a moment to appreciate the work you put in. Whether you’re looking to enhance functionality or simply maintain your existing setup, knowing how to connect your circuit board opens a world of possibilities. And remember, every great DIY project becomes a little easier with practice!