
Imagine you’re sitting at your kitchen table, coffee in hand, trying to troubleshoot a problem. You look at your linear circuit board—maybe it’s from your garage door opener and brand like LiftMaster or Chamberlain—and wonder why it’s behaving like a moody teenager. Here’s a friendly guide to help you get to the bottom of it.
Understanding the Structure of Linear Circuit Boards
Before diving into repairs, let’s talk about how these boards are built. A linear circuit board consists of various components like resistors, capacitors, and transistors—each playing a specific role in the circuit. Resistors control the flow of electricity, while capacitors store energy for when it’s needed.
Now, you might be thinking, “What does this mean for me?” Well, when one of these components fails, the entire board can throw a tantrum. It’s sort of like a chain reaction; if one link breaks, the whole thing can fall apart. Usually, problems stem from bad solder joints, burnt components, or even faulty connections.
If you’re up for a little adventure, grab a magnifying glass. Inspect the board closely for any signs of damage. Look for burnt spots or components that seem out of place. Remember, a board might look fine to the naked eye but could still carry hidden problems.
Gathering Your Tools
Now that you’re familiar with the board’s layout, it’s time to prepare for repairs. You’ll need some essential tools, so consider this your shopping list:
- Soldering Iron: For fixing broken connections.
- Screwdrivers: Various sizes to open up your device.
- Multimeter: To test electrical components.
- Desoldering Pump: Handy for removing faulty solder.
- Wire Cutters: For cleaning up any excess wires.
Having these tools on hand makes it easier to diagnose and fix issues quickly. Honestly, you don’t need to be an expert technician; just having the right tools and a bit of patience can make a world of difference.
Identifying Common Issues on Linear Circuit Boards
A wide range of potential issues can arise on a linear circuit board. Here are some common culprits:
- Burnt Components: If you spot a blackened component, it’s a sure sign of trouble.
- Frayed Wires: Wires can wear out over time, causing intermittent problems.
- Cold Solder Joints: These joints can cause weak electrical connections.
It’s essential to recognize these problems early. For example, a burnt resistor can easily be replaced if caught in time, but if the issue goes unnoticed, it could lead to more severe damage to the board. Regular checks and simple maintenance can save you from a headache down the road.
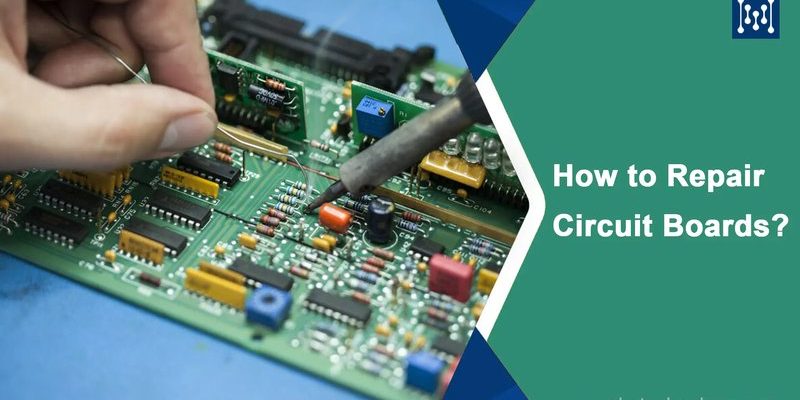
How to Resolder Components
Ready to get your hands dirty? Let’s go step by step on how to resolder a faulty component:
1. Turn Off Power: Always ensure the device is unplugged.
2. Identify the Damaged Component: Look for those burnt marks.
3. Remove It: Carefully desolder the damaged component using your soldering lift or iron.
4. Prepare the New Component: Position it in place.
5. Solder It Back In: Heat the connection until the solder flows, then let it cool.
You might be wondering—why not just replace the board? While that’s an option, it can be expensive. Often, minor repairs can restore your device to its former glory without breaking the bank.
Testing the Board for Functionality
Once you’ve made your repairs, it’s crucial to ensure everything is working correctly. This is where your multimeter becomes your best friend. Here’s how to test the board:
1. Set the Multimeter: Switch it to the resistance setting.
2. Check the Connections: Test different points on the circuit to see where the resistance should be.
3. Make Comparisons: Compare your results against the expected values from the device’s schematic (if available).
If you’re still experiencing problems, don’t fret. It’s normal—sometimes one issue can mask another. Just keep tracing your steps back through the circuit, and don’t hesitate to recheck your solder joints.
Preventive Maintenance for Linear Circuit Boards
Fixing a linear circuit board is great, but what about keeping it in shape? Preventive maintenance can extend the life of your device. Here are some tips:
- Regular Inspections: Check for visible damage or wear.
- Keep It Clean: Dust and debris can cause issues. Use compressed air to blow it away.
- Monitor Your Device’s Performance: Keep an eye on how it operates. Sudden changes can signal pending problems.
Think of it as giving your device a check-up. A little attention goes a long way in keeping everything running smoothly.
When to Replace Your Linear Circuit Board
Sometimes, despite your best efforts, repairs aren’t feasible. If you’ve tried troubleshooting without success, it may be time for a replacement. Here are some signs:
- Persistent Failures: If issues keep recurring.
- High Repair Costs: If the total cost of repairs starts ringing alarm bells.
- Outdated Technology: If your board is significantly older, a new investment might be worthwhile.
Here’s the thing: while replacing may feel like a last resort, modern circuit boards can offer enhanced functionality or efficiency.
In closing, fixing a linear circuit board doesn’t have to feel overwhelming. By understanding the structure, gathering the right tools, and knowing how to identify and address issues, you can keep your devices functioning optimally. So, whether it’s fixing your garage door opener or diving into an old stereo, you’ve got what it takes to troubleshoot comfortably and confidently. Keep tinkering, and happy fixing!