Overhead door circuit boards are common in various brands like LiftMaster, Chamberlain, and Genie. Knowing how to troubleshoot and fix them is easier than it sounds. In this guide, we’ll walk through the steps to diagnose and repair a faulty circuit board. By the end, you’ll feel like a true garage door guru, ready to tackle the issue with confidence. So, grab a cup of coffee, and let’s dive in!
Understanding the Circuit Board’s Role
The circuit board of your overhead door opener is where all the magic happens. It controls the motor’s function, manages signals from your remote, and responds to safety features like photo eyes. Here’s the thing: if your circuit board is acting up, you may experience issues like your door refusing to open or close, flashing lights signaling an error, or even strange noises from the opener.
Knowing how the circuit board works can help you fix it more effectively. Imagine it as a conductor in an orchestra—if one instrument plays out of tune, the entire symphony suffers. If you experience any problems with your garage door—the conductor may have lost its ability to direct.
Signs Your Circuit Board Needs Attention
Before jumping into repairs, it’s essential to recognize the signs that indicate your circuit board might be on the fritz. Here are common symptoms to look out for:
- Your remote doesn’t respond. If your remote isn’t working, but the door can still be operated via the wall switch, the remote circuit on the board could be malfunctioning.
- Flashing lights. Many models have warning lights that indicate an issue with the board. If the light flashes in a pattern or changes color, it might be signalling you to check the board.
- Inconsistent door operation. If your door opens halfway or closes on its own without any prompt, something’s likely amiss with the control signals being sent by the board.
If you notice any of these issues, don’t worry—you can troubleshoot and sometimes repair them yourself.
Gathering the Right Tools
Before getting into the nitty-gritty of fixing your overhead door circuit board, it’s crucial to have the right tools on hand. Trust me; having everything ready makes the process smoother and more efficient. Here’s a quick checklist to get started:
- Screwdriver set: You’ll typically need both Phillips and flat-head screwdrivers to remove the cover of the opener.
- Multimeter: This handy tool will help you test the voltage and continuity of the circuit board.
- Wire cutters/strippers: If you need to repair or replace any wires, these will come in handy.
- Safety glasses: Protect your eyes while you work—it’s better to be safe than sorry!
Once you gather these tools, you’re ready to take a look at that circuit board and start troubleshooting.
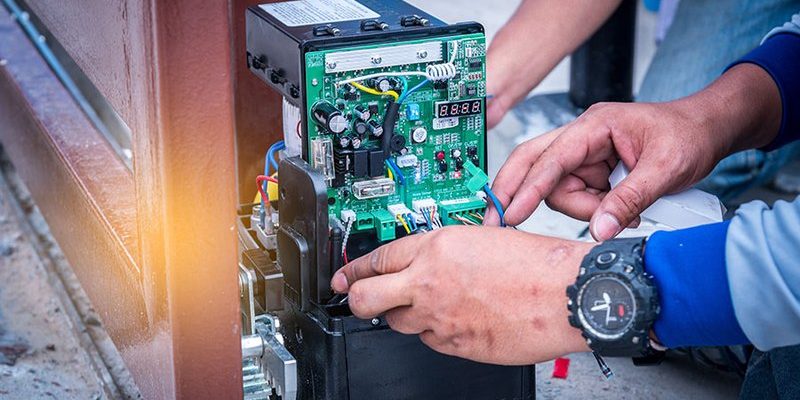
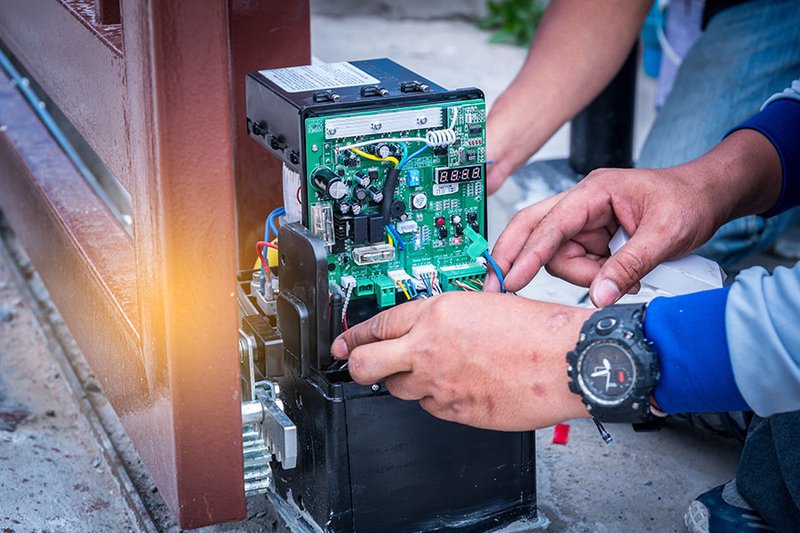
Inspecting the Circuit Board
Now that you have your tools, it’s time to open the overhead door opener and take a peek inside. Here’s how to go about it step by step:
1. Power Down: Before you begin, unplug your opener. Safety first!
2. Remove the Cover: Use your screwdriver to take off the cover. Try to remember how it goes back on so you can avoid any confusion later.
3. Visual Inspection: Look for burnt components, loose wires, or any signs of damage. Sometimes, it’s as simple as a loose connection that just needs a little TLC.
4. Check for Moisture: If your opener is located in a damp place, moisture might be causing issues. Wipe down the board, but avoid using water—use a soft cloth instead.
If you notice damaged components, that could be your problem.
Testing the Circuit Board with a Multimeter
Once you’ve inspected the circuit board, it’s time to do some testing. Using a multimeter, you’ll be able to check for voltage and continuity, helping you pinpoint the issue. Here’s how to do it:
1. Set Up the Multimeter: Switch it to the voltage test setting.
2. Test the Incoming Power: Place the probes on the terminals where the power comes into the circuit board. If you don’t see the expected voltage (usually around 24V), your issue might be elsewhere, like in the power outlet or the wiring leading to the board.
3. Check Connections: Test the continuity of connections on the board. If a connection is broken, that’s where the signal is getting blocked.
4. Replace Any Faulty Components: If you find that certain components are faulty, you may need to replace them.
Performing these tests can reveal a lot about what’s going wrong with your circuit board.
Fixing or Replacing the Circuit Board
If you’ve concluded that the circuit board is beyond repair, replacing it might be your best option. Here are some steps to guide you through the replacement process:
1. Purchase the Right Replacement: Make sure to get a circuit board compatible with your specific garage door opener model. Manufacturers usually have part numbers that make this easy.
2. Remove the Old Board: Unplug any wires connected to the old board, taking note of where each wire goes. It’s a bit like taking a photo with your phone—better to have a reference than to guess later.
3. Install the New Board: Connect the wires to the new board in the same configuration as the old one. Once everything is attached, secure the board back into place.
4. Test Functionality: Plug in the opener and test it. If all goes well, you should have a fully functioning garage door once again!
Final Thoughts and Maintenance Tips
Fixing your overhead door circuit board can seem daunting, but it’s manageable—even for beginners. By familiarizing yourself with how the circuit board works, recognizing the signs of trouble, and taking the appropriate steps to troubleshoot and repair, you can reclaim control over your garage door.
Remember to perform regular maintenance on your door opener. Simple checks can often prevent major issues down the road. Inspecting the opener and cleaning out dust and debris can keep everything running smoothly.
So, the next time your garage door gives you a hard time, you’ll be ready to fix the circuit board yourself, turning what used to be an annoyance into an experience of empowerment.