Many popular brands, like LiftMaster and Chamberlain, offer overhead door openers equipped with safety sensors, which are crucial for preventing accidents. If you notice your door reversing unexpectedly or not closing at all, you might wonder what’s at play. Remember, fixing these sensors isn’t rocket science, and with a little patience and guidance, you can be back on track in no time.
Understanding How Safety Sensors Work
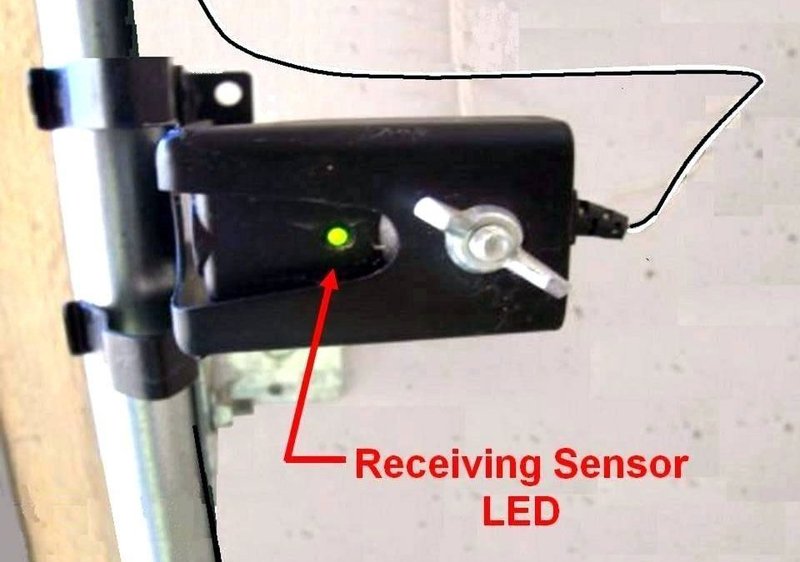
Before we dive into fixing issues, it’s important to understand what safety sensors do. Picture the sensors as two tiny guardians, one on each side of the garage door. Their job is to create an invisible beam between them. If something—or someone—interrupts that beam, the door will stop closing or reverse, preventing accidents. It’s a bit like having a safety net in any sports: always there, ready to catch if something goes wrong.
Typically, these sensors are infrared devices. They send out a beam of light that the other sensor detects. If this beam is broken, the system assumes there’s an obstruction and opens the door. This safety feature protects both kids and pets from potential harm. So, if you’re experiencing issues, knowing how these sensors work will help guide your troubleshooting.
Common Issues with Overhead Door Safety Sensors
If your garage door is misbehaving, here are a few common culprits that might be at play:
- Misalignment: If the sensors are slightly off-kilter, they won’t “see” each other, and the door will refuse to close.
- Blockages: Anything—even dirt, debris, or spider webs—can obstruct the sensors’ beam.
- Wiring Problems: Broken or frayed wires can prevent the sensors from communicating with your garage door opener.
- Faulty Sensors: Sometimes, the sensors or their components might simply malfunction over time.
Identifying which issue you’re facing can make all the difference in knowing how to fix it.
Step 1: Check for Obstructions
Start your troubleshooting by inspecting the sensors themselves. Look for any dirt, spider webs, or other debris that could be blocking the sensor’s beam. Wipe them down gently with a soft cloth to keep the surface clean.
You might also want to look around the sensor area. Sometimes, a stray toy or outdoor plant can creep into the beam’s path. Even an excess of leaves can cause interference!
Once you’ve cleared the area, try operating the garage door again. If it’s working, great! If not, don’t worry, let’s move to the next step.
Step 2: Align the Sensors
Misalignment is a common issue. Cup your hand over your eyes and look at the sensors from the side. They should be straight and facing each other. Use a level if you have one, or adjust them by loosening the screws and gently nudging them back into position.
Make sure they’re both at the same height and angle. You may even hear a soft click when they are aligned properly. Once adjusted, secure any screws and test the garage door again.
Resetting the Sensors
If alignment doesn’t solve the problem, it may be worth resetting the sensors. To do this, you typically need to:
1. Unplug the garage door opener from the power source.
2. Wait for about 10 seconds.
3. Plug it back in.
This simple reset can help clear up any temporary issues caused by power fluctuations or minor glitches. Once it’s plugged back in, see if the sensors function properly now.
Step 3: Inspect the Wiring
If you’re still having trouble, it might be time to inspect the wiring. Don’t panic! You don’t need to be an expert. Start at the sensors and trace the wires back to the garage door opener. Look for any visible damage, such as frays or breaks.
If you spot a problem, you might be able to use electrical tape to cover breaks temporarily. However, it’s best to replace any damaged wires entirely. If you’re not sure how to safely do this, consider consulting a professional.
Step 4: Testing the Sensors
After checking everything, it’s time to test your sensors. Begin by closing the garage door and interrupting the beam with an object. If the door stops or reverses, congratulations! Your sensors are functioning correctly.
If not, you might have faulty sensors that will need replacing. Don’t worry; they’re generally easy to find online or at your local hardware store.
Step 5: Replacing the Sensors
If your sensors are beyond repair, it might be time for replacements. First, make sure to buy compatible sensors. Typically, this means buying the same brand as your opener—like Genie, Craftsman, or Ryobi.
To replace them:
1. Disconnect the power to the garage door opener.
2. Unscrew the old sensors from their brackets.
3. Connect the new sensors, ensuring the wiring is identical.
4. Secure them in the brackets and plug in the opener to test.
If everything is set up correctly, your sensors should now work like new, keeping your garage door safe and functional.
Preventing Future Issues
Taking some simple preventative steps can save you from headaches down the road. Regularly check both sensors for dirt and keep the area free of obstructions. Think of it as part of your garage maintenance routine.
You might also want to consider investing in weatherproof sensors if your garage is frequently exposed to the elements. These special sensors can resist moisture and dust, reducing the risk of malfunction.
By keeping your overhead door safety sensors in good shape, you ensure a smooth and hassle-free garage experience.
In conclusion, fixing your overhead door safety sensors doesn’t have to be a daunting task. With a bit of patience and a few simple steps, you can troubleshoot common issues and get your garage door back to smoothly opening and closing when you need it. Whether it’s cleaning, adjusting, or replacing, a little attention can make all the difference. Happy fixing!
