Before you reach for your toolbox or fling the keypad into the abyss, let’s break this down. Whether you have a Chamberlain, LiftMaster, or Genie keypad, the solution could be as easy as pressing the right combination of buttons—or maybe just replacing a battery. This guide will walk you through the most common issues and their fixes so you can get back to the convenience of your overhead door without the hassle.
Common Problems with Overhead Door Keypads
You might be thinking, “What could possibly go wrong with my keypad?” Honestly, a lot! Understanding the common issues can help you pinpoint what’s going awry. Here are some frequent problems you might encounter:
- No Response: The keypad simply won’t respond when you hit those keys.
- Delay in Operation: There’s a lag before the door opens.
- Incorrect Code Entry: The keypad keeps rejecting your entry.
- Dead Backlight: The keypad is dark and unreadable.
Each problem can stem from different causes: ranging from dead batteries to wiring issues within the keypad itself. Now, let’s break it down and see how to tackle each one.
Checking the Batteries
First things first: if your keypad isn’t responding, the most likely culprit is the battery. Just like a remote control, these devices rely on fresh batteries. If the backlight is off, that’s often a dead giveaway.
To check or replace the battery:
1. Remove the keypad from the wall by unscrewing it gently.
2. Look for the battery compartment—it’s usually on the back or side.
3. Take out the old battery and replace it with a new, fresh one. Make sure it’s aligned correctly!
4. Reattach the keypad and test to see if it works.
If you’ve just replaced the batteries and the keypad still refuses to cooperate, the issue might be deeper.
Resetting Your Keypad
Sometimes, it’s not the batteries that are to blame but rather a glitch in the system. Just like your smartphone might need to be rebooted from time to time, so does your overhead door keypad. Resetting it can often fix minor hiccups.
Here’s how to reset your keypad:
1. First, look for the reset button—it’s usually inside the battery compartment.
2. Press and hold this button for about five seconds. You might see the backlight flash as a sign that it’s resetting.
3. After you’ve released the reset button, wait a minute before trying to program the code again.
This simple step can clear cached codes and set your keypad back to its factory settings. Remember, you will need to program your access code again afterward!
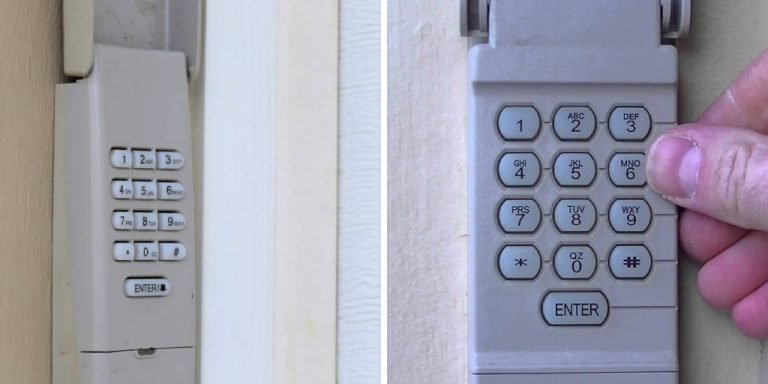
Reprogramming Your Keypad Code
If the keypad is working but won’t accept your code, it’s time for a reprogram. Every model has its own unique code entry method, but the general steps are often similar.
1. Enter the programming mode by pressing the correct sequence of buttons (you can find this in your manual).
2. Enter your new code—this should be something memorable but not too easy to guess.
3. Test your new code to see if the door opens. If it does, great! If not, repeat the process carefully.
A good practice is to periodically change your code for security reasons. Think of it like changing the locks on your doors; it keeps your home safer.
Cleaning the Keypad
Sometimes, dirt and grime can be the sneaky saboteurs behind a malfunctioning keypad. Dust, moisture, or crumbs might get into the cracks, making it hard for the buttons to function properly. Taking a moment to clean it can help.
To clean your keypad:
1. Use a soft, dry cloth to wipe down the surface.
2. For deeper clean, slightly dampen the cloth with water or a mild cleaner, ensuring no liquid seeps inside.
3. Make sure to dry the keypad afterward.
Keeping your keypad clean not only helps it function better but also extends its life. Your overhead door gadget didn’t sign up for a sticky mess!
Troubleshooting Wiring Issues
If you’ve gone through all the previous steps and your keypad is still a no-show, you might be facing wiring issues. It’s like discovering a hidden problem in a car; sometimes, the issue is deeper than just the surface.
1. Start by checking the wiring to the keypad to ensure there’s no damage or loose connections.
2. Ensure that the wires are securely attached to the circuit board inside the keypad.
3. If you see frayed wires, you might need to replace that section or consult a professional.
It might be a little daunting, but addressing wiring issues is crucial for the long-term functionality of your keypad.
Considering a Replacement
If all else fails and you find yourself scratching your head, it may be time to think about replacing your keypad. Sometimes gear just wears out like old shoes. If it’s more trouble than it’s worth, investing in a new model can save future headaches.
When shopping for a replacement, consider:
- Compatibility: Make sure it’s compatible with your existing door opener.
- Features: Some keypads come with extra features, like backlit buttons or weather resistance.
- Ease of Installation: Some models are easier to install than others.
Doing a little research can help you find the perfect match that fits your needs and budget.
Final Thoughts
Fixing your overhead door keypad doesn’t have to feel like rocket science. By following these steps and troubleshooting common problems like battery issues, resetting, and reprogramming, you can often solve the issue yourself. Remember, a little maintenance goes a long way in ensuring that your keypad continues to serve you well.
If you find yourself stuck along the way, don’t hesitate to reach out for professional help. In the end, you want to ensure your access to your home remains safe and easy—just the way it should be.