Fortunately, replacing these sensors isn’t as daunting as it sounds. With the right guide, a few tools, and a little bit of patience, you can have new sensors installed quickly and easily. You might have a LiftMaster, Chamberlain, or another remote type, but the concept remains the same across the board. So, let’s explore how you can tackle this task like a pro!
Understanding the Role of Linear Safety Sensors
Before we dive into the replacement process, let’s understand what these sensors do. Linear safety sensors are responsible for detecting objects in the path of your closing garage door. Imagine you’re in the parking lot and a car is backing up—there are sensors that alert the driver to stop if something’s in the way. In a similar fashion, if these sensors detect any obstruction, they send a signal to the opener, stopping the door from closing and reversing it instead.
The beauty of these sensors is rooted in their safety feature, which prevents accidents or damage. So, when your garage door opener starts acting funny—like closing unpredictably or not closing at all—it could be a sign that the sensors need attention. Learning how to replace them can save you time and keep your home safe from mishaps.
Gathering the Necessary Tools for Replacement
Before you grab your tools and dive into the replacement process, it’s essential to have everything set out first, like preparing for a cooking adventure. Here are the tools and materials you’ll need:
- New linear safety sensors (make sure they’re compatible with your opener)
- Screwdriver (usually a Phillips head)
- Level (to ensure proper alignment)
- Wire cutters or strippers
- Electrical tape or wire connectors
Getting these tools together beforehand can make the installation process smoother and more enjoyable. Think of it like having all your ingredients prepped before you start cooking. Plus, it keeps you from running back and forth looking for that one elusive tool!
Removing the Old Sensors
Now that you’re equipped and ready to go, the first step is to remove the old sensors. Start by disconnecting the power to your garage door opener. Safety first! This step is crucial to ensure you don’t accidentally get shocked or short out something.
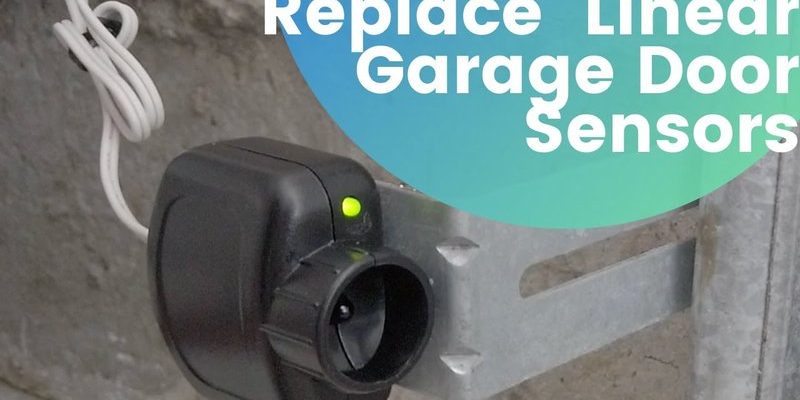
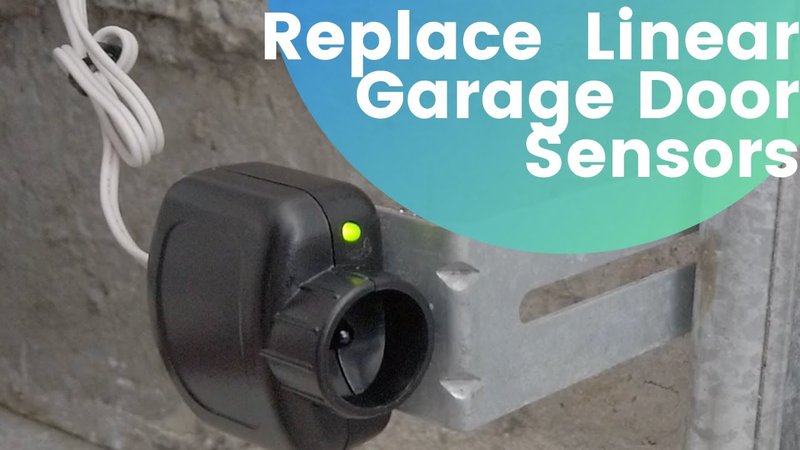
Once the power is disconnected, locate the existing sensors, typically mounted on either side of the garage door frame. They’ll be near the ground—about six inches up. Use your screwdriver to remove the screws holding them in place, then gently detach the wires connecting them to the opener. It’s like taking off your shoes before entering a clean house; you want to make space for the new sensors.
Installing the New Linear Safety Sensors
With the old sensors removed, it’s time to install the new ones. Begin by connecting the wires of the new sensors to the same terminals as the old sensors. Make sure you match the colors correctly—typically, you’ll see red and white wires. If you’re unsure, consult the manual that came with your new sensors for clarity.
Next, secure the sensors in place. Use the screws you set aside earlier to attach them to the same spots as the old ones. This might feel a bit tricky since you want them level. Here’s where that level comes in handy! Ensuring they’re aligned properly is critical for their functionality.
Powering Up and Synchronizing the Sensors
Now comes the exciting part: powering everything back on. Reconnect the power to your garage door opener and get ready to check if the sensors are correctly installed. You might be wondering how to sync them. Most systems will automatically sync when activated, but if yours requires manual syncing, refer to your product’s manual.
Typically, you’ll need to press a button on the garage door opener while holding the sensors a few inches apart, allowing them to find each other. It’s like a cute little reunion after a separation—it just takes a moment to reconnect!
Testing Your New Sensors
This is where you can take a sigh of relief—or hold your breath! Now that everything is in place and powered back up, it’s time to test your new sensors. Stand in the path of the closing garage door (but keep it safe—don’t put yourself in harm’s way!). Activate the garage door using your remote or wall switch.
If all is well, the door should stop and reverse immediately as it detects your presence. It’s like a friendly wave goodbye; the sensors should be successfully sensing any obstructions. If it doesn’t work, double-check all wiring and alignment. Sometimes, it’s just a minor adjustment that can fix the issue.
Troubleshooting Common Issues
If your new linear safety sensors still aren’t working, there are a few troubleshooting steps to keep in mind. First, check for obstructions. Sometimes debris might block the lenses, preventing them from working correctly. Make sure they’re clean and free of dirt or spider webs.
Next, verify the wiring connections again. Are the wires securely connected and in the correct positions? If everything appears fine but still fails, consider giving the opener a reset. Disconnect the power for about 10 seconds before reconnecting it. It’s like giving your device a little nap to help it start fresh.
If you’re still facing issues after all these steps, it may be time to consult the manufacturer or a professional for more in-depth troubleshooting. Don’t hesitate to reach out for help; it’s all part of the learning experience!
Replacing linear safety sensors doesn’t have to be a complicated task. With the right tools and a little bit of guidance, you can confidently tackle this project on your own. Not only will this ensure your garage door operates safely, but it will also give you peace of mind knowing you’ve handled it yourself.
Whether you’re dealing with an opening and closing problem or just want to keep your garage door in top shape, knowing how to replace those sensors is a valuable skill. Plus, the satisfaction of a job well done? Priceless! So gather your tools, roll up your sleeves, and get started. You’ve got this!