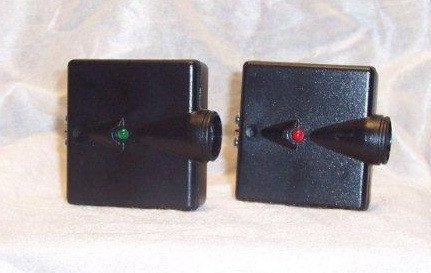
If you’ve got a specific brand like Chamberlain or LiftMaster, rest easy—replacing your safety sensor isn’t as daunting as it might seem. In fact, with a little time and the right tools, you can tackle this job confidently. Let me explain the steps you need to follow to get that door working like new again, without the hassle of calling for help.
Understanding Garage Door Safety Sensors
Before diving into the replacement process, it’s important to know what these sensors do. Safety sensors help detect objects in the garage door’s path. If they spot something, the door stops closing to prevent potential injuries or damage. These sensors are typically located at the bottom of the garage door tracks and work by sending infrared signals back and forth. If the signal is interrupted—say, by a toy or a pet—your door knows to stop.
You might be wondering why these sensors sometimes fail. Factors include wear and tear, dirt buildup, or simply a misalignment. When these sensors stop working reliably, it can lead to all sorts of frustrations. So, realizing when it’s time to replace them can save you headaches down the road.
Gathering Your Tools and Parts
Before you start replacing your safety sensors, it’s crucial to gather everything you need. Here’s a checklist:
- New safety sensors (make sure they’re compatible with your model)
- Wire strippers
- Flathead and Phillips screwdrivers
- Electrical tape
- Level (to ensure proper alignment)
Honestly, having the right tools handy will make this whole process smoother. Imagine attempting to cook dinner without a knife—frustrating, right? So take a moment to set everything up near your garage door. Once you’re armed with your equipment, it’s time to tackle the project.
Removing the Old Safety Sensors
To begin, you’ll want to disconnect the power supply to your garage door opener. This is a safety must-do because working with electrical parts can be risky. Simply unplug the unit or turn off the circuit breaker connected to it.
Now, locate the sensors on either side of the garage door frame. You’ll typically find them secured with screws. Use your screwdriver to remove these screws carefully. Once free, visibly inspect the wiring and connectors. If they look frayed or damaged, it could be time to replace the entire unit.
After unscrewing the sensors, gently pull them away from the mounting brackets. You might need to cut the wiring if it’s still attached but ensure to leave enough wire for the new connections. Remember, good practice means keeping track of which wire goes where, so taking a quick photo or jotting down a note can be helpful for later.
Installing the New Safety Sensors
Now that you’ve bid adieu to the old sensors, it’s time to install the new ones. Start by taking your new sensors and placing them into the brackets where the old ones were. Make sure you line them up in the same spot as the previous sensors.
Once in place, connect the wiring, referring to any notes or photos for guidance. If the new sensors come with different colored wires, typically, the red wire connects to the red, and the white goes with white. Use your wire stripper to expose enough copper for a solid connection, and then securely twist and cap the wires with electrical tape.
After everything is connected, it’s time to screw the sensors into place. Use the level to check that they’re aligned correctly. If they tilt even slightly, the sensors may not function properly—just like a crooked picture frame on the wall!
Testing the New Safety Sensors
Testing your new setup is a crucial step. Before plugging your garage door opener back in, double-check that everything is secure and properly connected. Once you’re satisfied, plug the door opener back into the power supply or reset the circuit breaker.
To test the sensors, use your garage door remote to signal the door to close. As it descends, wave your hand in front of the sensors to simulate an obstruction. The door should stop and reverse its direction if everything is functioning properly. If it doesn’t, you may need to readjust the sensors or recheck your connections.
Troubleshooting Common Issues
Sometimes, even with replacement sensors, you might run into problems. Here are some common issues to watch out for:
- Misalignment: Ensure both sensors are facing each other and are level.
- Dirt or Obstruction: Clear any debris near the sensors that may block the infrared beam.
- Electrical Problems: Inspect your wiring to ensure nothing is loose or damaged.
If you’ve checked everything and the sensors still don’t work, you might want to consider consulting your garage door’s manual for further troubleshooting or reaching out to a technician.
Replacing your overhead door safety sensors can feel like a big task, but with the right steps, it’s manageable and can save you from unnecessary expenses. By understanding how these sensors work and how to properly install and test them, you’re now equipped to tackle this project confidently. Remember to take your time, double-check your work, and enjoy the newfound safety your garage door will bring. It’s comforting to know that you can wrap up DIY projects like this one without going over budget or losing your sanity!