
If you’ve noticed your Skylink keypad isn’t responding or the buttons are sticking, it’s time for a change. Whether you’re looking to replace it because it’s broken or just upgrading to a newer model, knowing how to replace the keypad will save you time and possibly money on professional help. Let’s break down the steps in a friendly, beginner-friendly way—so you can tackle this yourself with confidence.
Understanding Your Skylink Keypad
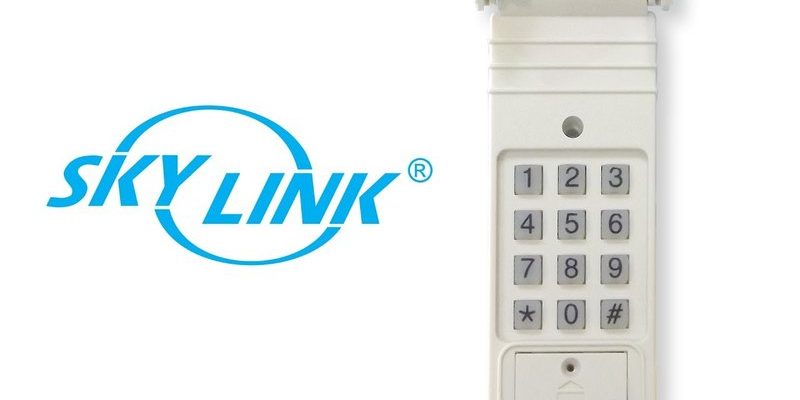
Before diving in, you need a little background on what a Skylink keypad is and how it works. Skylink keypads serve as wireless remote controls for your garage door opener, allowing you to open or close your garage door with just a pin code. They are convenient and increase security since you no longer have to fumble with the actual remote when your hands are full.
One of the best features these keypads offer is the ability to customize or change your access code easily. However, if they start malfunctioning—whether due to old age or exposure to the elements—it can be frustrating. That’s where replacing the keypad comes into play. It’s essential to choose a compatible model with the rest of your garage door system to ensure smooth operation.
Gathering the Tools You Need
Getting prepared before you start is key. Just like a chef wouldn’t dive into cooking without their utensils, you shouldn’t try to replace your Skylink keypad without the right tools handy. Here’s a quick list of what you’ll need:
- New Skylink keypad
- Phillips screwdriver
- Flathead screwdriver
- Pair of scissors (for cutting any wires, if needed)
- Access to a step ladder (if the keypad is mounted high)
- Owner’s manual for your garage door opener (for reference)
Make sure you have everything ready. This minimizes interruptions and frustration during the replacement process. Also, having the owner’s manual is incredibly helpful in case you need to refer to specific pairing or reset instructions.
Removing the Old Keypad
Once you’re armed with your tools, the next step is carefully removing the old keypad. Begin by locating the screws that hold the keypad in place. You’ll generally find them on the front or the sides. Use your Phillips screwdriver to unscrew these carefully. Pro tip: Place the screws in a small dish or a secure area—you don’t want to lose them!
Now, gently pull the keypad away from the wall. If it feels stiff, it could be stuck on a mounting bracket. Don’t force it; instead, look for any additional screws or clips that might be holding it in place. Once off, disconnect any wiring if it’s hardwired. Most Skylink keypads are battery-operated, so no wires should be attached, making this step easier.
Installing the New Keypad
Now comes the exciting part—installing your new Skylink keypad! First, take a moment to review the wiring instructions if your new keypad requires any connection. Usually, this step isn’t necessary if your keypad is wireless.
Position the new keypad against the wall where the old one was mounted. If your keypad has mounting holes, or a bracket, align them as you did before. Use your screwdriver to secure the keypad in place. Remember to tighten the screws but avoid overtightening, which might crack the new keypad casing.
With the keypad firmly in place, it’s time to insert the batteries according to the instructions provided. Inserting them incorrectly can lead to malfunctions, so double-check the battery orientation (there should be a diagram depicting this).
Programming Your New Keypad
Once the keypad is securely attached and powered, you’ll need to program it so your garage door opener recognizes it. Here’s the thing: this process usually involves entering a specific sequence on the keypad. Refer to the owner’s manual for your garage door opener because the exact sequence can vary by model.
Typically, you’ll start by pressing a designated button on the keypad until the lights on the door opener flash or beep. Then, enter your chosen code, which is usually a 4 to 8 digit number. This is an essential step, as it allows the keypad and opener to talk to each other. If the programming isn’t successful, you might need to do a quick reset on your garage door opener.
Testing the Keypad
After programming the keypad, it’s time for the moment of truth! Stand back, take a deep breath, and give your new keypad a test run. By entering your code, you should expect the garage door to respond. If it opens smoothly, congratulations! You’ve successfully replaced your Skylink keypad.
However, if it doesn’t work, double-check the code for any mistakes. Sometimes a simple error like a wrong digit can cause it to fail. If it still isn’t functioning, you might consider resetting the entire system. This can often be done by disconnecting the power for a few minutes, then plugging it back in.
Troubleshooting Common Issues
Even with the right tools and careful installation, things can still go wrong. Here are some common issues you may encounter when replacing a Skylink keypad, along with their solutions:
- Keypad not responding: Check your battery orientation and replace the batteries if necessary.
- Incorrect code entry: Make sure your code is entered correctly. It’s easy to mix up digits!
- Interference from other signals: If you’re still having trouble, consider if there’s another device nearby that could be causing interference.
Don’t let small hiccups discourage you. Most issues can be fixed with a little patience and troubleshooting.
Replacing your Skylink keypad doesn’t have to be a hassle. With the right tools and by following these straightforward steps, you can upgrade your garage door’s access system confidently. You’ve learned how to remove the old keypad, install the new one, and program it to work with your garage door opener. And let’s not forget the value of being able to tackle such repairs yourself!
Taking on these kinds of DIY tasks not only saves you money but also gives you a gratifying sense of accomplishment. So next time you find yourself puzzling over your garage door opener or other similar gadgets, you’ll feel better equipped to take on the challenge. Happy DIY-ing!