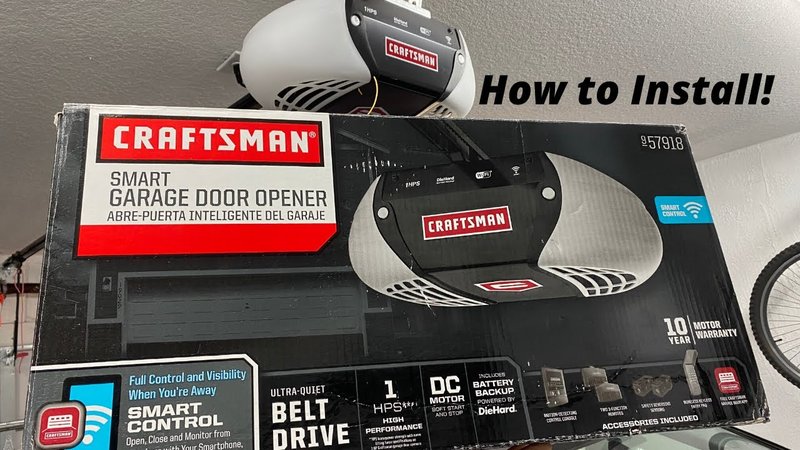
So, whether your Smart Hub isn’t syncing properly, has run out of juice, or simply needs an upgrade, you’re in the right place. This guide will walk you through everything you need to know about replacing your Craftsman Smart Hub, ensuring your garage door opener is back in action without confusion. Let’s dive in!
Understanding the Craftsman Smart Hub
The Craftsman Smart Hub is the brain of your garage door opener, connecting it to your home automation system and smartphone. Think of it as the control center for your garage. It communicates with your remote, smartphone app, and other smart devices in your home, providing seamless operation. When it’s working well, you can open your garage door from anywhere—how cool is that?
Over time, however, even the best tech can experience hiccups. If you’re facing issues like delayed responses or a hub that won’t connect, it might be time for a replacement. Fortunately, swapping it out isn’t something only a tech wizard can do. Anyone, even if you’re a beginner, can tackle this task with the right info.
Gathering Your Tools
Before you begin, make sure you’re prepared. Having the right tools on hand will make replacing your Craftsman Smart Hub a breeze. Here’s what you’ll need:
- Flathead screwdriver
- Phillips screwdriver
- Replacement Craftsman Smart Hub
- New batteries (if applicable)
- Smartphone or computer for setup
You might be wondering if you really need a specific screwdriver. The answer is yes—using the right tools will prevent damage and help everything fit together nicely. Also, don’t skip checking the batteries; a common problem is finding that the old hub isn’t dead but just needs a little boost.
Disconnecting the Old Hub
Now that you’ve got your tools, let’s get to work. The first step is to remove the old Craftsman Smart Hub. Here’s how to do it:
1. Power Off the Garage Door Opener: Before you start, make sure your garage door opener is disconnected from power. This step is crucial for safety.
2. Locate the Hub: The Smart Hub is typically found near the motor unit or on the wall above the garage door. It might be attached with screws.
3. Unscrew the Hub: Use your screwdriver to remove the screws holding the hub in place. Gently pull the hub away from its mounting position.
4. Disconnect the Wiring: If your model has wires connected, carefully unplug them. Note how they’re connected; this will help when you set up the new hub.
It’s essential to take your time during this process. Rushing can lead to mistakes, especially when dealing with wires.
Installing the New Craftsman Smart Hub
With the old hub out, it’s time to install your new Craftsman Smart Hub. You can think of this as putting together a puzzle—everything has a specific spot.
1. Connect the Wiring: If your new hub has wires, plug them into the same spots as the old hub. You might find it helpful to refer to your notes or take a quick photo of the original connections before removing it.
2. Secure the Hub: Position the new Smart Hub in place. Use your screwdriver to attach it securely to the mounting area.
3. Power Up: Once it’s secured, plug your garage door opener back into power. You should see lights or indicators on the hub, letting you know it’s trying to connect.
This step is where excitement kicks in! Your new hub is almost ready to work its magic.
Syncing the New Hub with Your Devices
After installing the new hub, syncing it with your phone or smart devices is crucial for functionality. Here’s how you do it:
1. Download the Craftsman App: If you haven’t done so already, download the official Craftsman garage door app on your smartphone. It’s available for both iOS and Android.
2. Create an Account: Open the app and create an account or log in if you already have one.
3. Add the New Hub: Follow the in-app instructions to add your new Craftsman Smart Hub. This may involve scanning a QR code or entering a code provided with the hub.
4. Test the Connection: Once the app says the hub is connected, test it by using your smartphone to open or close the garage door.
If you encounter problems during the syncing process, like the hub not being detected, double-check your wiring and make sure everything is secure. Sometimes a loose wire can create headaches.
Troubleshooting Tips
Even with the best of intentions, things can occasionally go wrong after a replacement. Here are some common issues you might face and how to troubleshoot them:
1. Hub Not Responding: If you find that the new hub is not responding, ensure there’s power going to it. Check the outlet and any circuit breakers.
2. Poor Connection: If your Smart Hub struggles to stay connected to Wi-Fi, consider moving your router closer or using a Wi-Fi extender.
3. App Issues: Sometimes, the app may not work correctly. If this happens, try closing it completely and reopening or reinstalling it.
Being thorough during your replacement will save you from unnecessary follow-up headaches. If issues persist, calling Craftsman support might be your best bet.
When to Consider Alternatives
Although replacing your Craftsman Smart Hub is an excellent option, there might be times you want to explore alternatives:
– Universal Garage Door Remotes: If you’re looking for something that manages multiple brands, consider a universal remote. These can work well with several systems.
– Full System Replacement: If your garage door opener is quite old, you might think about replacing the whole system instead of just the hub. Newer systems offer better security and features.
Deciding whether to replace just the hub or fully upgrade your system will depend on your specific needs and budget. Keep in mind that investing in newer technology can often save you time and hassle later on.
Replacing your Craftsman Smart Hub doesn’t have to be a tricky task. With a little time and the right guidance, you can get your garage door opener back in action. Remember to take it step-by-step—remove the old hub, install the new one, sync your devices, and troubleshoot as needed.
Now that you know how to replace the Smart Hub, you can regain control over your garage door with ease. Whether you’re a tech novice or a seasoned DIY expert, tackling this task means you’re one step closer to creating a more connected home. Enjoy the convenience and security that comes with a functioning Smart Hub!
