
Think of your garage door remote as your best assistant. It’s supposed to make your life easier, not harder. When it stops working, it often feels like you’ve lost a trusted companion. It’s pretty common for batteries to die or for the remote to lose sync with the opener, but rest assured, fixing it is usually straightforward. Let’s walk through the steps to replace your Liftmaster remote and get you back rolling.
Understanding Your Liftmaster Remote
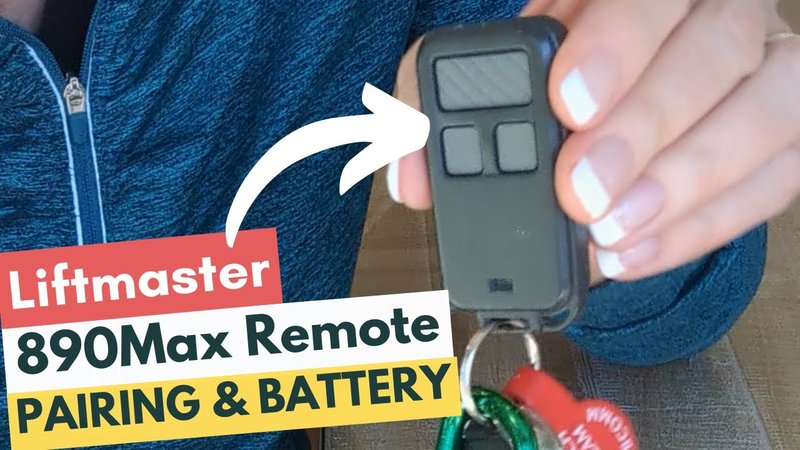
Before diving in, let’s get familiar with what you’re dealing with. Your Liftmaster remote is a small device designed to send signals to your garage door opener. It might be a clicker model or a keypad—you’ll want to check your specific type. If it’s an older model, it may still use 390 MHz frequency, while newer models typically operate on 315 MHz or 433 MHz.
Here’s the thing: When you press the button, the remote sends a coded signal to the opener. If the batteries are dead or the remote isn’t synced anymore, that signal won’t reach its destination. It’s like trying to communicate with a friend who’s on another frequency—frustrating, right? Recognizing your remote type helps to smooth out the process, so check the back of the device or your user manual for specifics.
Gathering Your Tools
Before you begin, it’s essential to have a few handy items on hand. While this isn’t an extensive DIY project, having the right tools makes a huge difference. Here’s a quick list:
- New Batteries: Most Liftmaster remotes take either A23 or 2032 batteries, but double-check your model.
- Screwdriver: Some remotes require a small screwdriver for battery replacement.
- User Manual: Keep it close by for reference; it’ll guide you through codes and programming.
With these tools, you’re ready to tackle the replacement process. It’s like setting the stage before an important performance—the better prepared you are, the smoother it will go.
Replacing the Batteries
Let’s kick things off with the simplest task—replacing the batteries. As straightforward as this sounds, many people overlook it. Sometimes the remote just needs a little energy boost. Here’s how to do it:
1. Open the Remote: Use your screwdriver to loosen the screws on the back cover or simply slide the back off, depending on your model.
2. Remove Old Batteries: Take out the old batteries and note their orientation—positive and negative ends.
3. Insert New Batteries: Place in your fresh batteries, ensuring they’re oriented the same way as the ones you removed.
4. Close the Remote: Securely replace the cover and tighten any screws if necessary.
After this step, try pressing the buttons to see if your garage door responds. It’s like giving it a second chance; many times, this is all it takes!
Syncing Your Remote with the Garage Door Opener
If a battery change doesn’t solve the issue, your remote might need to be synced with the garage door opener again. This can happen if the opener was recently reset or if the remote got out of sync for any reason. Here’s how to reprogram your Liftmaster remote:
1. Locate the Learn Button: This button is typically found on the back or side of the garage door opener itself. It’s often labeled “Learn” or “Program” and may be a colored button.
2. Press the Learn Button: Push this button, and you’ll see a light indicator turn on. This means it’s ready to sync with a remote.
3. Activate the Remote: Within 30 seconds, press and hold the button on your remote that you want to program. You should see the indicator light on the opener blink or turn off.
4. Test Your Remote: Press the programmed button on your remote to see if the door responds.
The syncing process is akin to opening a new chapter in a book—you’re establishing a fresh connection that allows your opener and remote to communicate once more.
Troubleshooting Common Issues
Sometimes things don’t go as planned. If replacing the batteries and syncing the remote doesn’t work, don’t panic. There are a few common issues to consider.
- Check the Batteries: Make sure they’re new and facing the right direction. Just because it’s a fresh battery doesn’t mean it isn’t faulty!
- Inspect the Remote: Look for any physical damage or buttons that might feel stuck. If a button isn’t working, it might need a little cleaning.
- Garage Door Opener Issues: If your remote is still unresponsive, the problem might lie with the garage door opener itself. Check if it’s plugged in and functioning correctly.
These troubleshooting tips can make the difference between frustration and success. It’s often a small issue at play; you just need to look a little closer!
Considerations for Universal Remotes
If you’ve tried everything and your Liftmaster remote still isn’t working, you might consider a universal remote. Universal remotes can control several different types of garage door openers, not just Liftmaster. Here are the pros and cons:
- Pros: They’re typically easy to find and can work with multiple brands. Plus, they often come with straightforward programming instructions.
- Cons: Sometimes, they might lack features specific to your Liftmaster system. And the setup could be a bit more complex compared to original remotes.
If you decide to go this route, make sure to read the packaging carefully to see if it’s compatible with your specific model.
Final Thoughts
Replacing your Liftmaster remote isn’t as daunting as it seems. Just like most things in life, taking it step by step makes the process manageable. Start with the batteries, try syncing, and troubleshoot any concerns you may have. If all else fails, consider a universal remote as an alternative.
At the end of the day, having a functioning remote is all about convenience. It’s one of those little things that just makes life easier. So take a breath, gather your tools, and dive in—you’ve got this!