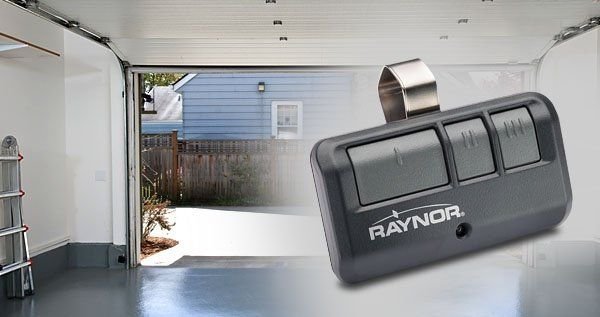
Raynor remotes are reliable and easy to use. They offer a convenient way to control your garage door from the comfort of your car or even from inside your home. Whether you’re replacing a lost remote or just upgrading, knowing how to install it correctly is key to making your life easier. Let’s break down the installation process into simple steps.
Gather Your Tools and Materials
Before you dive into the installation process, it’s helpful to gather everything you need. You want to avoid running back and forth, searching for items in the middle of the project. Here’s a quick list of what you should have on hand:
- Your new Raynor remote control
- A step ladder (if needed)
- A small flathead screwdriver (for some models)
- A Phillips screwdriver
- Access to the garage door opener unit
Having everything ready ensures a smoother installation process. You might be wondering why tools are necessary at all, but even if it looks like you just need to press a few buttons, getting inside the opener unit often requires a little more effort. Remember, the goal here is to make this as straightforward and efficient as possible.
Locate the Garage Door Opener Unit
Now that you have your tools, it’s time to find the garage door opener unit itself. This is typically mounted on the ceiling of your garage. It usually resembles a long, boxy shape, and the motor is inside. You may need a ladder to reach it safely and clearly see what you’re doing.
Once you’ve found it, take a moment to familiarize yourself with its parts. Look for the learn button. This is your key to programming the remote. On many Raynor models, the learn button is usually located on the back or side of the unit. You’ll recognize it by its bright color, often yellow or orange. Noticing where everything is located beforehand can help you avoid confusion later on.
Programming Your Raynor Remote
Now comes the fun part: programming your new remote control! Here’s how to do it step-by-step:
1. Press the Learn Button: When you find the learn button on your opener, press it. You should see a light blink on the unit. This indicates it’s ready to accept a new remote.
2. Prepare Your Remote: Within about 30 seconds, grab your Raynor remote and press and hold the button you want to program. Usually, it’s the larger button for single-door operation.
3. Watch for Confirmation: The opener’s light will blink once more. This means your remote has been successfully programmed! You can release the button on the remote.
And voilà, you just programmed your Raynor remote! It’s most satisfying to see it all come together like a magic trick. Just remember to keep your remote handy for the next step.
Testing Your Newly Installed Remote
After programming, it’s essential to test your remote to ensure everything works correctly. Here’s how to do that:
1. Stand Clear: Make sure you’re a safe distance from the garage door before you begin testing.
2. Press the Button: Use your new Raynor remote to open or close the garage door. You should see it respond immediately.
3. Repeat: Test it a couple of times to confirm it consistently opens and closes the door. If it doesn’t work, don’t panic. It’s common to face a few hiccups—let’s troubleshoot.
Troubleshooting Common Issues
Sometimes, even with the best intentions, problems can arise. If your Raynor remote isn’t working, consider these troubleshooting tips:
– Double-Check the Programming: Ensure you followed each step correctly when programming the remote.
– Check the Batteries: A simple but vital step—make sure your remote has fresh batteries. In many cases, dead batteries are the culprit.
– Inspect Signal Interference: If you have multiple garage door openers nearby, they may interfere with each other. Make sure you’re not near another opener when testing.
If you’ve gone through these steps and still can’t get your remote to work, you might want to consult the user manual or reach out to Raynor customer support for further assistance. It’s always good to ask for help when needed!
Maintaining Your Remote and Opener
Once everything is up and running, it’s essential to maintain your remote and garage door opener. Here are some quick tips:
– Keep Your Remote Dry: Avoid exposure to water as moisture can damage the electronic components.
– Regularly Check Batteries: Change the batteries in your remote every 6-12 months, even if it seems to be working fine.
– Clean the Opener’s Sensors: Dust and dirt can accumulate on the sensors, affecting their performance. Regular cleaning can minimize problems.
Taking care of your equipment not only prolongs its life but also saves you the headache of malfunctioning equipment down the line. Just like caring for a pet, a little love goes a long way in keeping everything running smoothly!
Why It Matters to Install Your Remote Correctly
Finally, let’s wrap up by discussing why proper installation is so important. A correctly installed Raynor remote makes your daily life smoother. Think about it: arriving home with your arms full of groceries and fumbling with keys is no fun. With a working remote, you can open the garage door with just a click, making your routine easier and more efficient.
Plus, a well-functioning remote ensures security. If it’s not programmed correctly, it could potentially lead to your garage door acting unpredictably. No one wants to deal with that! So, taking a moment to follow these steps can ensure safety and convenience for you and your family.
By following this comprehensive guide on how to install your Raynor remote, you should be well on your way to enjoying a more convenient garage experience. Remember, patience and attention to detail are your best friends in this process. Happy installing!