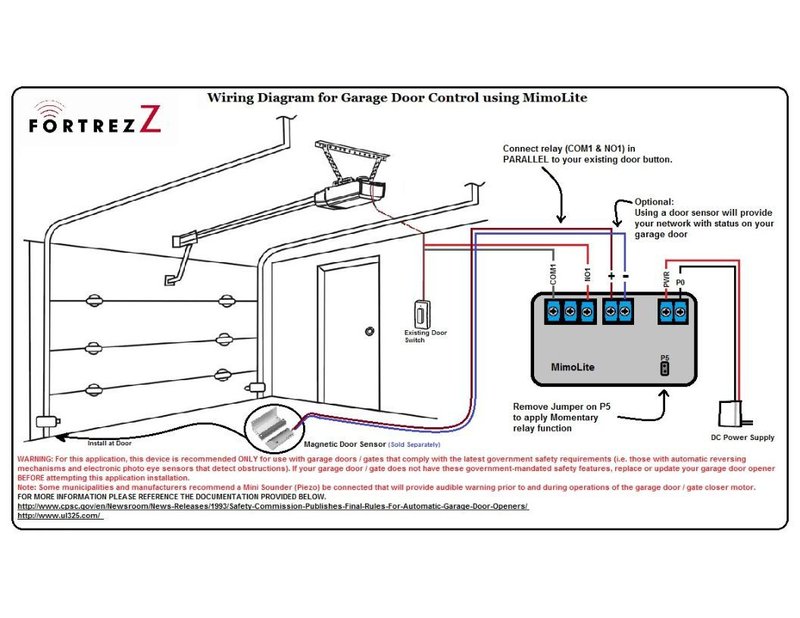
These sensors work by detecting objects in the path of the closing door, preventing it from closing on anything—or anyone—unexpectedly. Different models may have specific installation steps, but the principles are typically the same. In this guide, we’re focusing on how to install a linear safety sensor, commonly used with many garage door systems, like those from LiftMaster or Genie.
What is a Linear Safety Sensor?
A linear safety sensor is part of a garage door opener system designed to stop the door from closing if something is in the way. Think of it as a watchful eye that ensures your garage door doesn’t crush that forgotten tricycle or have a mishap with your car. These sensors emit an infrared beam across the door’s path; if something breaks that beam, the door stops closing.
Most likely, your garage door came equipped with these sensors, but if they’re damaged, misaligned, or missing, installing new ones is essential. This isn’t just about convenience; it’s also about safety for your family and your vehicles.
Installing the sensor isn’t just about following instructions; it’s an opportunity to understand your garage door system better. Plus, knowing how it works can save you time and money when it comes to upkeep and troubleshooting.
Gather Your Tools and Materials
Before jumping into the installation, it’s smart to gather everything you’ll need. Here’s a quick list to help you prepare:
- Linear safety sensor kit (usually comes with two sensors)
- Wire cutters and strippers
- Drill or screwdriver
- Measuring tape
- Level
- Electrical tape
Getting these supplies together will keep the process smooth. Picture it: you’re all set up, tools within reach, and ready to tackle the job. If you’re missing something, running back and forth is a sure way to lose your flow—and we don’t want that.
Finding the Right Location
Next up is choosing where to install the sensors. Linear safety sensors typically go close to the floor, near the garage door tracks. The tricky part? They need to be positioned so they can effectively cover the door’s path.
Here’s how to get it right:
1. Measure and Mark: Start by measuring about 6 inches off the ground—this is a good height for most doors. Mark this spot on both sides of the garage door frame.
2. Check Your Alignment: Using a level, ensure that the markings are even. If they’re not aligned, your sensors may not work properly.
3. Clear the Area: Make sure to remove any debris or items around the door tracks. Clear space helps the sensor’s infrared beam operate without obstruction and makes installation easier.
Finding the right spot might seem minor, but it makes all the difference for your sensor’s effectiveness.
Wiring the Sensors
Once you’ve got your location sorted, it’s time to wire those sensors. The wiring job might sound intimidating, but don’t worry. Follow these steps, and you’ll be golden:
1. Strip the Wires: Start by stripping about half an inch of insulation off the ends of the sensor wires. This exposes the copper, which will make for better connections.
2. Connect the Wires: Each sensor typically has two wires (a white one and a colored one). Connect the white wire from the sensor to the corresponding wire in the garage door opener, usually white as well. Then connect the colored wire to its matching color.
3. Secure With Electrical Tape: Once connected, secure those connections with electrical tape. Make sure there are no exposed wires left dangling.
The wiring process is essential; it’s where the magic happens. If the wires aren’t secured properly, the sensors won’t function, and you’d have just added a new decoration to your garage.
Mounting the Sensors
Now we’re moving to the fun part—mounting the sensors. This step is where your earlier measurements come into play:
1. Attach the Sensor Brackets: Use your drill or screwdriver to fix the sensor brackets to the marks you made earlier. Ensure they are level as you do this. If they’re off-kilter, the sensors won’t communicate correctly.
2. Insert the Sensors: Slide the sensors into their brackets and adjust them so they’re facing each other directly across the door’s path.
3. Test the Alignment: After both sensors are in place, give them a little wiggle. They should feel secure but still adjustable. Adjustment is the key to making sure they can properly read the beam.
Mounting can feel a bit like being an artist, getting everything just right so the final product works as it should.
Testing Your Installation
After everything is connected and mounted, it’s time to test your installation. This is the moment where you’ll see if all your efforts paid off. Here’s what to do:
1. Power Up the Garage Door Opener: Turn on the power to the opener and make sure the sensors are recognized by looking for a light indicator—most sensors have one to show they’re working.
2. Test the Door’s Functionality: Close the garage door while something like a broomstick is placed in the door’s path. The door should stop closing as soon as the beam is interrupted.
3. Fine-Tune if Needed: If the door doesn’t reverse, check the sensor alignment and wiring one more time. It’s worth a few minutes spent tweaking things to get a safe setup.
Testing is critical; if something feels off, you want to catch it now, not when you’re rushing to park your car later.
Common Troubleshooting Tips
Even the best installations can run into hiccups. Knowing how to troubleshoot can save time and frustration. Here are a few common issues and how to solve them:
– Sensor Lights Not Illuminating: This might mean the sensors aren’t wired properly, or there’s no power to the opener. Double-check your connections.
– Sensor Misalignment: If the door keeps closing when something is in its path, check if the sensors are facing each other. A small adjustment might do the trick.
– Interference: Sometimes dirt, spider webs, or other obstructions can interfere with the sensor beam. Regularly clean the sensors to ensure they function well.
Think of troubleshooting as a little detective work. You’re piecing together clues to ensure everything runs smoothly.
Installing a linear safety sensor might seem daunting at first, but with the right tools and steps, it’s totally manageable. Remember, these sensors are not just a feature; they’re an essential safety measure for your garage. By following each step carefully, from gathering materials to testing the installation, you’ll ensure your garage is both safe and functional.
So, take a deep breath, roll up your sleeves, and get to work. You’ll have peace of mind knowing your garage door system is set up correctly, making your home a little safer for everyone. And who knows? You might even enjoy the process of learning how your garage door works!
